Sign In
Upload
Manuals
Brands
Brother Manuals
Sewing Machine
Entrepreneur PR650e
Brother Entrepreneur PR650e Manuals
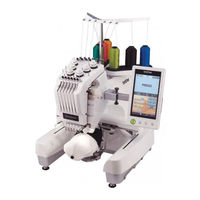
Manuals and User Guides for Brother Entrepreneur PR650e. We have
5
Brother Entrepreneur PR650e manuals available for free PDF download: Operation Manual, Manual De Instrucciones, Operating Manual Addendum
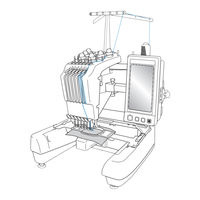
Brother Entrepreneur PR650e Operation Manual (280 pages)
Embroidery Machine
Brand:
Brother
| Category:
Sewing Machine
| Size: 28.07 MB
Table of Contents
Introduction
3
Important Safety Instructions
3
License Agreement
8
Warning Labels
9
Machine Structure and Features
10
Six-Needle Machine Embroidering
10
Differences with Single-Needle Machines
11
Other Features
12
Available Features
13
Manual Structure
14
Read before Use
14
Read When Additional Information Is Required
14
Searching for Information
14
Table of Contents
15
Getting Ready
21
Names of Machine Parts and Their Functions
22
Front View
22
Right-Side/Rear View
23
Operation Panel
23
Accessories
24
Included Accessories
24
Optional Accessories
25
Setting up the Machine
26
Setup and Transporting Precautions
26
Setup Location
27
Setting up the Machine
28
Adjusting the Operation Panel Position
29
Preparing the Thread Guide Assembly
30
Positioning the Spool Stand
31
Attaching the Embroidery Frame Holder
31
Embroidering Tutorial
33
Operating Precautions
34
Power Supply Precautions
34
Needle Precautions
35
Checking the Needle
35
Bobbin Precautions
35
Upper Thread Recommendations
36
Fabric Recommendations
36
Display Recommendations
36
Basic Procedures
37
Installing the Bobbin
38
Removing the Bobbin Case
38
Installing the Bobbin Case
39
Turning on the Machine
40
Understanding the Screens
41
Screen Overview
42
Selecting an Embroidery Pattern
44
Selecting an Embroidery Pattern
45
Editing the Embroidery Pattern
46
Continuing to the Embroidering Settings Screen
46
Specifying Embroidering Setting
47
Previewing the Image
48
Checking a Preview Image
48
Hooping the Fabric in the Embroidery Frame
49
Attaching the Embroidery Frame to the Machine
51
Attaching the Embroidery Frame
51
Checking the Embroidery Area
53
Temporarily Stopping to Check the Area
53
Continuing to the Embroidering Screen
54
10. Upper Threading
55
Checking the Needle Bars and Thread Colors
55
Upper Threading
57
Threading the Needle
61
11. Sewing the Embroidery
65
Starting Embroidering
65
Stopping Embroidering
67
12. Checking the Thread Tension
69
13. Removing the Embroidery Frame and Fabric
70
Removing the Embroidery Frame
70
Removing the Fabric
70
14. Turning off the Machine
71
Screen Quick Reference Guide
72
Key Displays
72
Common Screen Controls
72
Understanding the Pattern Type Selection Screen
73
Understanding the Pattern List Screen
74
Understanding the Pattern Editing Screen
75
Understanding the Embroidering Settings Screen
77
Understanding the Embroidering Screen
79
When You Have a Question, this May Help You
81
Technical Terms
81
Patterns
81
Embroidering
81
USB Connectivity
82
Other Basic Procedures
87
Changing the Needle
88
Replacing the Needle
88
Correctly Using the Embroidery Frames
90
Embroidery Frame Types and Applications
90
Attaching Iron-On Stabilizer (Backing) to Fabric
92
Hooping the Fabric
93
Hooping the Fabric in the Extra-Large and Large Embroidery Frames
93
Using the Embroidery Sheet
94
Large/Small Pieces of Fabric
95
Embroidery Frame Position and Movement
96
Changing the Embroidering Position
98
Adjusting the Angle
99
Switching the Thread Colors on the Screen
102
Embroidering a Pattern Containing Seven or more Colors
103
Checking if Thread Spool Changes Are Necessary
103
Changing the Thread Spools with Designs of Seven or more Colors
105
Change Thread Spools Message
105
Easily Changing the Thread Spools
106
If the Thread Breaks or the Bobbin Thread Runs out While Embroidering
107
If the Upper Thread Breaks
107
If the Bobbin Thread Breaks or Runs out
108
Embroidering from the Beginning or Middle of the Pattern
110
Resume Embroidering after Turning off the Machine
112
Adjusting the Thread Tension
114
Adjusting the Tension of the Bobbin Thread
114
Adjusting the Tension of the Upper Thread
115
Embroidering Settings
117
Basting Embroidery
118
Creating an Appliqué Piece
119
Using a Frame Pattern for the Outline
122
Automatic Lock Stitch Setting
124
Starting/Ending Position Settings
125
Repeatedly Sewing a Pattern Along a Diagonal
126
Embroidering Linked Characters
127
Maximum Sewing Speed Setting
129
Setting the Machine to Stop at Color Changes
130
Stopping the Machine at the Next Color Change
130
Specifying Pause Locations before Embroidering
130
Temporary Needle Bar Setting
132
Uninterrupted Embroidering (Using a Single Color)
133
Reserved Needle Bar Settings
134
Selecting/Editing/Saving Patterns
137
Precautions
138
Concerning Embroidery Data
138
Concerning Optional Embroidery Cards
140
Concerning USB Media
141
Selecting an Embroidery Pattern
142
General Pattern Selection
142
Embroidery Patterns
143
Frame Patterns
143
Monogram and Frame Designs
144
Alphabet Patterns
147
Floral Alphabet Patterns
150
Renaissance Alphabet Patterns
151
Appliqué Alphabet
152
Greek Alphabet Patterns
153
Embroidery Patterns Stored in the Machine Memory
153
Embroidery Cards (Optional)
154
Computer (USB)
158
USB Media
162
Editing the Embroidery Pattern (Pattern Editing Screen)
164
Combining Patterns
164
Selecting the Pattern to be Edited
165
Moving a Pattern
165
Flipping a Pattern Horizontally
166
Changing the Size of a Pattern
166
Rotating a Pattern
168
Changing the Text Arrangement of a Character
169
Changing the Character Spacing
169
Separating Combined Character Patterns
170
Trimming the Threads between Characters
171
Changing the Thread Density (Only for some Character and Frame Patterns)
172
Specifying Multi-Color Text
172
Changing the Colors of the Pattern
173
Designing Repeated Patterns
174
Creating a Custom Thread Table
178
Choosing a Color from the Custom Thread Table
181
Duplicating a Pattern
182
Deleting a Pattern
182
Editing the Embroidery Pattern (Embroidering Settings Screen)
183
Rotating the Entire Pattern
183
Editing a Combined Pattern
184
Saving Embroidery Patterns
189
Machine's Memory
189
If the Embroidery Pattern Cannot be Saved
189
USB Media
191
Computer (USB)
192
Basic Settings and Help Feature
195
Using the Settings Key
196
Understanding the Settings Screen
196
Changing the Display Guides
198
Changing the Thread Color Information
199
Specifying the Thumbnail Size
200
Changing the Background Colors of the Embroidery Patterns or Thumbnails
201
Specifying Jumpstitch Trimming / "DST" Jump Codes for Trimming
201
Deleting Short Stitches
203
Specifying the Remaining Length of Thread
203
Changing the Screen Saver Settings
203
Turning "ON" or "OFF" the Sewing Light
205
Changing the Speaker Volume
206
Specifying Thread Sensor
206
Changing the Pointer Shape When a USB Mouse Is Used
207
Changing the Units of Measurements
207
Changing the Language
207
Using the Machine Operations Guide Key
208
Appendix
211
Appliqué Sewing
212
Sewing Appliqué Patterns
212
Using a Frame Pattern to Create Appliqués (1)
213
Using a Frame Pattern to Create Appliqués (2)
214
Sewing Large-Size (Split) Embroidery Patterns
216
Helpful Tips for the Operation of the Machine
219
Checking the Thread Tension of Built-In Patterns
219
Sewing a Pattern Aligned with a Mark on the Fabric
220
The Pattern
221
Color Thread Table
222
Colors of Tajima (.Dst) Embroidery Data
222
Creating Beautiful Embroidery
223
Threads
223
Stabilizers (Backing)
223
Hooping Techniques
224
Fabric/Stabilizer Compatibility Chart
225
Optional Accessories
226
Attaching an Optional Embroidery Frame for Industrial Embroidery Machines
226
Using the Optional Cap Frame
227
Cap Frame and Its Accessories
227
Types of Caps
228
Fabric Precautions
229
Preparing to Use the Cap Frame
229
Attaching the Cap Frame
234
Installing the Embroidery Frame Holder
239
Additional Digitizing Information
240
Using the Optional Bobbin Winder
242
Precautions
242
Optional Bobbin Winder and Its Accessories
242
Setting up the Optional Bobbin Winder
243
Connecting the AC Adapter
243
Winding the Bobbin
244
Maintenance
247
Cleaning the LCD
247
Cleaning the Machine Surface
247
Cleaning the Hook
247
Cleaning Around the Needle Plate
248
Cleaning the Bobbin Case
249
Cleaning the Thread Paths of the Upper Threads
250
Oiling the Machine
252
About the Maintenance Message
253
Troubleshooting
254
On-Screen Troubleshooting
254
Troubleshooting
255
Error Messages
263
Usb Media
268
If the Machine Does Not Respond When a Key Is Pressed
271
Specifications
272
Embroidery Machine Specifications
272
Upgrading Your Machine's Software
273
Upgrade Procedure Using USB Media
273
Upgrade Procedure Using Computer
274
Index
275
Advertisement
Brother Entrepreneur PR650e Operation Manual (280 pages)
Embroidery Machine
Brand:
Brother
| Category:
Sewing Machine
| Size: 26.15 MB
Table of Contents
Introduction
3
Important Safety Instructions
3
License Agreement
8
Warning Labels
9
Machine Structure and Features
10
Six-Needle Machine Embroidering
10
Differences with Single-Needle Machines
11
Other Features
12
Available Features
13
Manual Structure
14
Read before Use
14
Read When Additional Information Is Required
14
Searching for Information
14
Table of Contents
15
Getting Ready
21
Names of Machine Parts and Their Functions
22
Front View
22
Right-Side/Rear View
23
Operation Panel
23
Accessories
24
Included Accessories
24
Optional Accessories
25
Setting up the Machine
26
Setup and Transporting Precautions
26
Setup Location
27
Setting up the Machine
28
Adjusting the Operation Panel Position
29
Preparing the Thread Guide Assembly
30
Positioning the Spool Stand
31
Attaching the Embroidery Frame Holder
31
Embroidering Tutorial
33
Operating Precautions
34
Power Supply Precautions
34
Needle Precautions
35
Checking the Needle
35
Bobbin Precautions
35
Upper Thread Recommendations
36
Fabric Recommendations
36
Display Recommendations
36
Basic Procedures
37
Installing the Bobbin
38
Removing the Bobbin Case
38
Installing the Bobbin Case
39
Turning on the Machine
40
Understanding the Screens
41
Screen Overview
42
Selecting an Embroidery Pattern
44
Selecting an Embroidery Pattern
45
Editing the Embroidery Pattern
46
Continuing to the Embroidering Settings Screen
46
Specifying Embroidering Setting
47
Previewing the Image
48
Checking a Preview Image
48
Hooping the Fabric in the Embroidery Frame
49
Attaching the Embroidery Frame to the Machine
51
Attaching the Embroidery Frame
51
Checking the Embroidery Area
53
Temporarily Stopping to Check the Area
53
Continuing to the Embroidering Screen
54
10. Upper Threading
55
Checking the Needle Bars and Thread Colors
55
Upper Threading
57
Threading the Needle
61
11. Sewing the Embroidery
65
Starting Embroidering
65
Stopping Embroidering
67
12. Checking the Thread Tension
69
13. Removing the Embroidery Frame and Fabric
70
Removing the Embroidery Frame
70
Removing the Fabric
70
14. Turning off the Machine
71
Screen Quick Reference Guide
72
Key Displays
72
Common Screen Controls
72
Understanding the Pattern Type Selection Screen
73
Understanding the Pattern List Screen
74
Understanding the Pattern Editing Screen
75
Understanding the Embroidering Settings Screen
77
Understanding the Embroidering Screen
79
When You Have a Question, this May Help You
81
Technical Terms
81
Patterns
81
Embroidering
81
USB Connectivity
82
Other Basic Procedures
87
Changing the Needle
88
Replacing the Needle
88
Correctly Using the Embroidery Frames
90
Embroidery Frame Types and Applications
90
Attaching Iron-On Stabilizer (Backing) to Fabric
92
Hooping the Fabric
93
Hooping the Fabric in the Extra-Large and Large Embroidery Frames
93
Using the Embroidery Sheet
94
Large/Small Pieces of Fabric
95
Embroidery Frame Position and Movement
96
Changing the Embroidering Position
98
Adjusting the Angle
99
Switching the Thread Colors on the Screen
102
Embroidering a Pattern Containing Seven or more Colors
103
Checking if Thread Spool Changes Are Necessary
103
Changing the Thread Spools with Designs of Seven or more Colors
105
Change Thread Spools Message
105
Easily Changing the Thread Spools
106
If the Thread Breaks or the Bobbin Thread Runs out While Embroidering
107
If the Upper Thread Breaks
107
If the Bobbin Thread Breaks or Runs out
108
Embroidering from the Beginning or Middle of the Pattern
110
Resume Embroidering after Turning off the Machine
112
Adjusting the Thread Tension
114
Adjusting the Tension of the Bobbin Thread
114
Adjusting the Tension of the Upper Thread
115
Embroidering Settings
117
Basting Embroidery
118
Creating an Appliqué Piece
119
Using a Frame Pattern for the Outline
122
Automatic Lock Stitch Setting
124
Starting/Ending Position Settings
125
Repeatedly Sewing a Pattern Along a Diagonal
126
Embroidering Linked Characters
127
Maximum Sewing Speed Setting
129
Setting the Machine to Stop at Color Changes
130
Stopping the Machine at the Next Color Change
130
Specifying Pause Locations before Embroidering
130
Temporary Needle Bar Setting
132
Uninterrupted Embroidering (Using a Single Color)
133
Reserved Needle Bar Settings
134
Selecting/Editing/Saving Patterns
137
Precautions
138
Concerning Embroidery Data
138
Concerning Optional Embroidery Cards
140
Concerning USB Media
141
Selecting an Embroidery Pattern
142
General Pattern Selection
142
Embroidery Patterns
143
Frame Patterns
143
Monogram and Frame Designs
144
Alphabet Patterns
147
Floral Alphabet Patterns
150
Renaissance Alphabet Patterns
151
Appliqué Alphabet
152
Greek Alphabet Patterns
153
Embroidery Patterns Stored in the Machine Memory
153
Embroidery Cards (Optional)
154
Computer (USB)
158
USB Media
162
Editing the Embroidery Pattern (Pattern Editing Screen)
164
Combining Patterns
164
Selecting the Pattern to be Edited
165
Moving a Pattern
165
Flipping a Pattern Horizontally
166
Changing the Size of a Pattern
166
Rotating a Pattern
168
Changing the Text Arrangement of a Character
169
Changing the Character Spacing
169
Separating Combined Character Patterns
170
Trimming the Threads between Characters
171
Changing the Thread Density (Only for some Character and Frame Patterns)
172
Specifying Multi-Color Text
172
Changing the Colors of the Pattern
173
Designing Repeated Patterns
174
Creating a Custom Thread Table
178
Choosing a Color from the Custom Thread Table
181
Duplicating a Pattern
182
Deleting a Pattern
182
Editing the Embroidery Pattern (Embroidering Settings Screen)
183
Rotating the Entire Pattern
183
Editing a Combined Pattern
184
Saving Embroidery Patterns
189
Machine's Memory
189
If the Embroidery Pattern Cannot be Saved
189
USB Media
191
Computer (USB)
192
Basic Settings and Help Feature
195
Using the Settings Key
196
Understanding the Settings Screen
196
Changing the Display Guides
198
Changing the Thread Color Information
199
Specifying the Thumbnail Size
200
Changing the Background Colors of the Embroidery Patterns or Thumbnails
201
Specifying Jumpstitch Trimming / "DST" Jump Codes for Trimming
201
Deleting Short Stitches
203
Specifying the Remaining Length of Thread
203
Changing the Screen Saver Settings
203
Turning "ON" or "OFF" the Sewing Light
205
Changing the Speaker Volume
206
Specifying Thread Sensor
206
Changing the Pointer Shape When a USB Mouse Is Used
207
Changing the Units of Measurements
207
Changing the Language
207
Using the Machine Operations Guide Key
208
Appendix
211
Appliqué Sewing
212
Sewing Appliqué Patterns
212
Using a Frame Pattern to Create Appliqués (1)
213
Using a Frame Pattern to Create Appliqués (2)
214
Sewing Large-Size (Split) Embroidery Patterns
216
Helpful Tips for the Operation of the Machine
219
Checking the Thread Tension of Built-In Patterns
219
Sewing a Pattern Aligned with a Mark on the Fabric
220
Color Thread Table
222
Colors of Tajima (.Dst) Embroidery Data
222
Creating Beautiful Embroidery
223
Threads
223
Stabilizers (Backing)
223
Hooping Techniques
224
Fabric/Stabilizer Compatibility Chart
225
Optional Accessories
226
Attaching an Optional Embroidery Frame for Industrial Embroidery Machines
226
Using the Optional Cap Frame
227
Cap Frame and Its Accessories
227
Types of Caps
228
Fabric Precautions
229
Preparing to Use the Cap Frame
229
Attaching the Cap Frame
234
Installing the Embroidery Frame Holder
239
Additional Digitizing Information
240
Using the Optional Bobbin Winder
242
Precautions
242
Optional Bobbin Winder and Its Accessories
242
Setting up the Optional Bobbin Winder
243
Connecting the AC Adapter
243
Winding the Bobbin
244
Maintenance
247
Cleaning the LCD
247
Cleaning the Machine Surface
247
Cleaning the Hook
247
Cleaning Around the Needle Plate
248
Cleaning the Bobbin Case
249
Cleaning the Thread Paths of the Upper Threads
250
Oiling the Machine
252
About the Maintenance Message
253
Troubleshooting
254
On-Screen Troubleshooting
254
Troubleshooting
255
Error Messages
263
If the Machine Does Not Respond When a Key Is Pressed
271
Specifications
272
Embroidery Machine Specifications
272
Upgrading Your Machine's Software
273
Upgrade Procedure Using USB Media
273
Upgrade Procedure Using Computer
274
Index
275
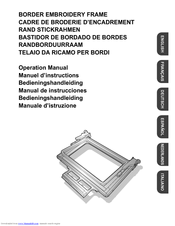
Brother Entrepreneur PR650e Operation Manual (64 pages)
BORDER EMBROIDERY FRAME
Brand:
Brother
| Category:
Sewing Machine
| Size: 14.88 MB
Table of Contents
English
3
Table of Contents
3
Accessories
4
Embroidering with the Border Embroidery Frame
4
Sample Projects Using the Border Embroidery Frame
4
Selecting a Pattern
5
Hooping the Fabric in the Border Embroidery Frame
7
Attaching the Border Embroidery Frame to the Embroidery Unit
8
Embroidering the First Pattern
9
Removing the Border Embroidery Frame
10
Embroidering the Next Pattern
10
Français
13
Accessoires
14
Broderie À L'aide du Cadre de Broderie de Bord
14
Exemples de Projets Avec Le Cadre de Broderie de Bord
14
Sélection D'un Motif
15
Mise en Place du Tissu Dans Le Cadre de Broderie de Bord
17
Fixation du Cadre de Broderie de Bord À L'unité de Broderie
18
Broderie du Premier Motif
19
Retrait du Cadre de Broderie de Bord
20
Broderie du Motif Suivant
20
Deutsch
23
Sticken mit dem Bordüren-Stickrahmen
24
Beispiele für Stickereien mit dem Bordüren-Stickrahmen
24
Auswahl eines Musters
25
Einspannen des Stoffes in den Bordüren-Stickrahmen
27
Einsetzen des Bordüren-Stickrahmens in die Stickeinheit
28
Sticken des Ersten Musters
29
Abnehmen des Bordüren-Stickrahmens
30
Sticken des Nächsten Musters
30
Zubehör
24
Español
33
Accesorios
34
Bordado con el Bastidor de Bordado de Bordes
34
Ejemplos de Labores con el Bastidor de Bordado de Bordes
34
Selección de un Patrón
35
Colocación de la Tela en el Bastidor de Bordado de Bordes
37
Colocación del Bastidor de Bordado de Bordes en la Unidad de Bordado
38
Bordado del Primer Patrón
39
Extracción del Bastidor de Bordado de Bordes
40
Bordado del Siguiente Patrón
40
Dutch
43
Accessoires
44
Borduren Met Het Randenborduurraam
44
Voorbeeldprojecten Met Het Randenborduurraam
44
Patroon Kiezen
45
Stof in Het Randenborduurraam Plaatsen
47
Randenborduurraam Aan de Borduurtafel Bevestigen
48
Eerste Patroon Borduren
49
Randenborduurraam Verwijderen
50
Volgende Patroon Borduren
50
Italiano
53
Accessori
54
Ricamo con Il Telaio da Ricamo Per Bordi
54
Progetti Campione Utilizzando Il Telaio da Ricamo Per Bordi
54
Selezione DI un Disegno
55
Inserimento del Tessuto Nel Telaio da Ricamo Per Bordi
57
Montaggio del Telaio da Ricamo Per Bordi All'unità da Ricamo
58
Ricamo del Primo Disegno
59
Rimozione del Telaio da Ricamo Per Bordi
60
Ricamo del Disegno Successivo
60
Advertisement
Brother Entrepreneur PR650e Operating Manual Addendum (13 pages)
Brother Sewing Machine User Manual
Brand:
Brother
| Category:
Sewing Machine
| Size: 2.76 MB
Table of Contents
Adjusting the Brightness of the Screen Display
2
Editing Patterns as a Group
4
Sending Embroidery Patterns from a Computer to the Machine (Link Function)
6
Operations Available with the Link Function
6
Embroidering Using the Link Function
7
Disabling the Link Function
10
Selecting the Thread Color Information for "PES" Format Data
11
(Spanish) Brother Entrepreneur PR650e Manual De Instrucciones (280 pages)
Users Manual - Spanish
Brand:
Brother
| Category:
Sewing Machine
| Size: 32.65 MB
Table of Contents
Introducción
3
Instrucciones De Seguridad Importantes
3
Contrato De Licencia
8
Etiquetas De Aviso
9
Estructura Y Funciones De La Máquina
10
Máquina De Bordar De Seis Agujas
10
Diferencias Con Las Máquinas De Una Sola Aguja
11
Otras Funciones
12
Funciones Disponibles
13
Estructura Del Manual
14
Lectura Antes De Usar La Máquina
14
Lectura Cuando Se Necesita Información Adicional
14
Búsqueda De Información
14
Table of Contents
15
Preparativos
21
Nombres Y Funciones De Las Piezas De La Máquina
22
Vista Frontal
22
Vista Lateral-Derecha Y Posterior
23
Panel De Operaciones
23
Accesorios
24
Accesorios Incluidos
24
Accesorios Opcionales
25
Instalación De La Máquina
26
Medidas De Precaución Para La Instalación Y El Transporte
26
Ubicación Para La Colocación
27
Instalación De La Máquina
28
Ajuste De La Posición Del Panel De Operaciones
29
Preparación Del Conjunto De La Guía Del Hilo
30
Colocación Del Soporte De Carretes
31
Colocación Del Soporte Del Bastidor De Bordado
31
Tutorial De Bordados
33
Medidas De Precaución Relativas Al Funcionamiento
34
Medidas De Precaución Con La Corriente Eléctrica
34
Medidas De Precaución Con Las Agujas
35
Comprobación De La Aguja
35
Medidas De Precaución Con La Bobina
35
Recomendaciones Para El Hilo Superior
36
Recomendaciones Sobre El Tejido
36
Recomendaciones Sobre La Pantalla
36
Procedimientos Básicos
37
Colocación De La Bobina
38
Extracción Del Estuche De La Bobina
38
Colocación Del Estuche De La Bobina
39
Encendido De La Máquina
40
Interpretación De Las Pantallas
41
Introducción a Las Pantallas
42
Selección De Diseños De Bordado
44
Selección De Un Diseño De Bordado
45
Edición Del Diseño De Bordado
46
Continuación Con La Pantalla De Ajustes De Bordado
46
Especificación De Los Ajustes De Bordado
47
Vista Preliminar De La Imagen
48
Comprobación De Una Imagen Preliminar
48
Colocación Del Tejido En El Bastidor De Bordado
49
Colocación Del Bastidor De Bordado En La Máquina
51
Colocación Del Bastidor De Bordado
51
Comprobación De La Zona De Bordado
53
Interrupción Temporal Para Comprobar La Zona
53
Continuación Con La Pantalla De Bordado
54
10. Enhebrado Superior
55
Comprobación De Las Varillas De Aguja Y Los Colores De Hilo
55
Enhebrado Superior
57
Enhebrado De La Aguja
61
11. Costura Del Bordado
65
Comienzo Del Bordado
65
Interrupción Del Bordado
67
12. Comprobación De La Tensión Del Hilo
69
13. Extracción Del Bastidor De Bordado Y El Tejido
70
Extracción Del Bastidor De Bordado
70
Extracción Del Tejido
70
14. Apagado De La Máquina
71
Guía De Referencia Rápida De Las Pantallas
72
Aspecto De Las Teclas
72
Controles Comunes De Las Pantallas
72
Interpretación De La Pantalla De Selección Del Tipo De Diseño
73
Interpretación De La Pantalla De Lista De Diseños
74
Interpretación De La Pantalla De Edición De Diseños
75
Interpretación De La Pantalla De Ajustes De Bordado
77
Interpretación De La Pantalla De Bordado
79
Información Útil De Consulta
81
Términos Técnicos
81
Diseños
81
Bordado
81
Conectividad USB
82
Otros Procedimiento Básicos
87
Cambio De La Aguja
88
Uso Adecuado De Los Bastidores De Bordado
90
Tipos Y Aplicaciones De Los Bastidores De Bordado
90
Colocación Del Estabilizador (Respaldo) Con Plancha En El Tejido
92
Colocación Del Tejido
93
Colocación Del Tejido En Los Bastidores Grande Y Extra Grande
93
Utilización De La Hoja De Bordado
94
Piezas De Tela Grandes Y Pequeñas
95
Posición Y Movimiento Del Bastidor
96
Cambio De La Posición De Bordado
98
Ajuste Del Ángulo
99
Cambio De Los Colores De Hilo En La Pantalla
102
Bordado De Un Diseño Con Siete O Más Colores
103
Comprobación De Si Es Necesario Cambiar Los Carretes De Hilo
103
Cambio De Los Carretes De Hilo Con Diseños De Siete O Más Colores
105
Mensaje De Cambio De Carretes De Hilo
105
Cómo Cambiar Fácilmente Los Carretes De Hilo
106
Si El Hilo Se Rompe O Se Acaba El Hilo De La Bobina Durante El Bordado
107
Si El Hilo Superior Se Rompe
107
Si El Hilo De La Bobina Se Rompe O Se Acaba
108
Bordado Desde El Principio O La Mitad Del Diseño
110
Continuación Del Bordado Tras Haber Apagado La Máquina
112
Ajuste De La Tensión Del Hilo
114
Ajuste De La Tensión Del Hilo De La Bobina
114
Ajuste De La Tensión Del Hilo Superior
115
Ajustes De Bordado
117
Hilvanado Del Bordado
118
Creación De Un Adorno
119
Uso De Una Costura De Encuadre Para El Contorno
122
Ajuste De La Costura De Remates Automática
124
Ajustes De Las Posiciones Inicial Y Final
125
Repetición De La Costura De Un Diseño a Lo Largo De Una Diagonal
126
Bordado De Caracteres Enlazados
127
Ajuste De La Velocidad Máxima De Cosido
129
Ajuste De La Máquina Para Que Se Pare En Los Cambios De Color
130
Parada De La Máquina En El Siguiente Cambio De Color
130
Especificación De Pausas Antes De Bordar
130
Ajuste Temporal De Las Varillas De Aguja
132
Bordado Sin Interrupción (Con Un Solo Color)
133
Ajuste De Las Varillas De Aguja Reservada
134
Selección, Edición Y Almacenamiento De Diseños
137
Medidas De Precaución
138
Respecto a Los Datos De Bordado
138
Respecto a Las Tarjetas De Bordado Opcionales
140
Respecto Al Dispositivo USB
141
Selección De Diseños De Bordado
142
Selección General De Diseños
142
Diseños De Bordado
143
Costuras De Encuadre
143
Diseños De Monograma Y Encuadre
144
Diseños Alfabéticos
147
Diseños Alfabéticos Con Motivos Florales
150
Diseños Alfabéticos De Estilo Renacentista
151
Diseños Alfabéticos Con Adornos
152
Diseños Alfabéticos Griegos
153
Diseños De Bordado Guardados En La Memoria De La Máquina
153
Tarjetas De Bordado (Opcional)
154
Ordenador (USB)
158
Dispositivo USB
162
Edición De Diseños De Bordado (Pantalla De Edición De Diseños)
164
Combinación De Diseños
164
Selección Del Diseño Que Se Va a Editar
165
Cambio De Posición De Diseños
165
Inversión Horizontal De Un Diseño
166
Cambio Del Tamaño De Un Diseño
166
Giro De Un Diseño
168
Cambio De La Disposición Del Texto De Un Carácter
169
Cambio Del Espacio Entre Caracteres
169
Separación De Diseños De Caracteres Combinados
170
Corte De Los Hilos Entre Caracteres
171
Cambio De La Densidad Del Hilo (Sólo Para Algunas Costuras De Caracteres Y De Encuadre)
172
Especificación De Texto Multicolor
172
Cambio De Los Colores Del Diseño
173
Creación De Diseños Repetidos
174
Creación De Una Tabla De Hilos Personalizados
178
Selección De Un Color De La Tabla De Hilos Personalizados
181
Duplicación De Un Diseño
182
Eliminación De Un Diseño
182
Edición De Diseños De Bordado (Pantalla De Ajustes De Bordado)
183
Giro Del Diseño Entero
183
Edición De Diseños Combinados
184
Almacenamiento De Diseños De Bordado
189
Memoria De La Máquina
189
Si El Diseño De Bordado No Se Puede Guardar
189
Dispositivos USB
191
Ordenador (USB)
192
Ajustes Básicos Y La Función Ayuda
195
Uso De La Tecla De Ajustes
196
Interpretación De La Pantalla De Ajustes
196
Cambio De Las Guías De Visualización
198
Cambio De La Información De Colores De Hilo
199
Especificación Del Tamaño De Las Miniaturas
200
Cambio De Los Colores De Fondo De Los Diseños De Bordado O Las Miniaturas
201
Especificación Del Corte De Saltos De Puntada/Códigos De Salto "DST" Para Cortar
201
Eliminación De Puntadas Cortas
203
Especificación Del Hilo Que Queda
203
Cambio De Los Ajustes Del Protector De Pantalla
203
Activación O Desactivación De La Luz De Costura
205
Cambio Del Volumen Del Altavoz
206
Especificación Del Sensor De Hilo
206
Cambio De La Forma Del Puntero Cuando Se Utiliza Un Ratón USB
207
Cambio De Las Unidades De Medida
207
Cambio Del Idioma
207
Uso De La Tecla Guía De Operaciones De La Máquina
208
Anexo
211
Costura De Adornos
212
Costura De Diseños Con Adornos
212
Uso De Costuras De Encuadre Para Crear Adornos (1)
213
Uso De Costuras De Encuadre Para Crear Adornos (2)
214
Costura De Diseños De Bordado Grandes (Divididos)
216
Consejos Útiles Para El Uso De La Máquina
219
Comprobación De La Tensión Del Hilo En Diseños Incorporados
219
Costura De Un Diseño Alineado Con Una Marca En El Tejido
220
Tabla De Colores De Hilo
222
Colores De Los Datos De Bordado Tajima (.Dst)
222
Creación De Bordados Bonitos
223
Hilos
223
Estabilizadores (Respaldo)
223
Técnicas De Colocación
224
Cuadro De Compatibilidad De Tejidos Y Estabilizadores
225
Accesorios Opcionales
226
Colocación De Un Bastidor Opcional Para Bordadoras Industriales
226
Uso Del Bastidor Para Gorras Opcional
227
Bastidor Para Gorras Y Sus Accesorios
227
Tipos De Gorras
228
Medidas De Precaución Para El Tejido
229
Preparación Para El Uso Del Bastidor Para Gorras
229
Colocación Del Bastidor Para Gorras
234
Colocación Del Soporte Del Bastidor De Bordado
239
Información Digitalizada Adicional
240
Uso De La Devanadora Opcional
242
Medidas De Precaución
242
Devanadora Opcional Y Sus Accesorios
242
Instalación De La Devanadora Opcional
243
Conexión Del Adaptador De CA
243
Devanado De La Bobina
244
Mantenimiento
247
Limpieza De La Pantalla LCD
247
Limpieza De La Superficie De La Máquina
247
Limpieza Del Gancho
247
Limpieza Alrededor De La Placa De La Aguja
248
Limpieza Del Estuche De La Bobina
249
Limpieza De Las Trayectorias De Los Hilos Superiores
250
Engrase De La Máquina
252
Acerca Del Mensaje De Mantenimiento
253
Solución De Problemas
254
Solución De Problemas En Pantalla
254
Solución De Problemas
255
Mensajes De Error
263
Si La Máquina No Responde Cuando Se Pulsa Una Tecla
271
Especificaciones
272
Especificaciones De La Máquina De Bordar
272
Actualización Del Software De La Máquina
273
Procedimiento De Actualización Con Un Dispositivo USB
273
Procedimiento De Actualización Con Un Ordenador
274
Índice
275
Advertisement
Related Products
Brother PR-650
Brother PR-650C
Brother PR655
Brother PR655C
Brother PR-600IIC
Brother PR-620C
Brother PR-600
Brother PR-600C
Brother PR680W
Brother PR670E
Brother Categories
Sewing Machine
All in One Printer
Printer
Label Maker
Fax Machine
More Brother Manuals
Login
Sign In
OR
Sign in with Facebook
Sign in with Google
Upload manual
Upload from disk
Upload from URL