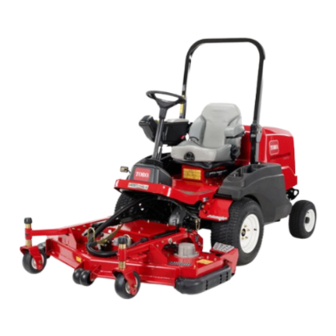
Toro Groundsmaster e3200 Installation Instructions Manual
Energy expansion kit traction unit
Hide thumbs
Also See for Groundsmaster e3200:
- Installation instructions manual (8 pages) ,
- Operator's manual (28 pages) ,
- Operator's manual (60 pages)
Advertisement
Quick Links
Energy Expansion Kit
Groundsmaster
Model No. 161-0859
Safety
Refer to your traction unit Operator's Manual for electrical system safety information.
Installation
Loose Parts
Use the chart below to verify that all parts have been shipped.
Procedure
1
2
3
4
5
© 2023—The Toro® Company
8111 Lyndale Avenue South
Bloomington, MN 55420
®
e3200 Traction Unit
Description
No parts required
No parts required
HyperCell® battery (sold separately;
refer to your authorized Toro distributor)
Wire harness
Bolt
No parts required
No parts required
Register at www.Toro.com.
Form No. 3464-198 Rev A
Installation Instructions
Qty.
–
Prepare the machine.
Remove the battery spacers and bus
–
bars.
2 or 4
Install the batteries.
2
4
Adjust the rear weight (for machines
–
with 15 batteries only).
–
Complete the installation.
Original Instructions (EN)
Printed in the USA
All Rights Reserved
Use
*3464-198*
Advertisement

Summary of Contents for Toro Groundsmaster e3200
- Page 1 Remove the battery spacers and bus – No parts required bars. HyperCell® battery (sold separately; 2 or 4 refer to your authorized Toro distributor) Install the batteries. Wire harness Bolt Adjust the rear weight (for machines – No parts required with 15 batteries only).
-
Page 2: Preparing The Machine
Remove the wire harness from the battery still above 1 VDC, there may be a battery fault; spacers and the batteries (Figure refer to the traction unit Service Manual or your authorized Toro distributor. Removing the Battery Spacers and Bus Bars No Parts Required Procedure Retain all removed parts for later installation. -
Page 3: Installing The Batteries
Figure 5 Parts needed for this procedure: 1. 4 installed batteries HyperCell ® battery (sold separately; refer to your 2 or 4 authorized Toro distributor) Connect the new wire harnesses to the battery Wire harness ports labeled D2 (Figure Bolt Procedure Insert your desired amount of new batteries into the battery compartment. - Page 4 Use the bolts included in the kit to loosely secure the bus bars to the new batteries (Figure g452835 Figure 6 Machine with 13 installed batteries shown 1. Battery ports (labeled D2) 2. Wire harnesses g452847 Figure 8 Remove the appropriate amount of caps from Machine with 13 installed batteries shown the bus bars (Figure...
-
Page 5: Completing The Installation
to the battery ports labeled D1; refer to Remove a weight and position the remaining Figure weight at the center of the bumper as shown in Figure 11 g450219 Figure 11 1. Weight-lock rod 3. Weight g459386 Figure 10 2. Nut 1. - Page 6 Notes:...
- Page 7 Notes:...


