Sign In
Upload
Manuals
Brands
JVC Manuals
Camcorder
GY-DV5100
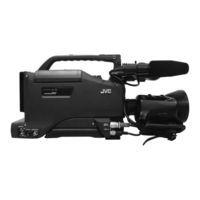
User Manuals: JVC GY-DV5100 Professional DV Camcorder
Manuals and User Guides for JVC GY-DV5100 Professional DV Camcorder. We have
4
JVC GY-DV5100 Professional DV Camcorder manuals available for free PDF download: Instructions Manual, User Manual
JVC GY-DV5100 Instructions Manual (103 pages)
Brand:
JVC
| Category:
Camcorder
| Size: 12.65 MB
Table of Contents
Important Safeguards
2
Safety Precautions
3
Main Features
4
Table of Contents
5
Contents
5
1 Introduction
6
Precautions for Proper Use
6
Routine and Periodical Maintenance
7
Precautions for Use of Head Cleaning Tape
7
Videocassette to be Used
8
Battery Pack to be Used
8
Condensation
9
Characteristic CCD Phenomena
9
2 Controls, Indicators and Connectors
10
Front Section
10
Right Side Section
12
Left Side Section
17
Top Section
18
Rear Section
19
Indications on the LCD Monitor and in the Viewfinder
21
Lens (Optional)
29
Inch Viewfinder (Optional)
30
3 Basic System Connections and Adjustments
31
Basic System
31
Attaching the Zoom Lens
32
Attaching the Viewfinder
32
Attaching the Microphone (Provided)
33
Attaching the Microphone (Optional)
33
Attaching the Tripod Base (Provided)
34
4 Power Supply
35
AC Operation
35
Battery Pack Operation (Optional)
35
Remaining Battery Power Display
38
Precautions for the Battery Pack
38
5 Preparations
39
Turning the Power on
39
Cassette Loading and Unloading
40
Viewing the LCD Monitor
42
Setting, Displaying and Recording the Date and Time
43
Displaying the Time and Date on the Screen
45
Charging the Built-In Battery
46
6 Setting and Adjustments before Shooting
47
Camera Settings
47
Screen Size (4:3/LETTER) Mode Selection
47
Viewfinder Adjustment
48
External Monitor Adjustment
48
Back Focus Adjustment
49
White Balance Adjustment
50
Audio Input Signal Selection
51
Recording Level Adjustment
52
Monitoring Audio During Recording
53
7 Shooting Operation
54
Basic Recording Operation
54
Searching for Recorded Scenes (Edit Search)
56
If the Record-Standby Mode Continues
57
Checking Recorded Contents in Record-Standby Mode (Recording Check Function)
57
HEADER REC Function
58
Recording the Color Bars
60
8 Playback Mode
61
Playback Procedure
61
Fast-Forward, Rewind
62
Search
62
Blank Search
62
Variable Slow Playback
63
Outputting CH-3, CH-4 Channel Audio
64
9 Using External Components
65
Connecting a Video Component with DV Connector
65
10 Time Code Operation
67
Displaying Time Code
67
Presetting and Recording of Time Code
68
Time Code Presetting Procedure
69
Recording Time Codes in Continuation of Time Codes Recorded on Tape
70
Reproducing Time Codes
70
11 Menu Screens
71
Menu Screen Configuration
71
Setting Menu Screens
72
FILE MANAGE Menu Screen
73
TOP MENU Screen
74
CAMERA OPERATION Menu Screen
75
CAMERA PROCESS MENU Screen
76
ADVANCED PROCESS Screen
78
SKIN COLOR ADJUST Screen
79
AUDIO/VIDEO Menu Screen
79
LCD/VF Menu Screen
81
TC/UB/CLOCK Menu Screen
83
HEADER REC Menu Screen
84
TIME/DATE Menu Screen
85
OTHERS Menu Screen
86
12 Features of the Camera Section
88
Full-Time Auto White Balance (FAW)
88
IRIS (Brightness) Adjustment
89
Adjusting the Shutter Speed
90
Shooting the Screen Image on a Computer Monitor
91
Gain (Sensitivity) Adjustment
92
Switch Setup According to Illumination and Subject
93
How to Use Skin Detail
94
Using the Skin Detail Function
95
13 Others
96
Alarm Indications and Actions
96
Troubleshooting
99
Hour Meter Display
100
Specifications
101
Advertisement
JVC GY-DV5100 User Manual (103 pages)
DV CAMCORDER
Brand:
JVC
| Category:
Camcorder
| Size: 4.91 MB
Table of Contents
Important Safeguards
2
Safety Precautions
3
Main Features
4
Table of Contents
5
Contents
5
1 Introduction
6
Precautions for Proper Use
6
Routine and Periodical Maintenance
7
Precautions for Use of Head Cleaning Tape
7
Videocassette to be Used
8
Battery Pack to be Used
8
Condensation
9
Characteristic CCD Phenomena
9
2 Controls, Indicators and Connectors
10
Front Section
10
Right Side Section
12
Left Side Section
17
Top Section
18
Rear Section
19
Indications on the LCD Monitor and in the Viewfinder
21
Lens (Optional)
29
Inch Viewfinder (Optional)
30
3 Basic System Connections and Adjustments
31
Basic System
31
Attaching the Zoom Lens
32
Attaching the Viewfinder
32
Attaching the Microphone (Provided)
33
Attaching the Microphone (Optional)
33
Attaching the Tripod Base (Provided)
34
4 Power Supply
35
AC Operation
35
Battery Pack Operation (Optional)
35
Remaining Battery Power Display
38
Precautions for the Battery Pack
38
5 Preparations
39
Turning the Power on
39
Cassette Loading and Unloading
40
Viewing the LCD Monitor
42
Setting, Displaying and Recording the Date and Time
43
Displaying the Time and Date on the Screen
45
Charging the Built-In Battery
46
6 Setting and Adjustments before Shooting
47
Camera Settings
47
Screen Size (4:3/LETTER) Mode Selection
47
Viewfinder Adjustment
48
External Monitor Adjustment
48
Back Focus Adjustment
49
White Balance Adjustment
50
Audio Input Signal Selection
51
Recording Level Adjustment
52
Monitoring Audio During Recording
53
7 Shooting Operation
54
Basic Recording Operation
54
Searching for Recorded Scenes (Edit Search)
56
If the Record-Standby Mode Continues
57
Checking Recorded Contents in Record-Standby Mode (Recording Check Function)
57
HEADER REC Function
58
Recording the Color Bars
60
8 Playback Mode
61
Playback Procedure
61
Fast-Forward, Rewind
62
Search
62
Blank Search
62
Variable Slow Playback
63
Outputting CH-3, CH-4 Channel Audio
64
9 Using External Components
65
Connecting a Video Component with DV Connector
65
10 Time Code Operation
67
Displaying Time Code
67
Presetting and Recording of Time Code
68
Time Code Presetting Procedure
69
Recording Time Codes in Continuation of Time Codes Recorded on Tape
70
Reproducing Time Codes
70
11 Menu Screens
71
Menu Screen Configuration
71
Setting Menu Screens
72
FILE MANAGE Menu Screen
73
TOP MENU Screen
74
CAMERA OPERATION Menu Screen
75
CAMERA PROCESS MENU Screen
76
ADVANCED PROCESS Screen
78
SKIN COLOR ADJUST Screen
79
AUDIO/VIDEO Menu Screen
79
LCD/VF Menu Screen
81
TC/UB/CLOCK Menu Screen
83
HEADER REC Menu Screen
84
TIME/DATE Menu Screen
85
OTHERS Menu Screen
86
12 Features of the Camera Section
88
Full-Time Auto White Balance (FAW)
88
IRIS (Brightness) Adjustment
89
Adjusting the Shutter Speed
90
Shooting the Screen Image on a Computer Monitor
91
Gain (Sensitivity) Adjustment
92
Switch Setup According to Illumination and Subject
93
How to Use Skin Detail
94
Using the Skin Detail Function
95
13 Others
96
Alarm Indications and Actions
96
Troubleshooting
99
Hour Meter Display
100
Specifications
101
JVC GY-DV5100 Instructions Manual (103 pages)
DV CAMCORDER
Brand:
JVC
| Category:
Camcorder
| Size: 4.98 MB
Table of Contents
Safety Precautions
2
Main Features
4
Table of Contents
5
1 Introduction
6
Precautions for Proper Use
6
Routine and Periodical Maintenance
7
Precautions for Use of Head Cleaning Tape
7
Videocassette to be Used
8
Battery Pack to be Used
8
Condensation
9
Characteristic CCD Phenomena
9
2 Controls, Indicators and Connectors
10
Front Section
10
Right Side Section
12
Left Side Section
17
Top Section
18
Rear Section
19
Indications on the LCD Monitor and in the Viewfinder
21
ZOOM Lens (Optional)
29
Inch Viewfinder (Optional)
30
3 Basic System Connections and Adjustments
31
Basic System
31
Attaching the Zoom Lens
32
Attaching the Viewfinder
32
Attaching the Microphone (Provided)
33
Attaching the Microphone (Optional)
33
Attaching the Tripod Base (Provided)
34
4 Power Supply
35
AC Operation
35
Battery Pack Operation (Optional)
35
Remaining Battery Power Display
38
Precautions for the Battery Pack
38
5 Preparations
39
Turning the Power on
39
Cassette Loading and Unloading
40
Viewing the LCD Monitor
42
Setting, Displaying and Recording the Date and Time
43
Displaying the Time and Date on the Screen
45
Charging the Built-In Battery
46
6 Setting and Adjustments before Shooting
47
Camera Settings
47
Screen Size (4:3/LETTER/SQUEEZE) Mode Selection
47
Viewfinder Adjustment
48
External Monitor Adjustment
48
Back Focus Adjustment
49
White Balance Adjustment
50
Audio Input Signal Selection
51
Recording Level Adjustment
52
Monitoring Audio During Recording
53
7 Shooting Operation
54
Basic Recording Operation
54
Searching for Recorded Scenes (Edit Search)
56
If the Record-Standby Mode Continues
57
Checking Recorded Contents in Record-Standby Mode (Recording Check Function)
57
HEADER REC Function
58
Recording the Colour Bars
60
8 Playback Mode
61
Playback Procedure
61
Fast-Forward, Rewind
62
Search
62
Blank Search
62
Variable Slow Playback
63
Outputting CH-3, CH-4 Channel Audio
64
9 Using External Components
65
Connecting a Video Component with DV Connector
65
10 Time Code Operation
67
Displaying Time Code
67
Presetting and Recording of Time Code
68
Time Code Presetting Procedure
69
Recording Time Codes in Continuation of Time Codes Recorded on Tape
70
Reproducing Time Codes
70
11 Menu Screens
71
Menu Screen Configuration
71
Setting Menu Screens
72
FILE MANAGE Menu Screen
73
TOP MENU Screen
74
CAMERA OPERATION Menu Screen
75
CAMERA PROCESS MENU Screen
76
ADVANCED PROCESS Screen
78
SKIN COLOR ADJUST Screen
79
AUDIO Menu Screen
79
LCD/VF Menu Screen
81
TC/UB/CLOCK Menu Screen
83
HEADER REC Menu Screen
84
TIME/DATE Menu Screen
85
OTHERS Menu Screen
86
12 Features of the Camera Section
88
Full-Time Auto White Balance (FAW)
88
IRIS (Brightness) Adjustment
89
Adjusting the Shutter Speed
90
Shooting the Screen Image on a Computer Monitor
91
Gain (Sensitivity) Adjustment
92
Switch Setup According to Illumination and Subject
93
How to Use Skin Detail
94
Others
94
Using the Skin Detail Function
95
13 Others
96
Alarm Indications and Actions
96
Troubleshooting
99
Hour Meter Display
100
Specifications
101
Advertisement
JVC GY-DV5100 Instructions Manual (75 pages)
DV CAMCORDER
Brand:
JVC
| Category:
Camcorder
| Size: 5.57 MB
Table of Contents
Important Safeguards
2
Safety Precautions
2
Main Features
4
Table of Contents
5
1 Introduction
6
Precautions for Proper Use
6
1 Introduction
7
Head Cleaning
7
Precautions for Use of Head Cleaning Tape
7
Routine and Periodical Maintenance
7
Battery Pack to be Used
8
Videocassette to be Used
8
2 Controls, Indicators and Connectors
9
Characteristic CCD Phenomena
9
Front Section
9
2 Controls, Indicators and Connectors
10
Right Side Section
10
Left Side Section
14
Rear Section
15
Top Section
15
Indications on the Lcd Monitor and in the Viewfinder
17
Basic System
24
Attaching the Zoom Lens
25
Attaching the Viewfinder
25
Power Supply
27
Remaining Battery Power Display
30
Precautions for the Battery Pack
30
5 Preparations
31
Turning the Power on
31
Cassette Loading and Unloading
32
Viewing the Lcd Monitor
33
6 SETTING and ADJUSTMENTS before 12-6 Switch Setup According to Illumination
38
Camera Settings
38
6 Setting and Adjustments before
39
Viewfinder Adjustment
39
External Monitor Adjustment
39
Back Focus Adjustment
40
White Balance Adjustment
40
Recording Level Adjustment
41
Audio Input Signal Selection
41
7 Shooting Operation
42
Monitoring Audio During Recording
42
Basic Recording Operation
42
7 Shooting Operation
43
Searching for Recorded Scenes (Edit Search)
43
Header Rec Function
45
Recording the Color Bars
47
Recording the Colour Bars
47
Playback Mode
48
Playback Procedure
48
Blank Search
48
Variable Slow Playback
49
Connecting a Video Component with DV Connector
50
The Viewfinder
51
10 Time Code Operation
52
9 Using External Components
52
Displaying Time Code
52
10 Time Code Operation
53
9 Using External Components
53
Presetting and Recording of Time Code
53
Codes Recorded on Tape
55
ADVANCED PROCESS Screen
56
11 Menu Screens
57
File Manage Menu Screen
57
Top Menu Screen
57
Camera Operation Menu Screen
58
Camera Process Menu Screen
58
11 Menu Screens
59
Advanced Process Screen
59
Skin Color Adjust Screen
60
Header Rec Menu Screen
64
OTHERS Menu Screen
65
Features of the Camera Section
66
Adjusting the Shutter Speed
67
Shooting the Screen Image on a Computer Monitor
67
Gain (Sensitivity) Adjustment
68
How to Use Skin Detail
69
13 Others
70
Alarm Indications and Actions
70
Precautions for Use of Head Cleaning Tape
71
13 Others
72
Hour Meter Display
72
Specifications
73
Advertisement
Related Products
JVC GY-DV5100U - 3-ccd Professional Dv Camcorder
JVC GY-DV5101
JVC GY-DV5000U - 3-ccd Professional Dv Camcorder
JVC GY-DV500U - Professional Dv Camcorder
JVC GY-DV500E - Pal Professional Dv Camcorder
JVC GY-DV500
JVC GY-DV5001
JVC GY-DV550
JVC GY-DV550U
JVC GY-DV550E - Studio Dv Camcorder
JVC Categories
Car Receiver
Camcorder
TV
VCR
Stereo System
More JVC Manuals
Login
Sign In
OR
Sign in with Facebook
Sign in with Google
Upload manual
Upload from disk
Upload from URL