Sign In
Upload
Manuals
Brands
HP Manuals
Dispenser
Compaq d300 Series
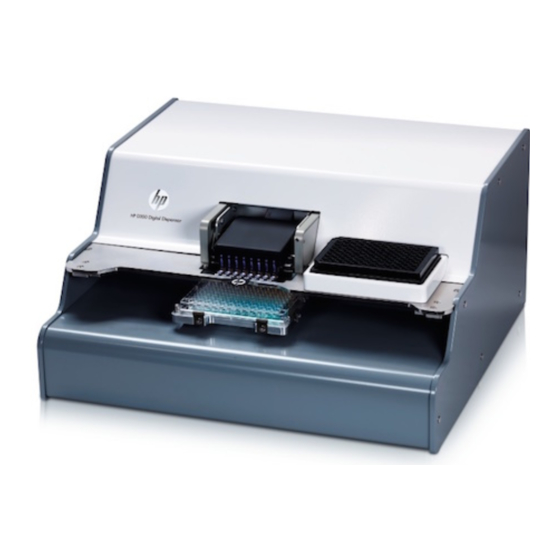
HP Compaq d300 Series Digital Dispenser Manuals
Manuals and User Guides for HP Compaq d300 Series Digital Dispenser. We have
2
HP Compaq d300 Series Digital Dispenser manuals available for free PDF download: Reference Manual, Operating Manual
HP Compaq d300 Series Reference Manual (238 pages)
business desktop
Brand:
HP
| Category:
Desktop
| Size: 6.11 MB
Table of Contents
Table of Contents
5
1 Installing the Operating System
11
Installing or Upgrading Device Drivers
11
Creating an Emergency Repair Diskette-Windows 2000
11
Using the Emergency Repair Diskette-Windows 2000
11
Converting to NTFS
12
Windows 2000 Professional
12
Windows XP Home and XP Professional
12
HP Software
12
2 Setup Utilities and Diagnostics Features
13
Power-On Self-Test (POST)
13
Computer Setup Utilities
14
Using Computer Setup (F10) Utilities
15
Computer Setup Menu
16
Diagnostics for Windows
25
Detecting Diagnostics for Windows
25
Installing Diagnostics for Windows
25
Using Categories in Diagnostics for Windows
26
Running Diagnostic Tests in Diagnostics for Windows
28
Configuration Record
29
Installing Configuration Record
29
Running Configuration Record
29
Remote Diagnostics Enabling Agent
30
Installing or Upgrading Remote Diagnostics Enabling Agent
30
Running the Remote Diagnostics Enabling Agent
30
Protecting the Software
30
Restoring the Software
31
3 Desktop Management
33
Initial Configuration and Deployment
33
Remote System Installation
34
Software Updating and Management
34
HP Client Manager Software
34
Altiris Client Management Solutions
34
System Software Manager
35
Proactive Change Notification (PCN)
35
Subscriber's Choice
36
ROM Flash
36
Remote ROM Flash
36
HPQ Flash
36
Failsafe Boot Block ROM
37
Replicating Your Setup
38
Dual-State Power Button
38
Power Management
39
World Wide Web Site
39
Building Blocks and Partners
39
Asset Tracking and Security
40
Password Security
43
Establishing a Setup Password Using Computer Setup
43
Establishing a Power-On Password Using Computer Setup
44
Drivelock
46
Using Drivelock
47
Drivelock Applications
47
Smart Cover Sensor
48
Locking the Smart Cover Lock
49
Using the Smart Cover Failsafe Key
49
Master Boot Record Security
50
Before You Partition or Format the Current Bootable Disk
51
Cable Lock Provision
51
Fingerprint Identification Technology
51
Fault Notification and Recovery
52
Drive Protection System
52
Surge-Tolerant Power Supply
52
Thermal Sensor
52
4 Serial and Parallel ATA Drive Guidelines and Features
53
PATA and SATA Device Information
53
ATA Cables
53
SATA Data Cable
53
SATA Power Cable
54
PATA Data Cable
54
PATA Power Cable
54
PATA Cable Layout
55
PATA Drive Installation Guidelines
56
PATA Device Classes
56
PATA Attach Sequence Rules by Class Priority
57
PATA Attach Sequence Worksheet
58
PATA Additional Drive Application Notes
60
PATA SMART Drives
61
Drive Capacities
61
Sata Bios
61
Legacy Mode
62
Native Mode
62
Mixed Devices Boot and Drive Letter Ordering
63
5 Identifying the Chassis, Routine Care, and Disassembly Preparation
65
Chassis Designations
65
Microtower (Μt)
65
Slim Tower (ST)
66
Desktop (DT)
66
Electrostatic Discharge Information
67
Generating Static
67
Preventing Electrostatic Damage to Equipment
67
Personal Grounding Methods and Equipment
68
Grounding the Work Area
68
Recommended Materials and Equipment
68
Routine Care
69
General Cleaning Safety Precautions
69
Cleaning the Computer Case
69
Cleaning the Keyboard
70
Cleaning the Monitor
70
Cleaning the Mouse
70
Service Considerations
71
Power Supply Fan
71
Tools and Software Requirements
71
Screws
71
Cables and Connectors
72
Hard Drives
72
Lithium Coin Cell Battery
72
6 Removal and Replacement Procedures-Microtower (Μt) Chassis
73
Preparation for Disassembly
73
Unlocking the Smart Cover Lock
74
External Security Devices
75
Installing a Cable Lock
75
Installing a Padlock
75
Access Panel
76
Front Bezel
77
Front Drive Bezels
79
Drive Bezel Blank
79
Diskette Drive Bezel
80
Drive Bezel Blank
80
Memory Modules
81
Expansion Cards
82
Expansion Slot Cover
82
PCI Expansion Card
83
AGP Card
85
Drives
87
Drive Positions
87
Removing a Drive
88
Releasing the Drives
89
Installing a Drive
90
Chassis Fan
93
Front I/O Panel Housing Assembly
94
Front I/O Devices
95
Power Switch Assembly
96
Processor and Heatsink
98
System Board
100
Battery
101
1Type 1 Battery Holder
102
2Type 2 Battery Holder
103
3Type 3 Battery Holder
104
Speaker
105
Power Supply
106
7 Removal and Replacement Procedures-Slim Tower (ST) Chassis
107
Preparation for Disassembly
107
Unlocking the Smart Cover Lock
108
Hood Sensor
110
External Security Devices
112
Cable Lock
112
Padlock
113
Computer Access Panel
114
Front Bezel
115
Front Drive Bezels
116
Memory Modules
117
PCI Expansion Card
118
Drives
121
1Drive Positions
121
2Cable Routing
122
3Optical Drive
123
4External 3.5-Inch Drive
126
5Primary Hard Drive
128
Front I/O Devices
130
Power Switch Assembly
131
System Board
132
Chassis Fan
133
Battery
134
1Type 1 Battery Holder
135
2Type 2 Battery Holder
136
Processor and Heatsink, Type 1
137
Processor and Heatsink, Type 2
138
Speaker
140
Power Supply
141
8 Removal and Replacement Procedures-Desktop (DT) Chassis
143
Preparation for Disassembly
143
Unlocking the Smart Cover Lock
144
Hood Sensor
145
External Security Devices
146
Cable Lock
146
Padlock
146
Computer Cover
147
Front Bezel
148
Front Drive Bezels
149
Drive Bezel Blank
149
Diskette Drive Bezel or Bezel Blank
150
Memory Modules
151
Expansion Cards
152
Drives
157
1Drive Positions
157
2Removing a Drive
158
3Optical Drive
162
4Hard Drive
164
Front I/O Devices
166
Power Switch Assembly
167
System Board
168
Battery
169
1Type 1 Battery Holder
170
2Type 2 Battery Holder
171
Type 1
172
Processor and Heatsink
172
Type 2
173
Type 3
174
Speaker
175
Chassis Fan
176
Power Supply
177
Connector Pin Assignments
179
Ethernet Aui
180
Parallel Interface
181
External Infrared Transceiver
183
Pin Power
186
General Requirements
187
Post Error Messages
189
Preliminary Checklist
197
Solving Minor Problems
198
Solving Power Supply Problems
200
Solving Diskette Problems
201
Solving Hard Drive Problems
203
Solving Display Problems
205
Solving Audio Problems
208
Solving Printer Problems
210
Solving Keyboard and Mouse Problems
211
Solving Hardware Installation Problems
212
Solving Network Problems
214
Solving Memory Problems
216
Solving Processor Problems
217
Solving Drive Key Problems
219
Solving Internet Access Problems
219
DIMM Sockets
224
Advertisement
HP Compaq d300 Series Operating Manual (74 pages)
Digital Dispenser
Brand:
HP
| Category:
Dispenser
| Size: 3.44 MB
Table of Contents
Table of Contents
3
1 Product Description
5
System Requirements
6
Hardware
6
Software
6
Environmental Operating Conditions
6
Shipping and Storage Conditions
6
2 Safety
7
General Safety Rules
7
Personal Protective Equipment
7
Possible Inhalation Hazard
7
Pinch Hazard
7
Laser Safety
8
Electrical Safety
8
Electrical Emissions Safety
8
Decontamination Prior to Servicing
9
Safe Disposal of Dispensehead Cassettes and Pipette Tips
9
Ergonomic Safety
9
Additional Assistance
9
3 Clean the Dispenser
10
4 Get Started
11
Start up the Dispenser
11
Get Familiar with the Software
12
Load an Existing Plate Configuration
14
Get to Know the Options Dialog Box
16
Options: General
17
Options: Edit: Units
17
Options: Edit: Fluid Defaults
18
Options: Edit: Assay Defaults
19
Options: Plate Jitter
19
Options: Report
20
Plate Dispense Procedure
21
Initiate Plate Dispense
21
Scan and Load the Well Plates
22
Load a Dispensehead Cassette
22
Load Fluid into the Dispensehead
23
View the Report
27
Turn off the HP D300 Digital Dispenser
30
5 Create Plate Configurations
31
Create the Fluids Table
31
Edit the Fluids List
32
Edit the Well Plate
33
Set Concentrations or Volumes in Wells
35
Use the Paste Special Dialog Box
38
Normalize
39
Randomize
41
Save the Plate Configuration
42
Plate Layout Wizard Basics
43
Create Single Zone Titration1Layouts
43
Position Nodispense Controls
47
Plate Layout Wizard Advanced Functions
49
Create Multizone Titration1 Layouts
49
Create Modified Range Titration1 Layouts
52
Create Titration2 Layouts: Two Fluids Per Well
55
6 Troubleshooting and Error Messages
58
Troubleshooting
58
Problems with Software
58
Computer Issues
58
Unable to Home Stage
59
Check the A1 Location
59
A1 Alignment Procedure
59
Check the Fuses and Replace if Necessary
61
Error Messages
64
Appendix A HP D300 Digital Dispenser Software Basics
70
Appendix B Glossary
71
Appendix C Quick Start Guide
72
Appendix D Revision History
74
Advertisement
Related Products
HP D300s - Evo - 128 MB RAM
HP D300v - Evo - 128 MB RAM
HP d3000
HP Compaq D315
HP d325 ST
HP d338 - Microtower Desktop PC
HP Compaq d330 MT
HP d325 - Microtower Desktop PC
HP D315 - Desktop PC
HP D340xA series
HP Categories
Desktop
Laptop
Server
Monitor
Switch
More HP Manuals
Login
Sign In
OR
Sign in with Facebook
Sign in with Google
Upload manual
Upload from disk
Upload from URL