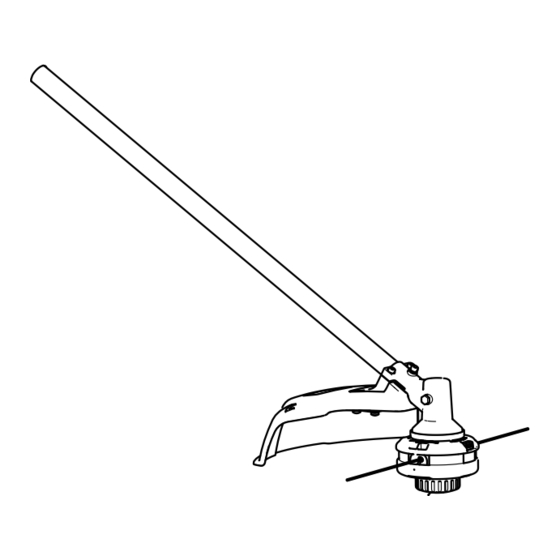
Toro Flex-Force Power System 88716 Operator's Manual
14in or 16in 60v max string trimmer
Hide thumbs
Also See for Flex-Force Power System 88716:
- Operator's manual (25 pages) ,
- Manual (53 pages)
Table of Contents

Summary of Contents for Toro Flex-Force Power System 88716
- Page 1 Form No. 3450-369 Rev A Flex-Force Power System ™ 14in or 16in 60V MAX String Trimmer Flex-Force Power System™ 60V MAX Attachment Model No. 88716—Serial No. 321000001 and Up *3450-369* Register at www.Toro.com. Original Instructions (EN)
- Page 2 It is to be used only by adults. It is designed to be used in combination with the Toro Flex-Force Power System 60V MAX Attachment-Capable Power Head Model 51810T. Using this product for purposes other than...
-
Page 3: Important Safety Instructions
II. Preparation Keep bystanders and children away from the operating area. Use only the battery pack specified by Toro. Using other accessories and attachments may increase the risk of injury and fire. Plugging the battery charger into an outlet that is not 120 V can cause a fire or electric shock. - Page 4 68°C (154°F) or incinerate Dress properly—Wear appropriate clothing, it. Replace the battery pack with a genuine Toro including eye protection; long pants; substantial, battery pack only; using another type of battery slip-resistant footwear; rubber gloves; and pack may cause a fire or explosion.
- Page 5 replacement parts to ensure that the product is safely maintained. Store an idle appliance indoors in a place that is dry, secure, and out of the reach of children. Do not dispose of the battery in a fire. The cell may explode. Check with local codes for possible special disposal instructions.
-
Page 6: Safety And Instructional Decals
Safety and Instructional Decals Safety decals and instructions are easily visible to the operator and are located near any area of potential danger. Replace any decal that is damaged or missing. decal145-3141 145-3141 decal139-5210 139-5210 1. Warning—read the Operator’s Manual; stay away from moving parts;... - Page 7 Setup Connecting the Attachment to the Power Head No Parts Required Procedure Install the square shaft of the attachment into the square shaft of the power head (A of Figure Align the locking button on the lower shaft with the slotted hole on the upper shaft and slide the 2 shafts together (B and C of Figure The locking button clicks into the slotted hole when the shafts are secured (C of...
-
Page 8: Installing The Guard
Installing the Guard Parts needed for this procedure: Guard Washer Bolt Procedure Align the trimmer guard beneath the guard mount as shown in Figure g333216 Figure 4 1. Guard mount 3. Washer 2. Trimmer guard 4. Bolt Secure the guard to the trimmer using the 4 washers and 4 bolts as shown in Figure... -
Page 9: Product Overview
Product Overview Operation Starting the Attachment Ensure that the vents on the attachment, power head, and battery are clear of any dust and debris. Align the cavity in the battery pack with the tongue on the handle housing (Figure g372306 Figure 5 1. - Page 10 Shutting Off the Trimmer Advancing the Line Using the Bump Feed To shut off the trimmer, release the trigger. Run the trimmer at full throttle. Whenever you are not using the trimmer or are transporting the trimmer to or from the work area, Tap the bump button on the ground to advance remove the battery pack.
-
Page 11: Operating Tips
Adjusting the Cutting Swath The trimmer comes from the factory with a cutting swath of 33 cm (13 inches) as shown in A of Figure 10. Refer to the following instructions to adjust the swath to 38.1 cm (15 inches) as shown in D of Figure Remove the swath blade from the bottom of the guard by removing the 2 screws holding it in place using the provided Allen wrench (B of... -
Page 12: Maintenance
Maintenance After each use of the trimmer, complete the following: Remove the battery from the power head. Wipe the trimmer clean with a damp cloth. Do not hose the trimmer down or submerge it in water. CAUTION The line cutoff blade on the deflector is sharp and can cut you. -
Page 13: Preparing The Battery Pack For Recycling
Call2Recycle seal, please contact your local municipality for more information on how to responsibly recycle the battery. If you are located outside of the US and Canada, please contact your authorized Toro distributor. -
Page 14: Troubleshooting
Troubleshooting Perform only the steps described in these instructions. All further inspection, maintenance, and repair work must be performed by an authorized service center or a similarly qualified specialist if you cannot solve the problem yourself. Problem Possible Cause Corrective Action The tool does not start. - Page 15 Notes:...
- Page 16 While the exposure from Toro products may be negligible or well within the “no significant risk” range, out of an abundance of caution, Toro has elected to provide the Prop 65 warnings. Moreover, if Toro does not provide these warnings, it could be sued by the State of California or by private parties seeking to enforce Prop 65 and subject to substantial penalties.


