Sign In
Upload
Manuals
Brands
Yamaha Manuals
Receiver
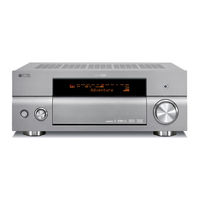
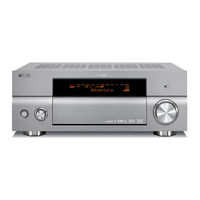
RX-V4600 - AV Receiver
Yamaha RX-V4600 - AV Receiver Manuals
Manuals and User Guides for Yamaha RX-V4600 - AV Receiver. We have
3
Yamaha RX-V4600 - AV Receiver manuals available for free PDF download: Owner's Manual, Service Manual
Yamaha RX-V4600 - AV Receiver Owner's Manual (841 pages)
Brand:
Yamaha
| Category:
Receiver
| Size: 13.97 MB
Table of Contents
English
3
Table of Contents
3
Introduction
4
Features
4
Getting Started
5
Supplied Accessories
5
Installing Batteries in the Remote Controls
6
Controls and Functions
7
Front Panel
7
Remote Control
9
Zone 2/Zone 3 Remote Control
11
Using the Remote Controls
11
Front Panel Display
12
Rear Panel
14
Preparation
15
Speaker Setup
15
Speaker Placement
15
Speaker Connections
17
FRONT Terminals
19
Bi-Wired Connection
19
SUBWOOFER Jack
19
Connections
20
Before Connecting Components
20
Cable Indications
20
Connecting Video Components
21
Connections for DVD Playback
21
Connecting to MULTI CH INPUT Jacks
22
Connecting Audio Components
24
Connecting to an External Amplifier
25
Connecting the Antennas
26
Connecting the Power Cable
27
Speaker Impedance Setting
28
Turning on the Power
28
Auto Setup
29
Introduction
29
Optimizer Microphone Setup
29
Starting the Setup
30
Confirming the Results
32
Basic Operation
35
Playback
35
Basic Operations
35
Selecting Sound Field Programs
36
Additional Operations
37
Selecting Audio Input Modes
42
Tuning
43
Automatic and Manual Tuning
43
Presetting Stations
44
Selecting Preset Stations
46
Exchanging Preset Stations
46
Receiving Radio Data System Stations
47
Changing the Radio Data System Mode
47
PTY SEEK Function
48
EON Function
49
Recording
50
Sound Field Programs
51
Sound Field Program Descriptions
51
For Movie/Video Sources
51
For Music Sources
53
Advanced Operation
54
Advanced Operations
54
Using the Sleep Timer
54
System Options
55
Changing Parameter Settings
57
Input Select
58
Manual Setup (Sound)
61
Manual Setup (Basic)
64
Manual Setup (Option)
69
System Memory
72
Remote Control Features
73
Control Area
73
Setting Remote Control Codes
74
Programming Codes from Other Remote Controls (Learn)
76
Changing Source Names in the Display Window
78
Using the Macro Feature
79
Clearing Function Sets
81
Clearing Individual Functions
82
Clearing a Macro Function
83
Controlling each Component
84
Zone 2/Zone 3
85
Zone 2/Zone 3 Connections
85
Controlling Zone 2/Zone 3 from the Front Panel
86
Controlling Zone 2/Zone 3 Using the Remote Control
87
Standby Mode
88
Front Panel Display Menus
89
Advanced Setup Menu
89
Front Panel Display System Options Menu
90
USING I.link
94
What Is I.link
94
Connecting I.link Components
94
Basic I.link Operations
95
Changing I.link Select Parameters
95
I.link Display Messages
97
Using Hdmi
98
What Is HDMI
98
Connecting HDMI Components
99
Basic HDMI Operations
100
Changing HDMI Parameters
100
Additional Information
102
Editing Sound Field Parameters
102
What Is a Sound Field
102
Changing Parameter Settings
102
Sound Field Parameter Descriptions
103
Troubleshooting
108
Glossary
113
Audio Formats
113
Sound Field Programs
114
Audio Information
114
Video Signal Information
116
Parametric Equalizer Information
117
Specifications
118
Français
121
Introduction
122
Particularités
122
Pour Commencer
124
Accessoires Fournis
124
Mise en Place des Piles Dans Le Boîtier de Télécommande
125
Commandes Et Fonctions
126
Face Avant
126
Boîtier de Télécommande
128
Boîtier de Télécommande de la Zone 2/Zone 3
130
Utilisation des Boîtiers de Télécommande
130
Afficheur de la Face Avant
131
Panneau Arrière
133
Préparations
134
Mise en Œuvre des Enceintes
134
Disposition des Enceintes
134
Raccordements des Enceintes
136
Raccordements
139
Avant de Raccorder Les Appareils
139
Raccordements des Appareils VIDéo
140
Raccordements des Appareils Audio
143
Raccordements des Antennes
145
Raccordement du Câble D'alimentation
146
Réglage D'impédance des Enceintes
147
Mise Sous Tension
147
Auto Setup
148
Introduction
148
Mise en Place du Microphone D'optimisation
148
Début des Opérations
149
Confirmation des Résultats
151
Opérations de Base
154
Lecture
154
Opérations de Base
154
Choix D'une Correction de Champ Sonore
155
Opérations Complémentaires
156
Sélection des Modes D'entrée Audio
161
Syntonisation
162
Syntonisation Automatique Et Syntonisation Manuelle
162
Mise en Mémoire des Fréquences
163
Sélection de Stations Préréglées
165
Échange des Fréquences
165
Réception des Stations du Système de Diffusion de Données Radio
166
Changement du Mode du Système de Diffusion de Données Radio
166
Fonction PTY SEEK
167
Fonction EON
168
Enregistrement
169
Corrections de Champ Sonore
170
Description des Corrections de Champ Sonore
170
Cas des Films Et des Sources VIDéo
170
Sources Musicales
172
Opérations Détaillées
173
Utilisation de la Minuterie de Mise Hors Service
173
Options Générales
174
Modification des Valeurs des Paramètres
176
Input Select
177
Manual Setup (Sound)
180
Manual Setup (Basic)
183
Manual Setup (Option)
188
System Memory
191
Particularités de la Télécommande
192
Section des Commandes
192
Enregistrement des Codes de Commande
193
Apprentissage des Codes des Autres Boîtiers de Télécommande
195
Changement du Nom D'une Source Apparaissant Dans la Fenêtre D'affichage
197
Utilisation de la Fonction de Macro
198
Effacement des Modifications
200
Effacement Individuel des Fonctions
201
Commande de Chaque Appareil
203
Zone 2/Zone 3
204
Raccordements Pour Zone 2/Zone 3
204
Contrôle de la Zone 2/Zone 3 Avec Le Boîtier de Télécommande
206
Menus Apparaissant Sur L'afficheur de la Face Avant
208
Menu des Réglages Détaillés
208
Menu des Options Système Affiché Sur la Face Avant
209
UTILISATION I.link
213
Qu'est-Ce que I.link
213
Raccordements des Appareils I.link
213
Opérations I.link de Base
214
Modification des Paramètres I.link Select
214
Messages I.link
216
Utilisation Hdmi
217
Qu'est-Ce que HDMI
217
Raccordements des Appareils HDMI
218
Opérations HDMI de Base
219
Modification des Paramètres HDMI
219
Modification des Paramètres des Champs Sonores
221
Qu'est-Ce Qu'un Champ Sonore
221
Modification des Valeurs des Paramètres
221
Description des Paramètres de Correction de Champ Sonore
222
Guide de Dépannage
227
Glossaire
233
Formats des Gravures Sonores
233
Corrections de Champ Sonore
234
Informations Relatives Aux Signaux Sonores
234
Informations Relatives Aux Signaux VIDéo
236
Quelques Mots Sur L'égalisation Paramétrique
237
Caractéristiques Techniques
238
Informations Complémentairies
221
Deutsch
241
Einleitung
242
Merkmale
242
Wollen wir Beginnen
243
Mitgeliefertes Zubehör
243
Einsetzen der Batterien in die Fernbedienung
244
Bedienungselemente und Ihre Funktionen
245
Frontblende
245
Fernbedienung
247
Fernbedienung für Zone 2/Zone 3
249
Verwendung der Fernbedienung
249
Frontblende-Display
250
Rückwand
252
Vorbereitung
253
Lautsprecher-Setup
253
Anordnung der Lautsprecher
253
Lautsprecheranschlüsse
255
Anschlüsse
258
Vor dem Anschließen der Komponenten
258
Anschluss der Videokomponenten
259
Anschluss der Audiokomponenten
262
Anschluss der Antennen
264
Anschluss des Netzkabels
265
Einstellung der Lautsprecherimpedanz
266
Einschalten der Stromversorgung
266
Auto Setup
267
Einleitung
267
Optimierungsmikrofon-Setup
267
Starten des Setups
268
Bestätigung der Ergebnisse
271
Grundlegende Bedienungsvorgänge
274
Wiedergabe
274
Wahl von Soundfeldprogrammen
275
Zusätzliche Bedienungsvorgänge
276
Wahl der Audio-Eingangsmodi
281
Abstimmung
282
Automatische und Manuelle Abstimmung
282
Automatische Abstimmung
282
Abstimmen auf Festsender
283
Aufrufen eines Festsenders
285
Austauschen von Festsendern
285
Empfang von Radio-Daten-System-Sendern
286
Umschalten des Radio-Daten-System-Modus
286
PTY SEEK Funktion
287
EON Funktion
288
Aufnahme
289
Soundfeldprogramme
290
Beschreibung der Soundfeldprogramme
290
Für Film/Videoquellen
290
Für Musikquellen
292
Weiterführende Bedienungsvorgänge
293
Verwendung des Einschlaf-Timers
293
System-Optionen
294
Änderung der Parametereinstellungen
296
Input Select
297
Manual Setup (Sound)
300
Manual Setup (Basic)
303
Manual Setup (Option)
308
System Memory
311
Merkmale der Fernbedienung
312
Bedienungsbereich
312
Einstellung der Fernbedienungscodes
313
Programmierung von Codes von anderen Fernbedienungen (Lernfunktion)
315
Änderung der Quellennamen in dem Displayfenster
317
Verwendung der Macro-Funktion
318
Löschen Eingestellter Funktionen
320
Löschung Individueller Funktionen
321
Bedienung jeder Komponente
323
Zone 2/Zone 3
324
Zone 2/Zone 3 Anschlüsse
324
Steuerung der Zone 2/Zone 3 von der Frontblende
325
Steuerung der Zone 2/Zone 3 unter Verwendung der Fernbedienung
326
Auf der Frontblende Angezeigte Menüs
328
Weiterführendes Setup-Menü
328
Systemoptionsmenü des Frontblende-Displays
329
VERWENDUNG von I.link
333
Was ist I.link
333
Anschluss von I.link-Komponenten
333
Grundlegend I.link-Bedienungsvorgänge
334
Änderung von I.link Select-Parametern
335
I.link-Anzeigemeldungen
337
Verwendung von Hdmi
338
Was ist HDMI
338
Anschluss von HDMI-Komponenten
339
Grundlegend HDMI-Bedienungsvorgänge
340
Änderung von HDMI-Parametern
340
Zusätzliche Informationen
342
Bearbeitung der Soundfeldparameter
342
Was ist ein Soundfeld
342
Änderung der Parametereinstellungen
342
Beschreibungen der Soundfeldprogramme
343
Störungsbeseitigung
348
Glossar
353
Audio-Formate
353
Soundfeldprogramme
354
Audio-Informationen
354
Videosignalinformationen
356
Informationen zu dem Parametrischen Equalizer
357
Technische Daten
358
Svenska
361
Egenskaper
362
Inledning
362
Förberedelser
363
Medföljande Tillbehör
363
Isättning Av Batterier I Fjärrkontrollen
364
Kontroller Och Funktioner
365
Frontpanelen
365
Fjärrkontrollen
367
Zone 2/Zone 3-Fjärrkontroll
369
Att Använda Fjärrkontrollerna
369
Frontpanelens Display
370
Bakpanelen
372
Högtalarinstallation
373
Högtalarnas Placering
373
Högtalaranslutningar
375
Anslutningar
378
Innan Komponenter Ansluts
378
Anslutning Av Videokomponenter
379
Anslutning Av Ljudkomponenter
382
Anslutning Av Antennerna
384
Anslutning Av Nätkabeln För Strömförsörjning
385
Inställning Av Högtalarimpedans
386
Slå På Strömmen
386
Auto Setup
387
Inledning
387
Uppsättning Av Optimeringsmikrofonen
387
Sätta Igång Inställningen
388
Bekräftande Av Resultaten
390
Grundläggande Användning
393
Uppspelning
393
Grundläggande Manövrering
393
Välja Ljudfältsprogram
394
Övriga Manövreringar
395
Val Av Ljudinmatningslägen
400
Stationsinställning
401
Automatisk Och Manuell Stationsinställning
401
Förinställning Av Radiostationer
402
Ställa in en Förinställd Station
404
Växla Förinställda Stationer
404
Mottagning Av Radiodatasystem-Stationer
405
Ändring Av Radiodatasystem-Läge
405
Funktionen PTY SEEK
406
Funktionen EON
407
Inspelning
408
Beskrivningar Av Ljudfältsprogram
409
För Film/Videokällor
409
För Musikkällor
411
Avancerad Användning
412
Avancerad Manövrering
412
Att Använda Insomningstimern
412
Systemalternativ
413
Ändring Av Parameterinställningar
415
Input Select
416
Manual Setup (Sound)
419
Manual Setup (Basic)
422
Manual Setup (Option)
427
System Memory
430
Fjärrkontrollens Funktioner
431
Kontrollområde
431
Inställning Av in Fjärrkontrollkoder
432
Programmera in Koder Från Andra Fjärrkontroller (Inlärning)
434
Ändra Beteckningen På Källan I Displayfönstret
436
Att Använda Macro-Funktionen
437
Att Radera en Funktionsuppsättning
439
Att Radera Individuella Funktioner
440
Kontrollområdet För Varje Komponent
442
Zone 2/Zone 3
443
Zone 2/Zone 3-Anslutningar
443
Styrning Zone 2/Zone 3 Från Frontpanelen
444
Styrning Av Zone 2/Zone 3 Med Hjälp Av Fjärrkontrollen
445
Menyer På Frontpanelens Display
447
Meny För Avancerade Inställningar
447
Meny För Systemalternativ På Frontpanelens Display
448
ANVÄNDNING AV I.link
452
Vad Är I.link
452
Anslutning Av I.link-Komponenter
452
Grundläggande I.link-Manövrering
453
Att Ändra I.link Select-Parametrar
453
Displaymeddelanden Gällande I.link
455
Användning Av Hdmi
456
Vad Är HDMI
456
Anslutning Av HDMI-Komponenter
457
Grundläggande HDMI-Manövrering
458
Att Ändra HDMI-Parametrar
458
Redigering Av Ljudfältsparametrar
460
Vad Är Ett Ljudfält
460
Ändring Av Parameterinställningar
460
Ytterligare Information
460
Beskrivningar Av Ljudfältsparametrar
461
Felsökning
466
Ordlista
471
Ljudformat
471
Ljudfältsprogram
472
Ljudinformation
472
Videosignalinformation
474
Information Om Parametrisk Equalizer
475
Tekniska Data
476
Italiano
479
Introduzione
480
Caratteristiche
480
Per Cominciare
481
Accessori in Dotazione
481
Installazione Delle Batterie Nei Telecomandi
482
Comandi E Loro Funzione
483
Pannello Anteriore
483
Telecomando
485
Telecomando Zone 2/Zone 3
487
Uso Dei Telecomandi
487
Display del Pannello Anteriore
488
Pannello Posteriore
490
Preparativi
491
Installazione Diffusori
491
Posizionamento Dei Diffusori
491
Collegamento Diffusori
493
Collegamenti
496
Prima DI Collegare Dei Componenti
496
Collegamento DI Componenti Video
497
Collegamento DI Componenti Audio
500
Collegamento Delle Antenne
502
Collegamento del Cavo DI Alimentazione
503
Impostazione Dell'impedenza Dei Diffusori
504
Accensione Dell'unità
504
Funzione DI Configurazione Automatica (Auto Setup)
505
Introduzione
505
Impostazione del Microfono Ottimizzatore
505
Inizio Dell'impostazione
506
Conferma Dei Risultati
508
Funzionamento DI Base
511
Riproduzione
511
Operazioni DI Base
511
Scelta DI Campi Sonori
512
Operazioni Addizionali
513
Scelta Delle Modalità DI Ingresso Audio
518
Sintonizzazione
519
Sintonia Automatica E Manuale
519
Sintonizzazione Automatica
519
Sintonia Manuale
519
Stazioni Preselezionate
520
Scelta DI Stazioni Preselezionate
522
Cambio DI Stazioni Preselezionate
522
Ricezione DI Stazioni Radio Data System
523
Cambio Della Modalità Radio Data System
523
Funzione PTY SEEK
524
Funzione EON
525
Registrazione
526
Descrizione Dei Programmi del Campo Sonoro
527
Per Film O Video
527
Per Sorgenti DI Musica
529
Programmi DI Campo Sonoro
527
Uso Avanzato
530
Uso del Timer DI Spegnimento
530
Funzionamento Avanzato
530
Opzioni Sistema
531
Modifica DI Parametri
533
Input Select
534
Manual Setup (Sound)
537
Manual Setup (Basic)
540
Manual Setup (Option)
545
System Memory
548
Caratteristiche del Telecomando
549
Area DI Controllo
549
Impostazione Dei Codici DI Telecomando
550
Memorizzazione DI Codici DI Altri Telecomandi (Learn)
552
Cambio del Nome DI Sorgenti DI Segnale Sul Display
554
Uso Della Caratteristica Macro
555
Cancellazione DI Gruppi DI Funzioni
557
Cancellazione DI una Sola Funzione
558
Controllo DI Ciascun Componente
560
Zone 2/Zone 3
561
Collegamenti Zone 2/Zone 3
561
Controllo Zone 2/Zone 3 Dal Pannello Anteriore
562
Controllo DI Zone 2/Zone 3 Usando Il Telecomando
563
Menu Display Pannello Anteriore
565
Menu Impostazione Avanzata
565
Menu Opzioni DI Sistema del Pannello Anteriore
566
UTILIZZO I.link
570
Cos'è I.link
570
Collegamento DI Componenti I.link
570
Operazioni DI Base I.link
571
Modifica DI Parametri I.link Select
571
Utilizzo Hdmi
574
Cosa È HDMI
574
Collegamento DI Componenti HDMI
575
Operazioni DI Base HDMI
576
Modifica DI Parametri HDMI
576
Modifica DI Parametri DI Campo Sonoro
578
Cos'è un Campo Sonoro
578
Modifica DI Parametri
578
Informazioni Addizionali
578
Descrizione Dei Parametri Dei Campi Sonori
579
Diagnostica
585
Problemi DI Carattere Generale
585
Glossario
590
Formati Audio
590
Programmi DI Campo Sonoro
591
Informazioni Audio
591
Informazioni Sul Segnale Video
593
Informazioni Equalizzatore Parametrico
594
Dati Tecnici
595
Español
598
Características
599
Introducción
599
Primeros Pasos
600
Accesorios Suministrados
600
Instalación de las Pilas en Los Mandos a Distancia
601
Controles y Funciones
602
Panel Delantero
602
Mando a Distancia
604
Mando a Distancia de Zone 2/Zone 3
606
Utilización de Los Controles del Mando a Distancia
606
Visualizador del Panel Delantero
607
Panel Trasero
609
Instalación de Los Altavoces
610
Colocación de Los Altavoces
610
Conexiones de Altavoces
612
Preparación
610
Conexiones
615
Antes de Conectar Componentes
615
Conexión de Componentes de Vídeo
616
Conexión de Componentes de Audio
619
Conexión de Antenas
621
Conexión del Cable de Alimentación
622
Ajuste de Impedancia de Los Altavoces
623
Conexión de la Alimentación
623
Instalación Automática (Auto Setup)
624
Introducción
624
Instalación del Micrófono Optimizador
624
Inicio de la Instalación
625
Confirmación de Los Resultados
627
Funcionamiento Básico
630
Reproducción
630
Operaciones Básicas
630
Selección de Programas de Campos Acústicos
631
Operaciones Adicionales
632
Selección de Modos de Entrada de Audio
637
Sintonización
638
Sintonización Manual y Automática
638
Presintonización de Emisoras
639
Selección de Emisoras Presintonizadas
641
Intercambio de Emisoras Presintonizadas
641
Recepción de Emisoras del Sistema de Datos de Radio
642
Cambio del Modo del Sistema de Datos de Radio
642
Función PTY SEEK
643
Función EON
644
Grabación
645
Descripciones de Programas de Campos Acústicos
646
Para Fuentes de Películas/Vídeo
646
Para Fuentes de Música
648
Operaciones Avanzadas
649
Utilización del Temporizador para Dormir
649
Funcionamiento Avanzado
649
Opciones del Sistema
650
Cambio de Ajustes de Parámetros
652
Input Select
653
Manual Setup (Sound)
656
Manual Setup (Basic)
659
Manual Setup (Option)
664
System Memory
667
Funciones del Mando a Distancia
668
Área de Control
668
Control de Otros Componentes
668
Puesta de Los Códigos de Mando a Distancia
669
Programación de Códigos desde Otros Mandos a Distancia (Aprendizaje)
671
Cambio de Nombres de Fuentes en el Visualizador
673
Utilización de la Función Macro
674
Cancelación de Funciones Individuales
677
Control de cada Componente
679
Zone 2/Zone 3
680
Conexiones Zone 2/Zone 3
680
Control de Zone 2/Zone 3 desde el Panel Delantero
681
Distancia
682
Utilizando el Mando a Distancia
682
Menús del Visualizador del Panel Delantero
684
Menú de Instalación Avanzada
684
Menú de Opciones del Sistema del Visualizador del Panel Delantero
685
UTILIZACIÓN de I.link
689
Qué es I.link
689
Conexión de Componentes I.link
689
Operaciones I.link Básicas
690
Utilización de Hdmi
693
Qué es HDMI
693
Conexión de Componentes HDMI
694
Operaciones HDMI Básicas
695
Cambio de Los Parámetros HDMI
695
Información Adicional
697
Edición de Parámetros de Campos Acústicos
697
Qué es un Campo Acústico
697
Cambio de Ajustes de Parámetros
697
Descripciones de Parámetros de Campos Acústicos
698
Solución de Problemas
703
Glosario
708
Formatos de Audio
708
Programas de Campos Acústicos
709
Información de Audio
710
Información de Señal de Vídeo
712
Información de Ecualizador Paramétrico
713
Dutch
717
Inleiding
718
Kenmerken
718
Van Start
719
Meegeleverde Accessoires
719
Inzetten Van Batterijen in de Afstandsbedieningen
720
Bedieningsorganen en Functies
721
Voorpaneel
721
Afstandsbediening
723
Zone 2/Zone 3 Afstandsbediening
725
Gebruiken Van de Afstandsbedieningen
725
Display Voorpaneel
726
Achterpaneel
728
Luidspreker Setup
729
Opstelling Van de Luidsprekers
729
Luidspreker-Aansluitingen
731
Voorbereidingen
729
Aansluitingen
734
Voor U Componenten Gaat Aansluiten
734
Aansluiten Van Videocomponenten
735
Aansluiten Van Audiocomponenten
738
Aansluiten Van de Antennes
741
Aansluiten Van Het Netsnoer
742
Instelling Luidsprekerimpedantie
743
Inschakelen Van de Stroom
743
Auto Setup
744
Inleiding
744
Optimalisatie-Microfoon Setup
744
Beginnen Van de Setup
745
Bevestigen Van de Resultaten
747
Weergave
750
Basisbediening
750
Selecteren Van Geluidsveldprogramma's
751
Aanvullende Mogelijkheden
752
Selecteren Van Audio Ingangsfuncties
757
Basisbediening
750
Afstemmen
759
Automatisch en Handmatig Afstemmen
759
Automatisch Afstemmen
759
Zenders Voorprogrammeren
760
Selecteren Van Voorkeuzezenders
762
Omwisselen Van Voorkeuzezenders
762
Afstemmen Op Radio Data Systeem Zenders
763
Veranderen Van de Radio Data Systeem Functie
763
De PTY SEEK Functie
764
De EON Functie
765
Opnemen
766
Geluidsveldprogramma's
767
Geluidsveldprogramma Beschrijvingen
767
Voor Film/Video Bronnen
767
Thx Cinema
768
Voor Muziekmateriaal
769
Geavanceerde Bediening
770
Gebruiken Van de Slaaptimer
770
Instellen Van de Slaaptimer
770
Systeeminstellingen
771
Veranderen Van Instellingen
773
Input Select
774
Manual Setup (Sound)
777
Manual Setup (Basic)
780
Manual Setup (Option)
785
System Memory
788
Kenmerken Van de Afstandsbediening
790
Bedieningstoetsen
790
Bedienen Van Dit Toestel
790
Instellen Van Afstandsbedieningscodes
791
Overnemen Van Functies Van andere Afstandsbedieningen (Leerfunctie)
793
Veranderen Van de Namen Van Signaalbronnen in Het Uitleesvenster
795
Gebruiken Van de Macro Functie
796
Wissen Van Ingestelde Functies
798
Wissen Van Individuele Functies
799
Bedienen Van andere Componenten
801
Zone 2/Zone 3
802
Zone 2/Zone 3 Aansluitingen
802
Bediening Van Zone 2/Zone 3 Via Het Voorpaneel
803
Bediening Van Zone 2/Zone 3 Met de Afstandsbediening
804
Menu's Op Het Display Op Het Voorpaneel
806
Geavanceerd Setup Menu
806
Voorpaneel Display Systeem Opties Menu
807
GEBRUIKEN I.link
811
Wat Is I.link
811
Aansluiten Van I.link Componenten
811
Basisbediening I.link
812
Veranderen Van I.link Select Parameters
812
I.link Displaymeldingen
814
Gebruiken Hdmi
815
Wat Is HDMI
815
Aansluiten Van HDMI Componenten
816
Basisbediening HDMI
817
Veranderen Van HDMI Parameters
817
Aanvullende Informatie
819
Wijzigen Van Geluidsveld Instellingen
819
Wat Is Een Geluidsveld
819
Veranderen Van Instellingen
819
Geluidsveld Parameter Beschrijvingen
820
Oplossen Van Problemen
825
Woordenlijst
830
Audioformaten
830
Geluidsveldprogramma's
831
Audio Informatie
831
Videosignaal Informatie
833
Parametrische Equalizer Informatie
834
Technische Gegevens
835
Advertisement
Yamaha RX-V4600 - AV Receiver Service Manual (145 pages)
AV RECEIVER/AV AMPLIFIER
Brand:
Yamaha
| Category:
Receiver
| Size: 29.24 MB
Table of Contents
Table of Contents
1
Important Notice
1
Service Manual
1
To Service Personnel
2
About Lead-Free Solder
2
Front Panels
3
Rear Panels
3
Remote Control
7
Specifications / 参考仕様
8
Internal View
11
Removal of Top Cover
12
Removal of Front Panel
12
Removal of Sub Chassis
12
Disassembly Procedures / 分解手順
12
Removal of FUNCTION P.C.B.
13
Removal of Amp Unit
14
Removal of OPERATION P.C.B.
14
Removal of Fan
14
When Checking the Amp Unit
15
Updating Firmware
16
Equipment Required
16
Preparations
16
Firmware Updating Procedure
16
ファームウェアの書き込み
16
Writing of HDMI
20
Writing of I.link
20
Self Diagnosis Function (Diag) / 自己診断機能(ダイアグ
22
Starting DIAG
25
Starting DIAG in the Protection Cancel Mode
25
Canceling DIAG
25
When There Is a History of Protection Function
26
When There Is no History of Protection Function
26
Display Provided When DIAG Started
26
History of Protection Function
28
Display During Menu Operation
28
Operation Procedure of DIAG Menu and SUB-MENU
28
DIAG Menu Selection
28
Functions in DIAG Mode
29
Initial Settings Used to Start DIAG
29
Details of DIAG Menu
30
Reference Data
30
Yss Full Bit
30
Bypass
31
Analog Bypass
31
Dsp Bypass
31
Front Att
32
Ram through
32
Pro Logic / Neo6
33
Speakers Set
34
External Input
35
6Ch Input_6Ohms
35
6Ch Input_8Ohms
35
8Ch Input_6Ohms
35
Effect off / Display Check
36
Checking FL Display Section
36
Check of the Video Control Circuit. (Monitor Out)
37
Manual Test
38
Txd/Rxd DATA
38
Hard Flow
38
Factory Preset
39
Preset Stations
39
DC/FAN out (Protection Detection/Fan Drive Level)
40
TH1/TH2 (Temperature Detection)
40
PS1/PS2 (Power Supply Voltage Protection Detection)
40
Ad Data Check / Fan Test
40
POWER LIMIT (Power Limiter Detection)
41
Fan Drive Test
41
V Conv Status
42
Low Byte Data
42
High Byte Data
42
If Status
43
IS1-2 (Internal Status)
43
Dsp Ram Check
45
YSS930 Bus Check
45
Second Decoder (Da60Y) Bus Check
45
Ygv619 Bus Check
45
Tuner Destination
46
Tuner Exist
46
Soft Sw
46
Sw Mode
46
Hdmi Info
47
HDMI Mdel Name
47
HDMI Product ID
47
HDMI Vendor Name
47
Hdmi Connect
48
HDMI in 1 : HDMI in 1Port
48
Hdmi Self Check
48
Pcb Self Check
48
1394 Connect
49
1394 IN 3 : 3Rd Device (Upper GUID)
49
1394 IN 2 : 2Nd Device (Middle GUID)
49
Input Mode
50
SPDIF Fix
50
1394 I2S
50
Hdmi I2S
50
1394 Firmware Version
51
HDMI Firmware Version
51
HDMI Firmware Checksum
51
F/W Info
51
Microprocessor Information
52
Confirmation of Idling Current of Amp
53
Amp Adjustment / アンプ部調整
53
Pin Connection
54
Grid Assignment
54
Display Data
54
IC Data
55
Block Diagram
59
Pin Connection Diagram
61
Diodes
62
Transistors
62
Dsp P.C.b.
63
Printed Circuit Board
63
Schematic Diagram
85
Abbreviations
101
Electrical Parts
101
Parts List
101
P.C.b. Dsp
102
P.C.b. Function
105
P.C.b. Function & P.C.b. Operation
109
P.C.b. Operation
110
P.C.b. Main & P.C.b. Power
115
P.C.b. Power & P.C.b. Input
119
P.C.b. Input
121
P.C.b. Input & P.C.b. Control
122
Exploded View
136
Accessories
138
Front Panel & Sub Chassis Unit
139
Amp Unit
140
Yamaha RX-V4600 - AV Receiver Owner's Manual (126 pages)
Yamaha AV Receiver Owner's Manual
Brand:
Yamaha
| Category:
Receiver
| Size: 2.26 MB
Table of Contents
Important Safety Instructions
2
Table of Contents
5
Features
6
Getting Started
7
Supplied Accessories
7
Installing Batteries in the Remote Controls
8
Controls and Functions
9
Front Panel
9
Remote Control
11
Zone 2/Zone 3 Remote Control
13
Using the Remote Controls
13
Front Panel Display
14
Rear Panel
16
Speaker Setup
17
Speaker Placement
17
Speaker Connections
19
Connections
22
Before Connecting Components
22
Connecting Video Components
23
Connecting Audio Components
26
Connecting to an External Amplifier
27
Connecting the Antennas
28
Connecting the Power Cable
29
Speaker Impedance Setting
30
Turning on the Power
30
Auto Setup
31
Introduction
31
Optimizer Microphone Setup
31
Starting the Setup
32
Confirming the Results
34
Playback
37
Basic Operations
37
Selecting Sound Field Programs
38
Additional Operations
39
Pure Direct
42
Selecting Audio Input Modes
44
Tuning
45
Automatic and Manual Tuning
45
Presetting Stations
46
Selecting Preset Stations
48
Exchanging Preset Stations
48
Using HD Radio
49
HD Radio ™ Tuning
49
Selecting HD Radio ™ Audio Programs
50
Displaying HD Radio ™ Information
50
Recording
51
Sound Field Program Descriptions
52
For Movie/Video Sources
52
Thx Cinema
53
For Music Sources
54
Advanced Operation
55
Advanced Operations
55
Using the Sleep Timer
55
System Options
56
Changing Parameter Settings
58
Input Select
59
Manual Setup (Sound)
62
Manual Setup (Basic)
65
Manual Setup (Option)
70
System Memory
73
Remote Control Features
74
Control Area
74
Setting Remote Control Codes
75
Programming Codes from Other Remote Controls (Learn)
77
Changing Source Names in the Display Window
79
Using the Macro Feature
80
Macro Operations
81
Clearing Function Sets
82
Clearing Individual Functions
83
Clearing a Macro Function
84
Controlling each Component
85
Zone 2/Zone 3
86
Zone 2/Zone 3 Connections
86
Controlling Zone 2/Zone 3 from the Front Panel
87
Controlling Zone 2/Zone 3 Using the Remote Control
88
Front Panel Display Menus
90
Advanced Setup Menu
90
Front Panel Display System Options Menu
91
Manual Setup
92
USING I.link
95
What Is I.link
95
Connecting I.link Components
95
Basic I.link Operations
96
Changing I.link Select Parameters
96
I.link Display Messages
98
Using Hdmi
99
What Is HDMI
99
Connecting HDMI Components
100
Basic HDMI Operations
101
Changing HDMI Parameters
101
Editing Sound Field Parameters
103
What Is a Sound Field
103
Changing Parameter Settings
103
Sound Field Parameter Descriptions
104
Troubleshooting
109
Glossary
114
Audio Formats
114
Sound Field Programs
115
Audio Information
115
Video Signal Information
117
Advertisement
Advertisement
Related Products
Yamaha RX-V4600/DSP
Yamaha RX-V465BL
Yamaha RX-V467BL
Yamaha RX-V467
Yamaha RX-V463
Yamaha RX-V465
Yamaha RXV465 - RX AV Receiver
Yamaha RXV461BL
Yamaha RXV463BL
Yamaha RX-V461DAB
Yamaha Categories
Motorcycle
Musical Instrument
Electronic Keyboard
Receiver
Amplifier
More Yamaha Manuals
Login
Sign In
OR
Sign in with Facebook
Sign in with Google
Upload manual
Upload from disk
Upload from URL