Sign In
Upload
Manuals
Brands
Samsung Manuals
Copier
SL-X7600GX
Samsung SL-X7600GX Manuals
Manuals and User Guides for Samsung SL-X7600GX. We have
1
Samsung SL-X7600GX manual available for free PDF download: Service Manual
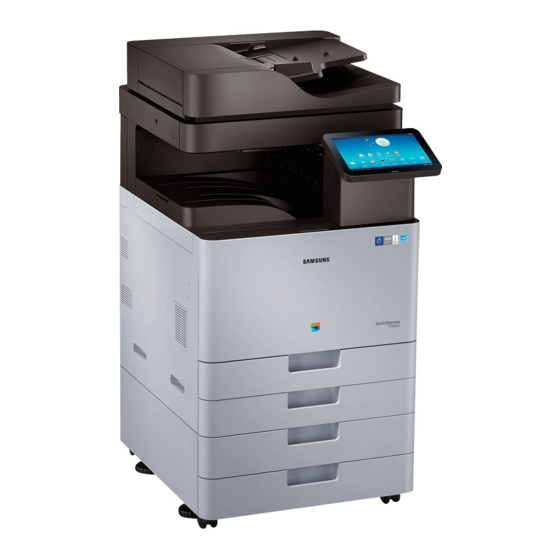
Samsung SL-X7600GX Service Manual (521 pages)
A3 Color Copier
Brand:
Samsung
| Category:
Copier
| Size: 19.81 MB
Table of Contents
Table of Contents
2
Precautions
11
Safety Warning
11
Caution for Safety
12
Electric Shock and Fire Safety Precautions
12
Toxic Material
12
Assembly and Disassembly Precautions
14
Handling Precautions
14
Disregarding this Warning May Cause Bodily Injury
15
ESD Precautions
16
Product Specifications and Description
17
Product Overview
17
Specifications
18
General Specification
18
Print Specifications
20
Scan Specification
22
Copy Specification
23
Fax Specification
24
Paper Handling Specification
26
Network and Software Specification
29
Supplies
32
Maintenance Parts
33
Maintenance Table
34
Option
35
Option List
36
Machine External View
40
Rear View
42
Inner View
43
Feeding System
44
Feeding System Overview
44
Main Components and Functions
45
Cassette (Tray)
49
Pick-Up Unit
50
Registration Unit
51
Mpf(Multi-Purpose Feeder) Unit
52
Image Creation
53
Printing Process Overview
53
Imaging Unit
54
Imaging Unit Overview
54
Drum Drive
55
Deve(Development) Unit
56
Toner Cartridge
58
ITB (Intermediate Transfer Belt) Unit
59
ITB Unit Overview
59
Transfer Belt Drive
60
Transfer Belt Cleaning
61
Toner Reservoir Unit
62
Fuser Unit
63
Fuser Unit Overview
63
Fuser Unit Drive
64
Fuser Unit Temperature Control
65
Loop Control
66
Laser Scanning Unit (LSU)
67
LSU Overview
67
Laser Scanning Optical Path
68
Laser Synchronizing Detectors
69
Automatic Line Position Adjustment
70
Drive System
73
Drive Motors
73
Main Drive Unit(Opc_Deve_Itb)
75
Pick-Up and CST Lift Drive
76
Feed Drive
77
Regi Drive
78
Fuser(Release)_Exit Drive
79
Toner Supply_Reservoir Drive
80
CST Lock Drive
81
Engage T1 Drive
82
WTB Drive
83
Scanner System
84
Scanner System Overview
84
Scanning System Components
87
Caution for Moving the Scanner
93
Dual Scan Document Feeder(DSDF) for LX Model
94
DSDF Overview
94
Electrical Parts Location
95
DSDF Drive System
97
DSDF Original Pick-Up Assembly
98
DSDF Original Regi. Drive
99
Original Scanning and Feed-Out Drive
100
Dual Scan Document Feeder(DSDF) for GX Model
101
DSDF Overview
101
Electrical Parts Location
102
DSDF Drive System
105
DSDF Original Pick-Up Assembly
106
DSDF Original Pre-Regi Assembly
107
DSDF Original Regi Assembly
108
DSDF Original Scanning Drive Assembly
109
DSDF Original Exit Assembly
110
DSDF Original Lifting Assembly
111
DSDF Original Pick-Up_Reverse Roller Release Assembly
112
DSDF Scan in Roller Release Assembly
113
Hardware Configuration
114
Main Controller
116
Usb Hub Pba
123
SMPS (Switching Mode Power Supply) PBA (Type5)
124
SMPS (Switching Mode Power Supply) PBA (Type4)
126
Fuser Drive Board (FDB)
128
HVPS (High Voltage Power Supply) PBA
129
Eraser PBA
132
Fuser PBA
132
Waste Sensor PBA
132
Paper Size Sensor PBA
133
OPE Unit
134
Dsdf Pba
135
Scan Joint PBA
136
CCDM Pba
137
Wled if Pba
138
Wled Pba
138
Double Cassette Feeder(DCF) Unit
139
High Capacity Feeder(HCF) Unit
145
High Capacity Feeder Side Unit (Large Cassette Tray Unit)
150
Disassembly and Reassembly
158
Precautions When Replacing Parts
158
Precautions When Assembling and Disassembling
158
Precautions When Handling PBA
158
Releasing Plastic Latches
159
Maintenance
160
Cleaning the LSU Window
160
Machine Cleaning for Maintenance
160
Cleaning the Scan Glass
161
Cleaning the DSDF White Bar_Cis
162
Cleaning the Paper Dust Stick
163
Cleaning the LSU Window
165
Replacing the Maintenance Part
167
Drum Unit
167
Development Unit (Deve Unit)
168
ITB Cleaner
169
ITB Unit
170
Fuser Unit
171
Pick-Up_Separation_Forward Roller
172
MP Pick Up_Reverse_Forward Roller
173
DSDF Pick-Up Roller Assy (LX Model)
174
DSDF Reverse Roller (LX Model)
175
DSDF Pick-Up Roller Assy (GX Model)
177
DSDF Reverse Roller Assy (GX Model)
178
Replacing the Main SVC Part
180
Left Cover
180
Rear Cover
180
HVPS Board
181
Temperature_Humidity Sensor
182
Lsu
183
OPE Unit
184
Main Board
185
Toner Supply Drive Unit
186
SMPS Board
187
SMPS Board 1
187
SMPS Board 2
188
SMPS Board 3
189
FDB (Fuser Drive Board)
190
SMPS Fan
191
Main Drive Unit
191
Inductor Unit
191
Auto Closing Unit
193
Pick-Up Drive Unit 1
194
Pick-Up Drive Unit 2
194
Regi Drive Unit
195
Feed_Mp Drive Unit
195
Fuser Fan
196
Fuser_Exit Drive Unit
197
Side Door Open Sensor
197
Auto Size Sensor
198
Inner Cover
199
Front Cover Open Sensor
201
Waste Toner Container Sensor
201
HDD (Hard Disk Drive)
202
WTB Drive Unit
202
LSU Fan
203
Side Unit
204
Feed 2 Sensor
205
Fuser-Out Sensor
205
MP Unit
207
MP Empty Sensor
209
MP Paper Length Sensor
209
MP Solenoid
210
Pick up Lifting Sensor and Empty Sensor
211
Pick-Up Unit 2
211
Pre-Feed Sensor 2
212
Pick-Up Lifting Sensor and Empty Sensor
213
Pick-Up Unit 1
213
Pre-Feed Sensor 1
214
Exit Unit
215
Duplex 1 Sensor
217
Return Sensor
217
Exit 1 bin Full Sensor
218
Exit Gate Solenoid
218
DSDF Unit for LX Model
219
Dsdf Pba
220
DSDF Main Motor
221
DSDF Paper Length Sensor
222
DSDF Unit for GX Model
224
Dsdf Pba
225
DSDF Stacker Sensor
226
Scanner Unit(Platen Unit)
228
Scan Glass
230
LED Lamp Module
232
Scanner Imaging Unit
233
Scan Joint PBA
234
APS Sensor
235
Reservoir Unit
236
DCF Feed Motor
240
Double Cassette Feeder(DCF) Unit
240
DCF Pick-Up Motor
241
Dcf Pba
242
HCF Feed Motor
243
High Capacity Feeder(HCF) Unit
243
HCF Pick-Up Motor
244
Hcf Pba
245
HCF Lift-Up Motor
246
HCF Shaft Motor
247
High Capacity Feeder Side Unit (Large Cassette Tray Unit)
248
LCT Feed Motor
248
Lct Pba
249
LCT Pick-Up Motor
249
LCT Lift-Up Motor
250
Troubleshooting
252
Control Panel
252
Display Screen and Useful Buttons
253
Menu Navigation
253
Home Screen Overview
254
Customizing Your Home Screen
255
Notification Bar
257
Understanding the Leds
258
Updating Firmware
259
Updating from the Printer Control Panel
259
Updating from the Network
260
JAM Removal
263
Clearing Original Document Jams
263
Clearing Paper Jams
266
Service Mode (Tech Mode)
271
Entering the Service Mode
271
Service Mode Menu Tree
272
General
277
Information
277
Supply Status
277
Fault Log
278
Print Reports
278
Service Hours
278
Software Version
278
Export Reports
279
Fault Count
280
Jam Count
280
Maintenance Counts
280
Part Replacement Count
281
Diagnostics
282
Engine Diagnostics
282
Fax Diagnostics
294
Scanner Diagnostics
299
Adjustment
303
Adf Adjustment
308
ACS (Auto Color Sensing)
310
Image Management
311
Print Test Patterns
313
Count Setting of Large Page
314
Hard Disk Maintenance
314
Main Memory Clear
314
Service Functions
314
Capture Log
315
Debug Log
315
Network Port
315
Network Packet Capture
316
System Recovery
317
TR Control Mode
319
Clear System Cache
320
EIUL (End of Image Unit Life)
320
Fdi
320
Hibernation
320
Paper Low Warning Message
320
Part Replacement Alert
320
SFE (Special Feature Enablement)
321
Dealer ID
322
Envelope Rotate
322
Error Code and Troubleshooting
323
11-2Txx (Paper Mismatch Error)
324
61-1Xxx (System Error)
325
4.6.3. A1-XXXX (Motor Error)
326
A1-XXXX (Motor Error)
326
Error Code Error Message
327
Troubleshooting Page
327
Motor Failure: #A1-1111. Turn off then On. Call for Service if the Problem Persists
328
Motor Failure: #A1-1113. Turn off then On. Call for Service if the Problem Persists
328
Motor Failure: #A1-1211. Turn off then On. Call for Service if the Problem Persists
329
Motor Failure: #A1-1213. Turn off then On. Call for Service if the Problem Persists
329
Motor Failure: #A1-1611. Turn off then On. Call for Service if the Problem Persists
330
Motor Failure: #A1-1612. Turn off then On. Call for Service if the Problem Persists
330
Motor Failure: #A1-1613. Turn off then On. Call for Service if the Problem Persists
330
Motor Failure: #A1-2211. Turn off then On. Call for Service if the Problem Persists
331
Motor Failure: #A1-2212. Turn off then On. Call for Service if the Problem Persists
331
Motor Failure: #A1-2213. Turn off then On. Call for Service if the Problem Persists
331
Motor Failure: #A1-2311. Turn off then On. Call for Service if the Problem Persists
332
Motor Failure: #A1-2312. Turn off then On. Call for Service if the Problem Persists
332
Motor Failure: #A1-2313. Turn off then On. Call for Service if the Problem Persists
332
Motor Failure: #A1-2411. Turn off then On. Call for Service if the Problem Persists
333
Motor Failure: #A1-2412. Turn off then On. Call for Service if the Problem Persists
333
Motor Failure: #A1-2413. Turn off then On. Call for Service if the Problem Persists
333
Motor Failure: #A1-2511. Turn off then On. Call for Service if the Problem Persists
334
Motor Failure: #A1-2512. Turn off then On. Call for Service if the Problem Persists
334
Motor Failure: #A1-2513. Turn off then On. Call for Service if the Problem Persists
334
Motor Failure: #A1-4310. Turn off then On. Call for Service if the Problem Persists
335
Motor Failure: #A1-5212. Turn off then On. Call for Service if the Problem Persists
336
Motor Failure: #A1-5213. Turn off then On. Call for Service if the Problem Persists
336
A2-XXXX (Fan Error)
340
4.6.5. A3-XXXX (Sensor Error)
342
A3-XXXX (Sensor Error)
342
The CTD Sensor Is Dirty. Please Clean It with Soft Cloth or Paper
343
Sensor Failure: #A3-3111. Turn off then On. Call for Service if the Problem Persists
344
Sensor Failure: #A3-3112. Turn off then On. Call for Service if the Problem Persists
344
Sensor Failure: #A3-3113. Turn off then On. Call for Service if the Problem Persists
344
Sensor Failure: #A3-3114. Turn off then On. Call for Service if the Problem Persists
344
Sensor Failure: #A3-3210. Turn off then On. Call for Service if the Problem Persists
345
Sensor Failure: #A3-3211. Turn off then On. Call for Service if the Problem Persists
345
Sensor Failure: #A3-3212. Turn off then On. Call for Service if the Problem Persists
345
Sensor Failure: #A3-3310. Turn off then On. Call for Service if the Problem Persists
346
Sensor Failure: #A3-3311. Turn off then On. Call for Service if the Problem Persists
346
Sensor Failure: #A3-3312. Turn off then On. Call for Service if the Problem Persists
346
Sensor Failure: #A3-3410. Turn off then On. Call for Service if the Problem Persists
346
Sensor Failure: #A3-3411. Turn off then On. Call for Service if the Problem Persists
346
Sensor Failure: #A3-3412. Turn off then On. Call for Service if the Problem Persists
346
4.6.6. C1-XXXX (Toner Cartridge Error)
347
C1-XXXX (Toner Cartridge Error)
347
End of Life, Replace with New Yellow Toner Cartridge
348
Error Code
348
Error Message
348
Prepare New Yellow Toner Cartridge
348
Replace with New Yellow Toner Cartridge
348
Yellow Toner Cartridge Failure: #C1-2311. Install Yellow Toner Cartridge Again
349
Shake Yellow Toner Cartridge
350
Yellow Toner Cartridge Is Not Compatible. Check Users Guide
350
Yellow Toner Cartridge Is Not Installed. Install It
350
End of Life, Replace with New Magenta Toner Cartridge
351
Prepare New Magenta Toner Cartridge
351
Replace with New Magenta Toner Cartridge
351
Magenta Toner Cartridge Failure: #C1-3311. Install Magenta Toner Cartridge Again
352
Magenta Toner Cartridge Is Not Compatible. Check Users Guide
353
Magenta Toner Cartridge Is Not Installed. Install It
353
Shake Magenta Toner Cartridge
353
End of Life, Replace with New Cyan Toner Cartridge
354
Prepare New Cyan Toner Cartridge
354
Replace with New Cyan Toner Cartridge
354
Cyan Toner Cartridge Is Not Compatible. Check Users Guide
356
Cyan Toner Cartridge Is Not Installed. Install It
356
Shake Cyan Toner Cartridge
356
End of Life, Replace with New Black Toner Cartridge
357
Prepare New Black Toner Cartridge
357
Replace with New Black Toner Cartridge
357
Black Toner Cartridge Failure: #C1-5311. Install Black Toner Cartridge Again
358
Black Toner Cartridge Is Not Compatible. Check Users Guide
359
Black Toner Cartridge Is Not Installed. Install It
359
Shake Black Toner Cartridge
359
4.6.7. C3-XXXX (Drum Unit Error)
360
C3-XXXX (Drum Unit Error)
360
End of Life, Replace with New Yellow Imaging Unit
361
Yellow Imaging Unit Is Not Compatible. Check Users Guide
362
Yellow Imaging Unit Is Not Installed. Install It
362
End of Life, Replace with New Magenta Imaging Unit
363
Prepare New Magenta Imaging Unit
363
Magenta Imaging Unit Is Not Compatible. Check Users Guide
364
Magenta Imaging Unit Is Not Installed. Install It
364
Prepare New Cyan Imaging Unit
365
Cyan Imaging Unit Is Not Compatible. Check Users Guide
366
Cyan Imaging Unit Is Not Installed. Install It
366
Black Imaging Unit Is Not Compatible. Check Users Guide
368
C5-XXXX (ITB Unit Error)
369
C6-XXXX (Fuser Unit Error)
371
C7-XXXX (Waste Toner Container Error)
372
Black Imaging Unit Is Not Installed. Install It
368
4.6.11. C8-XXXX (Developer Error)
373
C8-XXXX (Developer Error)
373
Error Code
374
Error Message
374
Replace with New Yellow Developer Unit
374
Yellow Developer Failure: #C8-2210. Turn off then on
374
Yellow Developer Failure: #C8-2310. Install Yellow Developer Unit Again
374
Yellow Developer Failure: #C8-2313. Turn off then On. Please Call for Service if the Problem Persists
374
Magenta Developer Failure: #C8-3210. Turn off then on
375
Magenta Developer Failure: #C8-3310. Install Magenta Developer Unit Again
375
Magenta Developer Failure: #C8-3313. Turn off then On. Please Call for Service if the Problem Persists
375
Replace with New Magenta Developer Unit
375
Cyan Developer Failure: #C8-4210. Turn off then on
376
Cyan Developer Failure: #C8-4310. Install Cyan Developer Unit Again
376
Cyan Developer Failure: #C8-4313. Turn off then On. Please Call for Service if the Problem Persists
376
Replace with New Cyan Developer Unit
376
Black Developer Failure: #C8-5210. Turn off then on
377
Black Developer Failure: #C8-5310. Install Black Developer Unit Again
377
Black Developer Failure: #C8-5313. Turn off then On. Please Call for Service if the Problem Persists
377
C9-XXXX (Transfer Roller Error)
378
H1-XXXX (Double Cassette Feeder Unit Error)
380
H1-XXXX (High Capacity Feeder Unit Error)
393
H1-XXXX (High Capacity Feeder Side Unit(LCT Unit) Error)
399
H2-XXXX (Finisher Error)
407
MX-XXXX (Jam Error)
408
MX-XXXX (Tray Not Install_Paper Empty_Outbin Full)
417
Replace with New Black Developer Unit
377
4.6.19. Sx-XXXX (System Error)
426
Sx-XXXX (System Error)
426
The Clock Became Initial Time. Set a Time Again
429
Video System Failure: #S1-1113. Turn off then
429
Video System Failure: #S1-1411. Turn off then
429
Video System Failure: #S1-2111. Turn off then
430
HDD Error #S1-2434. Check Users Guide
432
HDD Error #S1-2435. Check Users Guide
432
HDD Error #S1-2436. Check Users Guide
432
HDD Error #S1-2437. Check Users Guide
432
HDD Error #S1-2438. Check Users Guide
432
HDD Error #S1-2439. Check Users Guide
432
MSOK Failure: #S1-2521. Call for Service
433
Video System Failure: #S1-3110. Turn off then
434
Video System Failure: #S1-4111. Turn off then
434
Video System Failure: #S1-4311. Turn off then
435
FDI Device Is Not Installed. Install the Device
435
Engine System Failure: #S2-1211. Turn off then
436
Engine System Failure: #S2-2311. Turn off then
436
Engine System Failure: #S2-3110. Turn off then
436
Engine System Failure: #S2-3114. Turn off then
436
Wait Delay Time for Lower Fixing Temperature
437
Front Door Is Open. Close It
437
Failed to Adjust the Color Registration
438
Right Door Is Open. Close It
438
Scanner Is Locked
439
Scan System Failure: #S3-3211. Turn off then
440
There Has Been a Problem with Fax Modem Card(Line 1). Install Again. Call for Service if the Problem Persists
441
There Has Been a Problem with Fax Modem Card(Line 2). Install Again. Call for Service if the Problem Persists
441
Network Cable Is Disconnected. Check It
443
Network Failure: #S6-3113. Turn off then On. Call for Service if the Problem Persists
443
Network Failure: #S6-3114. Turn off then On. Call for Service if the Problem Persists
443
Authentication Failed. Please Contact the System Administrator
444
This IP Address Conflicts with that of Other System. Check It
444
Fuser Failure: #S7-2110. Turn off then
445
U1-XXXX (Fuser Error)
446
U2-XXXX (LSU Error)
449
U3-XXXX (Document Feeder Error_Dsdf for LX Model)
453
U3-XXXX (Document Feeder Error_Dsdf for GX Model)
459
Image Quality Problems and Solutions
465
Vertical Black Band
468
Vertical White Band, Light Band
469
Horizontal Periodic Black Band or Dot
471
Horizontal Periodic Light/Dark Band or Dot
472
Foggy Image
473
Light Image
474
Blurred Image
475
Incorrect Color Registration
476
Uneven Pitch and Jitter Image
477
Skewed Image
478
Blank Copy
479
Poor Fusing Performance
480
Stain on the Paper Back Side
481
Setting Standard Tone
482
Duplex Blur_White Spot_Blur on Color Print-Out
485
Other Errors
486
Image System Problem
486
Fuser Problem
490
Scanner and Document Feeder Problem
491
Drive Unit Problem
493
Feeding System Problem
494
LSU Problem
496
Electrical Circuit Problem
497
Adjusting the DSDF Skew
502
Connection Diagram
505
Connection Diagram (FUSER_EXIT_DUPLEX_TONER)
505
Connection Diagram (Scanner)
506
Connection Diagram (LSU_OPE_USB)
507
Connection Diagram (Side_Mp_Feed_Regi_Pick-Up)
508
Connection Diagram (OPC_WTB_CST Lock)
509
Connection Diagram (HVPS_SMPS_FDB)
510
Reference Information
511
Tools for Troubleshooting
511
Glossary
513
Model Name and Code
519
Document Revision List
520
Advertisement
Advertisement
Related Products
Samsung SL-X7500GX
Samsung SL-X7400GX
Samsung SL-X7400LX
Samsung SL-X7600LX
Samsung SL-X7500LX
Samsung MultiXpress SL-X4300LX
Samsung MultiXpress SL-X4250LX
Samsung MultiXpress SL-X4220RX
Samsung MultiXpress SL-K4350LX
Samsung MultiXpress SL-K4300LX
Samsung Categories
Cell Phone
Monitor
Microwave Oven
Air Conditioner
LCD TV
More Samsung Manuals
Login
Sign In
OR
Sign in with Facebook
Sign in with Google
Upload manual
Upload from disk
Upload from URL