Sign In
Upload
Manuals
Brands
Pioneer Manuals
Car Receiver
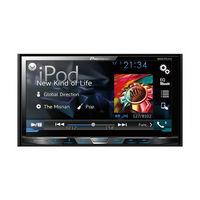
AVH-X6750DVD
Pioneer AVH-X6750DVD Manuals
Manuals and User Guides for Pioneer AVH-X6750DVD. We have
2
Pioneer AVH-X6750DVD manuals available for free PDF download: Owner's Manual
Pioneer AVH-X6750DVD Owner's Manual (200 pages)
DVD RDS AV RECEIVER
Brand:
Pioneer
| Category:
Car Receiver
| Size: 65.26 MB
Table of Contents
English
2
Table of Contents
2
Precaution
4
Important Safety Information
4
License, Warranty Disclaimer & Limitation of Liability
4
To Ensure Safe Driving
4
Handling the USB Connector
5
In Case of Trouble
5
Notes on Internal Memory
5
Protecting the LCD Panel and Screen
5
Rear View Camera
5
To Avoid Battery Exhaustion
5
Visit Our Website
5
When Using a Display Connected to V out
5
About this Manual
6
Use and Care of the Remote Control
6
Installing the Battery
6
Basic Operation
7
Checking Part Names and Functions
7
Notes on Using the LCD Panel
7
Remote Control
7
Adjusting the LCD Panel Angle
8
Inserting/Ejecting/Connecting Media
8
On First-Time Startup
8
Inserting and Ejecting a Disc
8
Inserting a Disc
8
How to Use the Screens
9
Changing the Display Order of Sources
10
Operating List Screens
10
Displaying the AV Operation Screen
10
Selecting a Source
10
Supported AV Source
10
Using the Touch Panel
10
Registration and Connec- Tion of Bluetooth Device
11
Displaying the "Bluetooth" Screen
11
Operating the Time Bar
11
Registering Your Bluetooth Devices
11
Deleting a Registered Device
11
Switching Operation Panel
11
Clearing the Bluetooth Memory
12
Displaying the Bluetooth Software Version
12
Hands-Free Phoning
12
Displaying the Device Information
12
Entering the PIN Code for Bluetooth Wireless Connection
12
Switching Visibility
12
Updating Bluetooth Software
12
Changing the Phone Settings
13
Displaying the Phone Menu Screen
13
Making a Phone Call
13
Minimizing the Dial Confirmation Screen
13
Receiving a Phone Call
13
Notes for Hands-Free Phoning
14
Setting the Private Mode
14
Setup for Ipod / Iphone or Smartphone
15
Using the Voice Recognition Function
14
(For Iphone)
14
Android™ Device Compatibility
15
Ipod Compatibility
15
Mirrorlink Device Compatibility
15
Setting the Device Connection Method
15
The Basic Flow of Ipod / Iphone or Smartphone Setup
15
Information on the Connections and Functions for each Device
16
Radio
17
Displaying the "Radio Settings" Screen
17
Searching by PTY Information
17
Setting the FM or am Tuning Step
17
Starting Procedure
17
Storing the Strongest Broadcast Frequencies
17
Tuning into Strong Frequencies
17
Limiting Stations to Regional Programing
18
Receiving Alarm Broadcasts
18
TV Tuner
18
Receiving News Announcements
18
Receiving Traffic Announcements (TA)
18
Setting the Alternative Frequency Search
18
Setting the Auto PI Search
18
Starting Procedure
18
Displaying the "DTV Settings" Screen
19
Receiving the Program Information
19
Starting Procedure
19
Storing Stations
19
Digital TV
19
Switching the Sound Output Setting
19
Switching the Subtitle Setting
19
Displaying the DTV Software Version
20
Disc
20
Setting the Parental Control
20
Selecting Files from the File Name List
21
Starting Procedure
21
Switching the Media File Type
21
Operating the DVD Menu
22
Operating the DVD Menu Using Touch Panel Keys
22
Compressed Audio Files
22
Searching for the Part You Want to Play
22
Switching the Subtitle/Audio Language
22
Selecting a File by Music Browse
23
Selecting a Song in the Album (Link Search)
23
Selecting Files from the File Name List
23
Starting Procedure (for Disc)
23
Starting Procedure (for USB)
23
Switching the Media File Type
23
Compressed Video Files
24
Selecting Files from the File Name List
25
Still Image Files
25
Starting Procedure
25
Saving the Image as the Wallscreen
26
Selecting Files from the File Name List
26
Setting the Slideshow Interval
26
Ipod
26
Switching the Media File Type
26
Connecting Your Ipod
27
Selecting Song or Video Sources from the Playlist Screen
27
Starting Procedure
27
Selecting a Song in the Album (Link Search)
28
Iphone or Smartphone Applications
28
Using Appradiomode
28
Using this Product's Ipod Function from Your Ipod
28
Using Mirrorlink
29
Using the Audio MIX Function
29
Pandora
30
Pandora Operations
30
Add Station
31
Bluetooth Audio Player
31
Selecting a Pandora Station from the List
31
Starting Procedure
31
Selecting Files from the File Name List
32
AUX Source
32
Starting Procedure
32
Setting the Video Signal
33
AV Input
33
Starting Procedure
33
Mixtrax
34
Displaying the "MIXTRAX Settings" Screen
34
MIXTRAX EZ Operation
34
MIXTRAX Operation
34
Setting the Flash Pattern
34
System Settings
35
Activating the Bluetooth Audio Source
35
Displaying the "System" Setting Screen
35
Setting the Ever Scroll
35
Setting the Rear View Camera
35
Setting the Steering Wheel Control
35
Turning off the Demo Screen
35
Adjusting the Response Positions of the Touch Panel (Touch Panel Calibration)
36
Selecting the System Language
36
Selecting the Using Location
36
Setting the Dimmer
36
Setting the Keyboard Language with the Application for Iphone
36
Adjusting the Picture
37
Displaying the Firmware Version
37
Updating Firmware
37
Audio Adjustments
38
Adjusting Loudness
38
Adjusting Source Levels
38
Adjusting the Cutoff Frequency Value
38
Displaying the "Audio" Setting Screen
38
Switching Sound Muting/Attenuation
38
Using Balance Adjustment
38
Using Fader Adjustment
38
Using the Auto Level Control
38
Using the Subwoofer Output
38
Adjusting the Speaker Output Levels Finely
39
Adjusting the Time Alignment
39
Boosting the Bass
39
Selecting the Listening Position
39
Switching the Rear Speaker Output
39
Switching the Time Alignment Preset
39
Adjusting the Equalizer Curve Automatically (Auto EQ)
40
Using the Equalizer
40
Loading the Sound Settings
41
Theme Menu
41
Saving the Sound Settings
41
Selecting the Background Display
41
Setting the Illumination Color
41
Selecting the Clock Image
42
Setting up the Video Player
43
Selecting the Theme Color
42
Setting the Angle Icon Display
43
Setting the Aspect Ratio
43
Setting the Top-Priority Languages
43
Automatic Playback of Dvds
44
Displaying Your DIVX VOD Deregistration Code
44
Displaying Your DIVX VOD Registration Code
44
Setting Parental Lock
44
Creating a Shortcut
45
Removing a Shortcut
45
Favorite Menu
45
Changing the Wide Screen Mode
46
Common Operations
45
Selecting a Shortcut
45
Setting the Time and Date
45
Setting the Video Signal for the Rear View Camera
45
Other Functions
46
Precautions
46
Precautions before Connecting the System
46
Restoring this Product to the Default Settings
46
Connection
46
Setting the "Sound Retriever" Function
46
Before Installing this Product
47
Notice for the Blue/White Lead
47
This Product
47
To Prevent Damage
47
Power Amp (Sold Separately)
48
Power Cord
48
Speaker Leads
48
Android or Mirrorlink Device
49
Iphone and Smartphone
49
Iphone with 30-Pin Connector
49
Iphone with Lightning Connector
49
Camera
50
External Video Component and the Display
50
Installation
51
Before Installing
51
Installation Notes
51
Installation Using the Screw Holes on the Side of this Product
51
Installing the Microphone
51
Mounting on the Sun Visor
51
Precautions before Installation
51
Adjusting the Microphone Angle
52
Assembling the TV Antenna
52
Installation on the Steering Column
52
Installing the TV Antenna
52
Mounting the TV Antenna
52
Troubleshooting
53
Appendix
54
Error Messages
54
Itunes Tagging
55
Usb Storage Device
55
Handling and Care of Discs
56
Playable Discs
56
Detailed Information for Playable Media
57
Bluetooth
59
Copyright and Trademark Notice
59
DIVX
59
Wma
59
Aac
60
Android
60
Detailed Information Regarding Connected Ipod Devices
60
Mirrorlink
60
Pandora
60
Using App-Based Connected Content
60
Notice Regarding DVD-Video Viewing
61
Notice Regarding MP3 File Usage
61
Notice Regarding Video Viewing
61
Specifications
61
Español
64
Precaución
66
Using the LCD Screen Correctly
61
Información Importante de Seguridad
66
Licencia, Exención de Garantía y Limitación de Responsabilidad
66
Cuando Utilice una Pantalla Conectada a V out
67
Cámara de Retrovisor
67
En Caso de Problemas
67
Para Evitar la Descarga de la Batería
67
Para Garantizar una Conducción Segura
67
Protección de la Pantalla y el Panel LCD
67
Uso del Conector USB
67
Visite Nuestro Sitio Web
67
Acerca de Este Manual
68
Notas Acerca de la Memoria Interna
68
Uso y Cuidado del Mando a Distancia
68
O Peraciones Básicas
69
Comprobación de las Funciones y Los Nombres de Piezas
69
Mando a Distancia
69
Ajuste del Ángulo del Panel LCD
70
Inserción/Expulsión/Conexión de Soportes
70
Notas sobre el Uso del Panel LCD
70
En el Primer Arranque
71
Cómo Utilizar las Pantallas
72
Cambio del Orden de Visualización de las Fuentes
73
Fuente de AV Compatible
73
Selección de una Fuente
73
Utilización del Panel Táctil
73
Visualización de la Pantalla de Función AV
73
Conexión Manual de un Dispositivo Bluetooth Registrado
74
Dispositivo Bluetooth
74
Registro y Conexión del Dispositivo Bluetooth
74
Registro de Sus Dispositivos Bluetooth
74
Visualización de la Pantalla "Bluetooth
74
Actualización del Software Bluetooth
75
Borrado de la Memoria Bluetooth
75
Cambio de Visibilidad
75
Introducción del Código PIN para la Conexión Inalámbrica Bluetooth
75
Visualización de la Información del Dispositivo
75
Visualización de la Versión del Software Bluetooth
75
Telefonía Manos Libres
76
Realizar una Llamada Telefónica
76
Cambio del Tono de Llamada
77
Visualización de la Pantalla de Menú del Teléfono
76
Cambio de la Configuración del Teléfono
77
Minimización de la Pantalla de Confirmación de Marcación
77
Notas sobre la Telefonía Manos Libres
77
Configuración del Ipod / Iphone O Smartphone
78
Recepción de una Llamada Telefónica
77
Uso de la Función de Reconocimiento de Voz (para Iphone)
77
Ajuste del Método de Conexión del Dispositivo
78
Compatibilidad con Ipod
78
Flujo Básico de la Configuración del Ipod / Iphone
78
Compatibilidad con Dispositivos Android
79
Compatibilidad con Dispositivos Mirrorlink
79
Información de las Conexiones y las Funciones de cada Dispositivo
80
Radio
81
Ajuste del Intervalo de Sintonización de FM O am
81
Almacenamiento de las Frecuencias de Radio con Mayor Potencia
81
Búsqueda Mediante Información de PTY
81
Procedimiento de Inicio
81
Sintonización de Frecuencias Potentes
81
Visualización de la Pantalla "Radio Settings
81
Ajuste de la Búsqueda de Frecuencia Alternativa
82
Ajuste de la Búsqueda PI Automática
82
Limitación de Emisoras a la Programación Regional
82
Recepción de Anuncios de Noticias
82
Recepción de Anuncios de Tráfico (TA)
82
Recepción de Emisiones de Alarma
82
Sintonizador de TV
83
Guardar Emisoras
83
Digital TV
83
Procedimiento de Inicio
83
Ajuste del Control Parental
84
Cambio del Ajuste de Salida de Sonido
84
Cambio del Ajuste de Subtítulos
84
Procedimiento de Inicio
84
Recepción de la Información del Programa
84
Visualización de la Pantalla "Configuración de DTV
84
Visualización de la Versión del Software DTV
84
Disco
85
Cambio del Tipo de Archivo Multimedia
86
Selección de Archivos de la Lista de Nombres de Archivo
86
Búsqueda de la Parte que Desea Reproducir
87
Cambio del Idioma de Audio/Subtítulos
87
Funcionamiento del Menú DVD
87
Utilización del Menú DVD Mediante las Teclas del Panel Táctil
87
Archivos de Audio Comprimidos
87
Procedimiento de Inicio (para el Disco)
88
Procedimiento de Inicio (para USB)
88
Selección de Archivos de la Lista de Nombres de Archivo
88
Selección de Archivos en el Modo de Exploración de Música
88
Cambio del Tipo de Archivo Multimedia
89
Archivos de Vídeo Comprimidos
89
Selección de Canciones de un Álbum (Búsqueda de Vínculos)
89
Procedimiento de Inicio
90
Selección de Archivos de la Lista de Nombres de Archivo
90
IMágenes Estáticas
91
Ajuste del Intervalo de Presentación de Diaposi- Tivas
91
Cambio del Tipo de Archivo Multimedia
91
Guardar una Imagen como Fondo de Pantalla
91
Selección de Archivos de la Lista de Nombres de Archivo
91
Conexión de un Ipod
92
Procedimiento de Inicio
92
La Pantalla de la Lista de Reproducción
93
Uso de la Función Ipod de Este Producto desde el Ipod
93
Aplicaciones para Iphone O Smartphone
93
Uso de Appradiomode
94
Uso de Mirrorlink
95
Utilización de la Función de Mezcla de Audio
95
Pandora
95
Funcionamiento de Pandora
96
Entrada AV
98
Procedimiento de Inicio
96
Añadir Emisora
96
Selección de una Emisora de Pandora de la
96
Ajuste de la Señal de Vídeo
98
Mixtrax
99
Utilización de MIXTRAX
99
Utilización de MIXTRAX EZ
99
Visualización de la Pantalla "MIXTRAX Settings
99
Activación de la Fuente de Audio Bluetooth
100
Ajuste del Control desde el Volante
100
Ajuste del Desplazamiento Continuo
100
Ajuste del Patrón de Parpadeo
100
Configuración del Sistema
100
Visualización de la Pantalla de Ajuste "Sistema
100
Ajuste de la Cámara de Retrovisor
101
Ajuste de las Posiciones de Respuesta del Panel Táctil (Calibración del Panel Táctil)
101
Ajuste del Idioma del Teclado con la Aplicación para Iphone
101
Desactivación de la Pantalla de Demostración
101
Selección de la Ubicación de Uso
101
Selección del Idioma del Sistema
101
Ajuste de la Atenuación
102
Ajuste de la Imagen
102
Actualización del Firmware
103
Ajustes de Audio
103
Utilización del Ajuste de Desvanecimiento
103
Utilización del Ajuste del Balance
103
Visualización de la Pantalla de Ajuste "Audio
103
Visualización de la Versión del Firmware
103
Ajuste de la Sonoridad
104
Ajuste de Los Niveles de la Fuente
104
Ajuste del Valor de Frecuencia de Corte
104
Cambio de Salida del Altavoz Trasero
104
Cambio del Silenciamiento O la Atenuación del Sonido
104
Utilización de la Salida del Subwoofer
104
Utilización del Control de Nivel Automático
104
Ajuste del Alineamiento de Tiempo
105
Ajuste Preciso de Los Niveles de Salida de Los Altavoces
105
Cambio del Alineamiento de Tiempo Preestablecido
105
Realce de Bajos
105
Selección de la Posición de Escucha
105
Utilización del Ecualizador
105
Ajuste Automático de la Curva del Ecualizador (Medición con el Ecualizador Automático)
106
Almacenamiento de Los Ajustes de Sonido
107
Carga de Los Ajustes de Sonido
107
Menú de Temas
108
Ajuste del Color de Iluminación
108
Selección de la Imagen del Reloj
108
Configuración del Reproductor de Vídeo
109
Selección de la Visualización de Fondo
108
Selección del Color del Tema
108
Ajuste de Los Idiomas de Mayor Prioridad
109
Ajuste de la Relación de Aspecto
110
Ajuste de la Visualización del Icono de Ángulo
110
Ajuste del Bloqueo Paterno
110
Visualización del Código de Registro DIVX VOD
110
Registro DIVX VOD
110
Ajuste de la Señal de Vídeo para la Cámara de Retrovisor
111
Menú Favorito
111
Creación de un Acceso Directo
111
Eliminación de un Acceso Directo
111
Operaciones Comunes
112
Reproducción Automática de DVD
111
Selección de un Acceso Directo
111
Ajuste de la Función "Sound Retriever
112
Ajuste de la Hora y la Fecha
112
Cambio del Modo de Pantalla Panorámica
112
Otras Funciones
112
Restauración de Este Producto a la Configura- CIón Predeterminada
112
Conexión
113
Antes de Instalar Este Producto
113
Para Impedir Daños
113
Precauciones
113
Precauciones Antes de Conectar el Sistema
113
Aviso para el Cable Azul/Blanco
114
Cable de Alimentación
114
Cables de Altavoz
114
Este Producto
114
Amplificador de Potencia (Se Vende por Separado)
115
Iphone con Conector Lightning
115
Iphone y Smartphone
115
Cámara
116
Dispositivo Mirrorlink O Android
116
Iphone con Conector de 30 Clavijas
116
Antes de la Instalación
117
Componente de Vídeo Externo y Pantalla
117
Instalación
117
Precauciones Antes de la Instalación
117
Instalación del Micrófono
118
Instalación Utilizando Los Orificios de Tornillo del Lateral de Este Producto
118
Montaje en el Parasol
118
Notas Acerca de la Instalación
118
Ajuste del Ángulo del Micrófono
119
Colocación de la Antena de TV
119
Apéndice
120
Instalación de la Antena de TV
119
Instalación en la Columna de Dirección
119
Montaje de la Antena de TV
119
Solución de Problemas
120
Mensajes de Error
121
Discos que Pueden Reproducirse
123
Manipulación y Cuidado de Los Discos
123
Información Detallada de Los Soportes que Se Pueden Reproducir
124
Dolby Digital
124
Aviso sobre Copyright y Marca Comercial
126
Aac
127
Android
127
Bluetooth
127
DIVX
127
Información Detallada Relacionada con Los Dispositivos Ipod Conectados
127
App Store
127
Mirrorlink
127
Wma
127
Aviso Acerca de la Visualización de DVD Vídeo
128
Aviso Acerca de la Visualización de Vídeo
128
Aviso Acerca del Uso de Archivos MP3
128
Pandora
128
Uso del Contenido con Conexión Basado en Apps
128
Utilización Correcta de la Pantalla LCD
128
Português
132
Precaução
134
Informações de Segurança Importantes
134
Licença, Renúncia de Garantia E Limitação de Responsabilidade
134
Câmera de Visão Traseira
135
Em Caso de Problema
135
Manipulando O Conector USB
135
Para Evitar a Exaustão da Bateria
135
Para Garantir Uma Condução Segura
135
Quando Usar Uma Tela Conectada Ao V out
135
Visite Nosso Site
135
Observações sobre Memória Interna
136
Proteger O Painel LCD E a Tela
136
Sobre Este Manual
136
Utilização E Cuidados Do Controle Remoto
136
Controle Remoto
137
Verificação Dos Nomes Dos Elementos E Fun- Ções
137
Ajuste Do Ângulo Do Painel LCD
138
Inserindo/Ejetando/Conectando Mídia
138
Observações Ao Usar O Painel LCD
138
Ao Iniciar Pela Primeira Vez
139
Como Usar as Telas
140
Alterando a Ordem de Exibição das Fontes
141
Exibindo a Tela de Operação AV
141
Fonte AV Suportada
141
Selecione Uma Fonte
141
Usando O Painel de Toque
141
Registro E Conexão de Dispositivo Bluetooth
142
Conectando um Dispositivo Bluetooth Registrado Manualmente
142
Registrando Seus Dispositivos de Bluetooth
142
Visualizando a "Bluetooth" Tela
142
Alternando a Visibilidade
143
Atualizando O Software Do Bluetooth
143
Exibindo a Versão Do Software de Bluetooth
143
Telefonia Mãos Livres
144
Exibindo as Informações Do Dispositivo
143
Inserindo O Código PIN para Conexão Sem Fio Bluetooth
143
Limpando a Memória de Bluetooth
143
Exibindo a Tela de Menu Do Telefone
144
Fazendo Uma Chamada Telefônica
144
Alterando as Definições da Chamada
145
Atendendo Uma Chamada Telefônica
145
Minimizando a Tela de Confirmação de Disca- Gem
145
Notas para Ligação Em Viva-Voz
145
Configuração para Ipod / Iphone Ou Smartphone
147
Usando a Função de Reconhecimento de Voz (para Iphone)
145
Android™ Compatibilidade de Dispositivos
147
Compatibilidade Com Ipod
147
Configuração Do Método de Conexão Do Dispositivo
147
Mirrorlink Compatibilidade de Dispositivos
147
O Fluxo Básico de Configuração de Ipod / Iphone Ou Smartphone
147
Informação sobre Conexões E Funções de cada Dispositivo
148
Radio
149
Ajustando Em Frequências Fortes
149
Armazenando Frequências de Transmissão Mais Fortes
149
Definindo a Etapa de Ajuste de FM Ou am
149
Exibindo a Tela de "Radio Settings
149
Iniciando O Procedimento
149
Procurar por Informações de PTY
149
Definindo a Pesquisa de Auto PI
150
Definindo a Pesquisa de Frequência Alternativa
150
Iniciando O Procedimento
150
Limitando Estações para Programação Regional
150
Recebendo Anúncio de Tráfego (TA)
150
Recebendo Anúncios de Notícias
150
Recebendo Emissões de Alarme
150
Sintonizador de TV
150
Alterando a Definição da Saída de Som
151
Alterando O Idioma da Legenda
151
Iniciando O Procedimento
151
Memorizar Estações
151
TV Digital
151
Recebendo as Informações Do Programa
151
Visualizando a "Definições DTV" Tela
151
Definindo O Controle Parental
152
Exibindo a Versão Do Software DTV
152
Alterando O Idioma Do Legenda/Áudio
154
Alterando O Tipo de Arquivo de Mídia
154
Disc
154
Iniciando O Procedimento
154
Procurando a Parte que Você Deseja Reproduzir
154
Selecionando Arquivos da Lista de Nome de Arquivos
154
Usando O Menu de DVD
154
Operando O Menu de DVD Usando Teclas Do Painel de Toque
155
Arquivos de Áudio Compactados
155
Alterando O Tipo de Arquivo de Mídia
156
Arquivos de Vídeo Compactados
157
Iniciando O Procedimento (para Disco)
156
Iniciando O Procedimento (para USB)
156
Selecionando Arquivos da Lista de Nome de Arquivos
156
Selecionando um Arquivo Pelo Navegador de Músicas
156
Selecione Uma Música Do Álbum (Pesquisa de Link)
156
Iniciando O Procedimento
157
Selecionando Arquivos da Lista de Nome de Arquivos
157
Arquivos de Imagem Parada
158
Iniciando O Procedimento
158
Selecionando Arquivos da Lista de Nome de Arquivos
158
Configura O Intervalo de Apresentação de Slides
159
Pod
159
Salvando a Imagem como Papel de Parede
159
Conectando O Seu Ipod
160
Iniciando O Procedimento
160
Selecionando Fonte de Música Ou Vídeo da Tela de Lista de Reprodução
160
Selecione Uma Música Do Álbum (Pesquisa de Link)
160
Aplicativos de Iphone Ou Smartphone
162
Usando a Função de Ipod Desse Produto Com Seu Ipod
160
Usando Mirrorlink
162
Operações Do Pandora
163
Usando a Função de Mistura de Áudio
163
Pandora
163
Adiciona Estação
164
Reprodutor de Áudio Bluetooth
164
Iniciando O Procedimento
164
Selecionando Uma Estação Pandora da Lista
164
Iniciando O Procedimento
165
Selecionando Arquivos da Lista de Nome de Arquivos
165
Fonte AUX
165
Configurando O Sinal de Vídeo
166
Entrada AV
166
Iniciando O Procedimento
166
Mixtrax
167
Definir O Padrão de Flash
167
Configurações Do Sistema
168
Exibindo a Tela de "MIXTRAX Settings
167
Operação Do MIXTRAX
167
Operação Do MIXTRAX EX
167
Ativando a Fonte de Áudio Bluetooth
168
Configurando a Câmera de Visão Traseira
168
Configurando a Rolagem
168
Definindo O Controle Do Volante
168
Exibindo a Tela de Configurações Do "Sistema
168
Ajuste das Posições de Resposta Do Painel Tátil (Calibragem Do Painel Tátil)
169
Configuração Do Idioma Do Teclado Com O Aplicativo para Iphone
169
Definindo O Dimmer
169
Desligando a Tela de Demonstração
169
Selecionando O Local de Uso
169
Seleção Do Idioma Do Sistema
169
Ajuste da Imagem
170
Atualização de Firmware
170
Ajustes de Áudio
171
Exibição da Versão de Firmware
170
Ajustando Audibilidade
171
Ajustando O Valor da Freqüência de Corte
171
Ajustando os Níveis da Fonte
171
Alterando O Ajuste de Mudo/Atenuação Do Som
171
Exibindo a Tela de Configurações de "Áudio
171
Usando a Saída de Subwoofer
171
Usando O Ajuste de Balanço
171
Usando O Ajuste de Fader
171
Usando O Controle de Nível Automático
171
Ajustando O Alinhamento de Tempo
172
Ajustando os Níveis de Saída Dos Alto-Falantes Finamente
172
Alternando a Saída Do Alto-Falante Traseiro
172
Mudando O Alinhamento de Tempo Predefinido
172
Reforçando os Graves
172
Selecionando a Posição de Audição
172
Ajustando a Curva Do Equalizador Automatica- Mente (EQ Automático)
173
Usando O Equalizador
173
Carregando as Configurações de Som
174
Menu de Tema
175
Salvando as Configurações de Som
174
Configurando a Cor de Iluminação
175
Selecionando a Cor de Tema
175
Selecionando a Exibição Do Plano de Fundo
175
Selecionando a Imagem Do Relógio
175
Configurando O Reprodutor de Vídeo
176
Definindo os Idiomas de Prioridade Máxima
176
Definindo a Exibição Do Ícone de Ângulo
177
Definindo a Razão de Aspecto
177
Definindo Trava Parental
177
Exibindo Seu Código de Registro DIVX VOD
177
Configurando O Sinal de Vídeo da Câmera de Visão Traseira
178
Menu Favoritos
178
Criando um Atalho
178
Exibindo Seu Código de Cancelamento Do Registro DIVX VOD
178
Removendo um Atalho
178
Operações Comuns
179
Reprodução Automática de Dvds
178
Selecionando um Atalho
178
Alterando O Modo de Tela Ampla
179
Outras Funções
179
Definindo a Função "Sound Retriever
179
Definindo a Hora E Data
179
Restaurando Esse Produto para as Configurações Padrão
179
Conexão
180
Antes de Instalar Este Produto
180
Para Prevenir Danos
180
Precauções
180
Precauções Antes de Conectar O Sistema
180
Aviso para O Condutor Azul/Branco
181
Cabo de Alimentação
181
Cabos Do Altofalante
181
Este Produto
181
Amplificador de Potência (Vendido Separada- Mente)
182
Iphone Com Conector Lightning
182
Iphone E Smartphone
182
Câmera
183
Dispositivo Android Ou Mirrorlink
183
Iphone Com Conector de 30 Pinos
183
Antes da Instalação
184
Componente de Vídeo Externo E O Visor
184
Instalação
184
Notas sobre a Instalação
184
Precauções Antes da Instalação
184
Instalação Do Microfone
185
Instalação Na Coluna da Direção
185
Instalação Usando os Orifícios de Parafuso no Lado Do Produto
185
Montagem no Quebra-Sol
185
Ajustando O Ângulo Do Microfone
186
Instalando a Antena de TV
186
Montagem da Antena de TV
186
Montando a Antena de TV
186
Apêndice
187
Resolução de Problemas
187
Mensagens de Erro
188
Discos Reproduzíveis
190
Manipulação E Cuidados Com os Discos
190
Informações Detalhadas para a Mídia Reproduzível
191
Aviso de Marca Registrada E Direitos
193
Exemplo de Uma Hierarquia
193
Aac
194
Android
194
DIVX
194
Informações Detalhadas sobre Dispositivos Ipod Conectados
194
Mirrorlink
194
Usando Conteúdo Conectado Com Base Em Aplicativo
194
Wma
194
Aviso sobre O Uso de Arquivos MP3
195
Aviso sobre Visualização de DVD-Vídeo
195
Aviso sobre Visualização de Vídeo
195
Especificações
195
Pandora
195
Uso Correto da Tela LCD
195
Advertisement
Pioneer AVH-X6750DVD Owner's Manual (64 pages)
DVD RDS AV Receiver
Brand:
Pioneer
| Category:
Car Receiver
| Size: 19.88 MB
Table of Contents
Table of Contents
2
Precaution
4
Important Safety Information
4
License, Warranty Disclaimer & Limitation of Liability
4
Parking Brake Interlock
4
To Ensure Safe Driving
4
About this Product
5
Before Removing the Vehicle Battery
5
Data Subject to Erasure
5
Handling the USB Connector
5
In Case of Trouble
5
Rear View Camera
5
Resetting the Microprocessor
5
To Avoid Battery Exhaustion
5
Visit Our Website
5
When Using a Display Connected to V out
5
Installing the Battery
6
Basic Operation
7
Use and Care of the Remote Control
6
Checking Part Names and Functions
7
Remote Control
7
Adjusting the LCD Panel Angle
8
Ejecting a Disc
8
Inserting a Disc
8
Inserting and Ejecting a Disc
8
Inserting/Ejecting/Connecting Media
8
Notes on Using the LCD Panel
8
On First-Time Startup
8
How to Use the Screens
9
Changing the Display Order of Sources
10
Displaying the AV Operation Screen
10
Selecting a Source
10
Supported AV Source
10
Using the Touch Panel
10
Registration and Connec- Tion of Bluetooth Device
11
Connecting a Registered Bluetooth Device Manually
11
Displaying the "Bluetooth" Screen
11
Operating Time Bar
11
Registering Your Bluetooth Devices
11
Switching Operation Panel
11
Clearing the Bluetooth Memory
12
Displaying the Bluetooth Software Version
12
Hands-Free Phoning
13
Displaying the Device Information
12
Entering the PIN Code for Bluetooth Wireless Connection
12
Switching Visibility
12
Updating Bluetooth Software
12
Dialing from the History
13
Displaying the Phone Menu Screen
13
Making a Phone Call
13
Receiving a Phone Call
13
Using the Preset Dial Lists
13
Answering a Call Automatically
14
Changing the Phone Settings
14
Minimizing the Dial Confirmation Screen
14
Notes for Hands-Free Phoning
14
Setting the Private Mode
14
Switching the Ring Tone
14
Setup for Ipod / Iphone or Smartphone
15
Using the Voice Recognition Function (for Iphone)
14
Android™ Device Compatibility
15
Ipod Compatibility
15
Mirrorlink Device Compatibility
15
Setting the Device Connection Method
15
The Basic Flow of Ipod / Iphone or Smartphone Setup
15
Information on the Connections and Functions for each Device
16
Radio
17
Displaying the "Radio Settings" Screen
17
Searching by PTY Information
17
Setting the FM or am Tuning Step
17
Starting Procedure
17
Storing the Strongest Broadcast Frequencies
17
Tuning into Strong Frequencies
17
Limiting Stations to Regional Programing
18
Receiving Alarm Broadcasts
18
Disc
18
Receiving News Announcements
18
Receiving Traffic Announcements (TA)
18
Setting the Alternative Frequency Search
18
Setting the Auto PI Search
18
Operating the DVD Menu
20
Operating the DVD Menu Using Touch Panel Keys
20
Compressed Audio Files
21
Searching for the Part You Want to Play
20
Selecting Files from the File Name List
20
Starting Procedure
20
Switching the Media File Type
20
Switching the Subtitle/Audio Language
20
Starting Procedure (for Disc)
21
Starting Procedure (for USB)
21
Selecting a File by Music Browse
22
Selecting a Song in the Album (Link Search)
22
Selecting Files from the File Name List
22
Switching the Media File Type
22
Compressed Video Files
22
Selecting Files from the File Name List
23
Still Image Files
23
Starting Procedure
23
Saving the Image as the Wallscreen
24
Selecting Files from the File Name List
24
Setting the Slideshow Interval
24
Ipod
25
Starting Procedure
24
Switching the Media File Type
24
Connecting Your Ipod
25
Selecting a Song in the Album (Link Search)
26
Iphone or Smartphone Applications
26
Selecting Song or Video Sources from the Playlist Screen
26
Starting Procedure
26
Using this Product's Ipod Function from Your Ipod
26
Using Appradio Mode
27
Using Mirrorlink
27
Using the Keyboard
27
Using the Audio MIX Function
28
Bluetooth Audio Player
28
Selecting Files from the File Name List
29
AUX Source
29
Starting Procedure
29
Setting the Video Signal
30
AV Input
30
Starting Procedure
30
Mixtrax
31
Displaying the "MIXTRAX Settings" Screen
31
MIXTRAX EZ Operation
31
MIXTRAX Operation
31
Setting the Flash Pattern
31
System Settings
32
Activating the Bluetooth Audio Source
32
Displaying the "System" Setting Screen
32
Setting the Ever Scroll
32
Setting the Rear View Camera
32
Setting the Steering Wheel Control
32
Turning off the Demo Screen
32
Adjusting the Picture
33
Adjusting the Response Positions of the Touch Panel (Touch Panel Calibration)
33
Setting the Dimmer
33
Setting the Keyboard Language with the Application for Iphone
33
Displaying the Firmware Version
34
Updating Firmware
34
Audio Adjustments
34
Displaying the "Audio" Setting Screen
34
Using Balance Adjustment
34
Using Fader Adjustment
34
Adjusting Loudness
35
Adjusting Source Levels
35
Adjusting the Cutoff Frequency Value
35
Boosting the Bass
35
Selecting the Listening Position
35
Switching Sound Muting/Attenuation
35
Switching the Rear Speaker Output
35
Using the Auto Level Control
35
Using the Subwoofer Output
35
Adjusting the Speaker Output Levels Finely
36
Adjusting the Time Alignment
36
Recalling Equalizer Curves
36
Switching the Time Alignment Preset
36
Using the Equalizer
36
Adjusting the Equalizer Curve Automatically (Auto EQ)
37
Loading the Sound Settings
38
Theme Menu
38
Saving the Sound Settings
38
Selecting the Background Display
38
Setting the Illumination Color
38
Selecting the Clock Image
39
Setting up the Video Player
39
Selecting the Theme Color
39
Setting the Audio Language
39
Setting the Subtitle Language
39
Setting the Top-Priority Languages
39
Setting Parental Lock
40
Setting the Angle Icon Display
40
Setting the Aspect Ratio
40
Setting the Code Number and Level
40
Setting the Menu Language
40
Automatic Playback of Dvds
41
Displaying Your DIVX VOD Deregistration Code
41
Displaying Your DIVX VOD Registration Code
41
Setting the Video Signal for the Rear View Camera
41
Favorite Menu
42
Changing the Wide Screen Mode
42
Common Operations
42
Selecting a Shortcut
42
Setting the "Sound Retriever" Function
42
Setting the Time and Date
42
Before Installing this Product
43
Important Safeguards
43
Precautions
43
Precautions before Connecting the System
43
Restoring this Product to the Default Settings
43
Other Functions
43
Creating a Shortcut
42
Removing a Shortcut
42
Connection
43
To Prevent Damage
43
Notice for the Blue/White Lead
44
Power Cord
44
This Product
44
Power Amp (Sold Separately)
45
Speaker Leads
45
Android or Mirrorlink Device
46
Camera
46
Iphone and Smartphone
46
Iphone with 30-Pin Connector
46
Iphone with Lightning Connector
46
Before Installing
47
External Video Component and the Display
47
Installation
47
Installation Notes
47
Precautions before Installation
47
Installation on the Steering Column
48
Installation Using the Screw Holes on the Side of this Product
48
Installing the Microphone
48
Mounting on the Sun Visor
48
Adjusting the Microphone Angle
49
Troubleshooting
49
Advertisement
Related Products
Pioneer AVH-X6500DVD
Pioneer AVH-X6550DVD
Pioneer AVH-X3600BHS
Pioneer AVH-X550BT
Pioneer AVH-X8550BT
Pioneer AVH-X2650BT
Pioneer AVH-X4690DVD
Pioneer AVH-X3600DAB
Pioneer AVH-X7750TV/XNRD
Pioneer AVH-X5750BT
Pioneer Categories
Car Receiver
Receiver
Stereo Receiver
Amplifier
CD Player
More Pioneer Manuals
Login
Sign In
OR
Sign in with Facebook
Sign in with Google
Upload manual
Upload from disk
Upload from URL