Sign In
Upload
Manuals
Brands
Panasonic Manuals
Projector
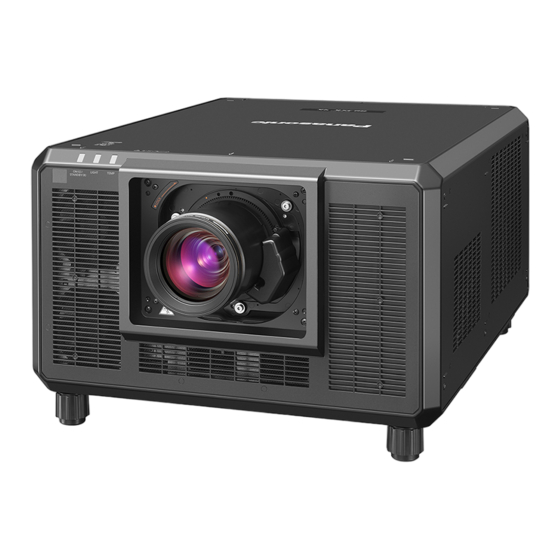
PT-SRQ35KC
Panasonic PT-SRQ35KC Manuals
Manuals and User Guides for Panasonic PT-SRQ35KC. We have
1
Panasonic PT-SRQ35KC manual available for free PDF download: Operating Instructions Manual
Panasonic PT-SRQ35KC Operating Instructions Manual (323 pages)
Brand:
Panasonic
| Category:
Projector
| Size: 44.43 MB
Table of Contents
Table of Contents
2
Read this First
5
Chapter 1 Preparation
15
Precautions for Use
16
Intended Use of the Product
16
Installation and Handling of the Laser Product
16
Cautions When Transporting
16
Cautions When Installing
16
Cautions When Setting up the Projector
18
Security
19
Notes Regarding the Wireless LAN
20
Quad Pixel Drive
21
Digital Link
21
Art-Net
21
Application Software Supported by the Projector
21
Storing
22
Disposal
22
Cautions on Use
22
Accessories
23
Optional Accessories
24
About Your Projector
25
Remote Control
25
Projector Body
27
Names and Functions of the Interface Board (Optional)
30
How to Confirm the Firmware Version of the Interface Board (Optional)
32
Preparing the Remote Control
33
Inserting and Removing the Batteries
33
When Using the Multiple Projectors
33
Connecting the Remote Control to the Projector with a Cable
34
Chapter 2 Getting Started
35
Setting up
36
Usable Outlet
36
Installation Mode
36
Projected Image and Throw Distance
37
Adjusting Adjustable Feet
51
Attaching/Removing the Projection Lens (Optional)
52
Attaching the Projection Lens
53
Removing the Projection Lens
54
Connecting
55
Before Connecting
55
Connecting Example: AV Equipment
55
Connecting Example: Computers
59
Connecting Example Using DIGITAL LINK
60
Connecting Example When Using the Contrast Synchronization Function/Shutter Synchronization Function
61
Chapter 3 Basic Operations
63
Switching On/Off the Projector
64
Connecting the Power Cord
64
Power Indicator
65
Switching on the Projector
66
When the Initial Setting Screen Is Displayed
67
When the Brightness Limitation Setting Screen Is Displayed
73
When the Administrator Account Setting Screen Is Displayed
74
Making Adjustments and Selections
75
Switching off the Projector
76
Projecting
77
Selecting the Input Signal
77
Adjusting the Focus, Zoom, and Lens Shift
79
Adjusting the Focus Balance
80
Setting the Lens Type
82
Executing the Lens Calibration
83
Moving the Projection Lens to the Home Position
84
Lens Shift Range
86
Adjusting the Lens Mounter When the Focus Is Unbalanced
88
Using the USB Memory
90
Notes on Use
90
USB Memory that Can be Used with the Projector
90
Attaching the USB Memory
90
Removing the USB Memory
90
Operating with the Remote Control
91
Using the Shutter Function
91
Using the On-Screen Display Function
91
Using the Automatic Setup Function
92
Switching the Image Aspect Ratio
92
Using the Function Button
92
Displaying Internal Test Pattern
93
Using the Status Function
93
Setting ID Number of the Remote Control
93
Chapter 4 Settings
95
Menu Navigation
96
Navigating through the Menu
96
Main Menu
97
Sub-Menu
98
[PICTURE] Menu
101
[Picture Mode]
101
[Contrast]
101
[Brightness]
102
[Color]
102
[Tint]
102
[Color Temperature]
102
[Gamma]
104
[System Daylight View]
106
[Sharpness]
106
[Noise Reduction]
106
[Dynamic Contrast]
106
[Color Space]
108
[System Selector]
108
Srgb-Compliant Video
109
[POSITION] Menu
110
[Shift]
110
[Aspect]
110
[Zoom]
111
[Geometry]
112
[Convergence]
117
[ADVANCED MENU] Menu
118
[Digital Cinema Reality]
118
[Gradation Smoother]
118
[Blanking]
118
[Edge Blending]
119
[Frame Response]
123
[Frame Delay]
123
[Quad Pixel Drive]
123
[Raster Position]
124
[DISPLAY LANGUAGE] Menu
125
Changing the Display Language
125
[DISPLAY OPTION] Menu
126
[Color Matching]
126
[Screen Setting]
128
[Auto Signal]
129
[Auto Setup]
129
[Backup Input Setting]
130
[Simul Input Setting]
131
[Hdmi 输入]
132
[Digital Link 输入]
134
[Slot 输入]
137
[On-Screen Display]
152
[Menu Mode]
154
[Back Color]
155
[Startup Logo]
155
[Uniformity]
155
[Shutter Setting]
156
[Freeze]
159
[Waveform Monitor]
159
[Cut Off]
160
[PROJECTOR SETUP] Menu
162
[Projector ID]
162
[Projection Method]
162
[Lens]
163
[Operation Setting]
175
[Light Output]
178
[Brightness Control]
178
[No Signal Setting]
182
[Initial Startup]
185
[Startup Input Select]
186
[Date and Time]
186
[Schedule]
187
[Multi Projector Sync]
190
[Remote2 Mode]
193
[Function Button]
193
[Status]
194
[Info Monitor Setting]
197
[Data Cloning]
199
[Save All User Data]
199
[Load All User Data]
199
[Initialize]
200
[Firmware Update]
201
[Service Password]
201
[TEST PATTERN] Menu
202
[Test Pattern]
202
[SIGNAL LIST] Menu
203
Registering New Signals
203
Renaming the Registered Signal
203
Deleting the Registered Signal
203
Expanding Signal Lock-In Range
204
Protecting the Registered Signal
204
Sub Memory
205
[SECURITY] Menu
206
[Security Password]
206
[Security Password Change]
206
[Control Device Setup]
206
[Control Device Password Change]
210
[Brightness Limitation]
210
[NETWORK] Menu
212
[Ethernet Type]
212
[Digital Link]
212
[Wired Lan]
214
[Wireless Lan]
214
[Projector Name]
215
[Network Status]
215
[Nfc Setting]
216
[Administrator Account]
216
[Network Security]
219
[Network Control]
219
[Pjlink]
220
[Art-Net]
221
Chapter 5 Operations
224
Network Connection
225
Connecting Via Wired LAN
225
Connecting Via Wireless LAN
227
Web Control Function
230
Computer that Can be Used for Setting
230
Accessing from the Web Browser
230
Using the Information Monitor Function
255
Screen Mode
255
Top Menu
255
Sub-Menu
255
Basic Operation Procedure in the Menu Operation Mode
256
[USER VIEW] Menu
256
[SETUP] Menu
257
[STATUS] Menu
261
Error Notification Mode
263
Using the Data Cloning Function
265
Copying the Data to Another Projector Via LAN
265
Copying the Data to Another Projector Using USB
267
Updating the Firmware
269
Updating the Firmware Via LAN
269
Updating the Firmware Using the USB Memory
274
Chapter 6 Maintenance
276
Light Source/Temperature Indicators
277
When an Indicator Lights up
277
Maintenance
279
Before Maintenance
279
Troubleshooting
280
Self-Diagnosis Display
282
Chapter 7 Appendix
284
Technical Information
285
Using Pjlink Function
285
Using Art-Net Function
287
Control Commands Via LAN
292
串口输入>/<串口输出> Terminal
296
REMOTE 2 输入> Terminal
300
Specifications
301
Dimensions
304
List of Compatible Signals
305
Installing the Interface Board (Optional)
319
Before Installing or Removing
319
How to Install the Interface Board
319
How to Remove the Interface Board
320
Index
321
Advertisement
Advertisement
Related Products
Panasonic PT-SRZ34KC
Panasonic PTST10E - LCD PROJECTOR
Panasonic PTST10EA - LCD PORJECTOR
Panasonic PT-ST10U
Panasonic PT-ST10
Panasonic PT-SW280A
Panasonic PT-SX320A
Panasonic PT-SX300A
Panasonic PT-SMZ16KCL
Panasonic PT-SMZ13KCL
Panasonic Categories
Camcorder
Air Conditioner
TV
Digital Camera
Cordless Telephone
More Panasonic Manuals
Login
Sign In
OR
Sign in with Facebook
Sign in with Google
Upload manual
Upload from disk
Upload from URL