Sign In
Upload
Manuals
Brands
Panasonic Manuals
Camcorder
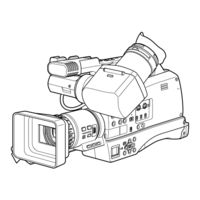
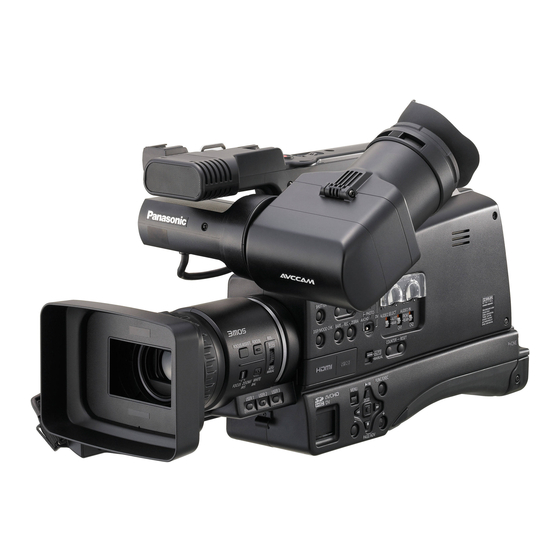
AVCCAM AG-HMC80P
Panasonic AVCCAM AG-HMC80P Camcorder Manuals
Manuals and User Guides for Panasonic AVCCAM AG-HMC80P Camcorder. We have
4
Panasonic AVCCAM AG-HMC80P Camcorder manuals available for free PDF download: Operating Instructions Manual
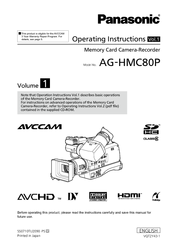
Panasonic AVCCAM AG-HMC80P Operating Instructions Manual (126 pages)
User Manual
Brand:
Panasonic
| Category:
Camcorder
| Size: 17.33 MB
Table of Contents
Table of Contents
2
Chapter 1: Operations in AVCHD Mode
5
Shooting in Manual Mode
5
Switching to Manual Mode
5
Manual Focusing
5
Using Focus Assist
6
Setting the Aperture and Gain
6
Adjusting the White Balance and Black Balance
7
Using Presets
8
Shooting in Progressive Mode
9
Shooting Techniques for Different Targets
10
Self-Portrait Shooting
10
Low Angle Shooting
10
Zebra Pattern
10
Marker
11
Checking and Displaying Shooting Status
11
Pre Rec
11
Optical Image Stabilizer
11
Adding Effects to Images
12
Using the USER Buttons
12
Backlight Compensation
12
Color Bars
12
Wave Form Monitor Function
12
Shot Mark Function
13
Interval Recording
13
Time Stamp Function
13
LAST CLIP Function
14
Adjusting the Shutter Speed
15
Synchro Scan
17
Selecting Audio Input
18
Using the Built-In Microphone / External Microphone (3.5 MM Stereo Mini Jack)
18
Using the External Microphone or Audio Devices Connected to the XLR Input Terminal
19
Adjusting the Audio Recording Level
20
Using Scene Files
21
Loading Scene Files
21
Setting and Saving Scene Files
21
Initializing Scene Files
23
Loading the Metadata
23
Selecting the USER CLIP NAME Recording Method
24
Using the Counter
25
Counter Display
25
Charging the Built-In Battery/Setting the Time Code
26
Recharging the Built-In Battery
26
Setting the Time Code
26
Specifying the Time Code
26
Setting User Information
27
Operating SD Memory Cards
28
Formatting SD Memory Cards
28
SD Memory Card Recording Times
29
Dividing Clips Recorded Onto SD Memory Cards
29
Removing SD Memory Card
30
Protecting SD Memory Cards
30
Repairing SD Memory Cards
30
Shooting Photos
31
Setting the Aspect Ratio / Recording Pixels
32
Setting the Picture Quality
32
Displaying the Histogram
32
Maximum Number of Photos
33
Clip and Photo Operations
35
During Clip Playback
35
During Photo Playback
37
Thumbnail Operations
38
Selecting the Thumbnail Display Method
38
Format Card and Card Information
39
Playing Back Clips
40
Set Playback Format
41
Playing Back Photos
42
Playback by Date
43
Deleting Clips/Photos (Videos and Photos)
44
Deleting Multiple Clips or Photos Simultaneously
44
Selecting Clips or Photos to Delete
44
Setting Protection (Videos and Photos)
45
Protecting Clips
45
Protecting Photos
45
DPOF Settings (Photos)
46
Printing Photos on a Printer (Pictbridge)
47
Useful Playback Functions
49
Adding a SHOT MARK to a Clip
49
Repeat Playback
49
Resume Playback (RESUME PLAY)
49
Viewing Images on a Television
49
Checking the Date and Time
49
Connecting External Units
50
Headphones
50
External Microphone (Stereo Mini Jack Compatible)
50
Computer (Non-Linear Editing/File Transfer)
51
Video Deck (Dubbing)
51
Tv/Monitor
52
Nonlinear Editing
53
Chapter 2: Operations in DV Mode
54
Shooting in Manual Mode
54
Switching to Manual Mode
54
Manual Focusing
54
Using Focus Assist
55
Setting the Aperture and Gain
55
Adjusting the White Balance and Black Balance
56
Shooting in Progressive Mode
58
Shooting Techniques for Different Targets
59
Self-Portrait Shooting
59
Low Angle Shooting
59
Zebra Pattern
59
Marker
60
Checking and Displaying Shooting Status
60
Pre Rec
60
Optical Image Stabilizer
60
Adding Effects to Images
61
Using the USER Buttons
61
Backlight Compensation
61
Color Bars
61
Wave Form Monitor Function
61
Shot Mark Function
62
Interval Recording
62
Time Stamp Function
62
LAST CLIP Function
63
Changing the Size of Images
63
Recording Backup Images
64
Adjusting the Shutter Speed
65
Synchro Scan
67
Selecting Audio Input
68
Using the Built-In Microphone / External Microphone (3.5 MM Stereo Mini Jack)
68
Using the External Microphone or Audio Devices Connected to the XLR Input Terminal
69
Adjusting the Audio Recording Level
70
Using Scene Files
71
Loading Scene Files
71
Setting and Saving Scene Files
71
Initializing Scene Files
72
Using the Counter
73
Counter Display
73
1394 TC Preset Mode
73
Charging the Built-In Battery/Setting the Time Code
74
Recharging the Built-In Battery
74
Setting the Time Code
74
Specifying the Time Code
74
Setting User Information
75
Operating SD Memory Cards
76
Formatting SD Memory Cards
76
SD Memory Card Recording Times
77
Dividing Clips Recorded Onto SD Memory Cards
77
Removing SD Memory Card
78
Protecting SD Memory Cards
78
Repairing SD Memory Cards
78
Clip Operations
79
During Clip Playback
79
Thumbnail Operations
81
Operating the Thumbnail Menu
81
Selecting the Thumbnail Display Method
81
Deleting Clips
81
Repairing Clips
82
Formatting SD Memory Cards
82
Displaying Card and System Information
83
Playing Back Clips
84
Useful Playback Functions
85
Adding a SHOT MARK to a Clip
85
Repeat Playback
85
Resume Playback (RESUME PLAY)
85
Viewing Images on a Television
85
Checking the Date and Time
85
Connecting External Units
86
Headphones
86
External Microphone (Stereo Mini Jack Compatible)
86
Video Deck (Dubbing)
87
Digital Video (Dubbing)
88
Tv/Monitor
89
Dubbing
90
Digital Input/Output
90
Chapter 3: Screen Displays and Setting Menus
91
Screen Displays
91
Regular Displays
91
Main Warning Displays
96
Error Displays
98
Setting the DISPLAY Items
99
Setup Menu List
101
SCENE FILE Screen
101
CAMERA SETUP Screen
102
RECORD SETUP Screen
103
PICTURE Screen (AVCHD Mode Only)
105
PLAY SETUP Screen
106
OPERATION Screen (AVCHD Mode Only)
106
PICT. SETUP Screen (AVCHD Mode Only)
106
SW&DISP SETUP Screen
107
OTHER FUNCTIONS Screen
110
OPTION MENU Screen (DV Mode Only)
113
List of Thumbnail Menus
114
(DV Mode Only)
114
THUMBNAIL Menu
114
OPERATION Menu
114
OTHER FUNCTIONS Menu
114
Chapter 4: Reference
115
Before Calling for Service
115
Updating the Firmware
119
Cleaning
119
Cleaning the Eye Piece
119
Storage Precautions
120
Software Information
121
Recording Format
121
How to Handle Data Recorded on SD Memory Card
122
Index
124
Advertisement
Panasonic AVCCAM AG-HMC80P Operating Instructions Manual (126 pages)
Memory Card Camera-Recorder
Brand:
Panasonic
| Category:
Camcorder
| Size: 10.36 MB
Table of Contents
Table of Contents
2
Chapter 1: Operations in AVCHD Mode
5
Shooting in Manual Mode
5
Switching to Manual Mode
5
Manual Focusing
5
Using Focus Assist
6
Setting the Aperture and Gain
6
Adjusting the White Balance and Black Balance
7
Shooting in Progressive Mode
9
Shooting Techniques for Different Targets
10
Self-Portrait Shooting
10
Low Angle Shooting
10
Zebra Pattern
10
Marker
11
Checking and Displaying Shooting Status
11
Pre Rec
11
Optical Image Stabilizer
11
Adding Effects to Images
12
Using the USER Buttons
12
Backlight Compensation
12
Color Bars
12
Wave Form Monitor Function
12
Shot Mark Function
13
Interval Recording
13
Time Stamp Function
13
LAST CLIP Function
14
Adjusting the Shutter Speed
15
Synchro Scan
17
Selecting Audio Input
18
Using the Built-In Microphone / External Microphone (3.5 MM Stereo Mini Jack)
18
Using the External Microphone or Audio Devices Connected to the XLR Input Terminal
19
Adjusting the Audio Recording Level
20
Using Scene Files
21
Loading Scene Files
21
Setting and Saving Scene Files
21
Initializing Scene Files
22
Clip Metadata
23
Loading the Metadata
23
Selecting the USER CLIP NAME Recording Method
24
Using the Counter
25
Counter Display
25
Charging the Built-In Battery/Setting the Time Code
26
Recharging the Built-In Battery
26
Setting the Time Code
26
Specifying the Time Code
26
Setting User Information
27
Operating SD Memory Cards
28
Formatting SD Memory Cards
28
SD Memory Card Recording Times
29
Dividing Clips Recorded Onto SD Memory Cards
29
Removing SD Memory Card
30
Protecting SD Memory Cards
30
Repairing SD Memory Cards
30
Shooting Photos
31
Setting the Aspect Ratio / Recording Pixels
32
Setting the Picture Quality
32
Displaying the Histogram
32
Maximum Number of Photos
33
Clip and Photo Operations
35
During Clip Playback
35
During Photo Playback
37
Thumbnail Operations
38
Selecting the Thumbnail Display Method
38
Format Card and Card Information
39
Playing Back Clips
40
Set Playback Format
41
Playing Back Photos
42
Playback by Date
43
Deleting Clips/Photos (Videos and Photos)
44
Deleting Multiple Clips or Photos Simultaneously
44
Selecting Clips or Photos to Delete
44
Setting Protection (Videos and Photos)
45
Protecting Clips
45
Protecting Photos
45
DPOF Settings (Photos)
46
Printing Photos on a Printer (Pictbridge)
47
Useful Playback Functions
49
Adding a SHOT MARK to a Clip
49
Repeat Playback
49
Resume Playback (RESUME PLAY)
49
Viewing Images on a Television
49
Checking the Date and Time
49
Connecting External Units
50
Headphones
50
External Microphone (Stereo Mini Jack Compatible)
50
Computer (Non-Linear Editing/File Transfer)
51
Video Deck (Dubbing)
51
Tv/Monitor
52
Nonlinear Editing
53
Chapter 2: Operations in DV Mode
54
Shooting in Manual Mode
54
Switching to Manual Mode
54
Manual Focusing
54
Using Focus Assist
55
Setting the Aperture and Gain
55
Adjusting the White Balance and Black Balance
56
Shooting in Progressive Mode
58
Shooting Techniques for Different Targets
59
Self-Portrait Shooting
59
Low Angle Shooting
59
Zebra Pattern
59
Marker
60
Checking and Displaying Shooting Status
60
Pre Rec
60
Optical Image Stabilizer
60
Adding Effects to Images
61
Using the USER Buttons
61
Backlight Compensation
61
Color Bars
61
Wave Form Monitor Function
61
Shot Mark Function
62
Interval Recording
62
Time Stamp Function
62
LAST CLIP Function
63
Changing the Size of Images
63
Recording Backup Images
64
Adjusting the Shutter Speed
65
Synchro Scan
67
Selecting Audio Input
68
Using the Built-In Microphone / External Microphone (3.5 MM Stereo Mini Jack)
68
Using the External Microphone or Audio Devices Connected to the XLR Input Terminal
69
Adjusting the Audio Recording Level
70
Using Scene Files
71
Loading Scene Files
71
Setting and Saving Scene Files
71
Initializing Scene Files
72
Using the Counter
73
Counter Display
73
1394 TC Preset Mode
73
Charging the Built-In Battery/Setting the Time Code
74
Recharging the Built-In Battery
74
Setting the Time Code
74
Specifying the Time Code
74
Setting User Information
75
Operating SD Memory Cards
76
Formatting SD Memory Cards
76
SD Memory Card Recording Times
77
Dividing Clips Recorded Onto SD Memory Cards
77
Removing SD Memory Card
78
Protecting SD Memory Cards
78
Repairing SD Memory Cards
78
Clip Operations
79
During Clip Playback
79
Thumbnail Operations
81
Operating the Thumbnail Menu
81
Selecting the Thumbnail Display Method
81
Deleting Clips
81
Repairing Clips
82
Formatting SD Memory Cards
82
Displaying Card and System Information
83
Playing Back Clips
84
Useful Playback Functions
85
Adding a SHOT MARK to a Clip
85
Repeat Playback
85
Resume Playback (RESUME PLAY)
85
Viewing Images on a Television
85
Checking the Date and Time
85
Connecting External Units
86
Headphones
86
External Microphone (Stereo Mini Jack Compatible)
86
Video Deck (Dubbing)
87
Digital Video (Dubbing)
88
Tv/Monitor
89
Dubbing
90
Digital Input/Output
90
Chapter 3 : Screen Displays and
91
Screen Displays
91
Regular Displays
91
Main Warning Displays
96
Error Displays
98
Setting the DISPLAY Items
99
Setup Menu List
101
SCENE FILE Screen
101
CAMERA SETUP Screen
102
RECORD SETUP Screen
103
PICTURE Screen (AVCHD Mode Only)
105
PLAY SETUP Screen
106
OPERATION Screen (AVCHD Mode Only)
106
PICT. SETUP Screen (AVCHD Mode Only)
106
SW&DISP SETUP Screen
107
OTHER FUNCTIONS Screen
110
OPTION MENU Screen (DV Mode Only)
113
List of Thumbnail Menus
114
(DV Mode Only)
114
THUMBNAIL Menu
114
OPERATION Menu
114
OTHER FUNCTIONS Menu
114
Chapter 4: Reference
115
Before Calling for Service
115
Updating the Firmware
119
Cleaning
119
Cleaning the Eye Piece
119
Storage Precautions
120
Software Information
121
Recording Format
121
How to Handle Data Recorded on SD Memory Card
122
Index
124
Panasonic AVCCAM AG-HMC80P Operating Instructions Manual (52 pages)
Memory Card Camera-Camcorder
Brand:
Panasonic
| Category:
Camcorder
| Size: 6.64 MB
Table of Contents
Read this First
2
Declaration of Conformity
3
Fcc Warning
3
Important Safety Instructions
4
Table of Contents
7
Operating Precautions
8
Precaution for Use
10
SD Memory Cards Compatible with this Product
12
(SD Speed Class 6)
14
SDHC Memory Cards
14
Compatibility of Recorded Video
15
About AVCHD
15
About DV
15
Outline
16
Using this Camera
16
Shooting and Playing Back with this Camera
16
Editing and Saving with External Devices
17
Accessories
18
Optional Accessories
19
Using Tele Conversion Lenses, Wide Conversion Lenses
19
Description of Parts
20
Front Side and Rear Side
20
Right Side
21
Left Side
22
Preparation
24
Recharging the Battery
24
Recharging
24
Power Sources
26
Using the Battery
26
Using the AC Adaptor
26
Adjusting the Grip Belt
27
Attaching the Shoulder Strap
27
Detaching and Attaching the Lens Hood
28
Fitting the Eye Cup
28
The Remote Control
29
Insert the Battery
29
Remote Control Usable Range
29
Basic Operations
30
Turn On/Off the Camera
30
Tally Lamp
30
Using the Cursor Button
31
Basic Operations
31
Menu Screen Operations
31
Playback Mode (PB Mode Only)
31
Using the Viewfinder
32
Using as a LCD Monitor
33
Emphasizing Outlines
33
Adjusting the Screen Display
34
Setting the Calendar
35
Setting the Time Zone
35
Setting the Clock
35
Basic Shooting Operations
36
Preparing for Recording
36
SD Memory Card ACCESS Lamp
36
Shooting in Auto Mode
37
Checking Photos Taken (REC CHECK)
38
Using the Zoom Function
39
Digital Zoom Function
39
Using the Setup Menus
40
Using the Menus
40
Using the Function Menu
41
Initializing the Menu Settings
41
Setup Menu Structure
42
CAMERA Mode Menu
42
PHOTO Mode Menu
43
DV in Mode Menu
43
PB Mode Menu
44
Thumbnail Menu (DV Mode Only)
44
Specifications
45
Index
48
Advertisement
Panasonic AVCCAM AG-HMC80P Operating Instructions Manual (50 pages)
Brand:
Panasonic
| Category:
Camcorder
| Size: 6.05 MB
Table of Contents
Operating Instructions
1
Read this First
2
Declaration of Conformity
3
Fcc Warning
3
Important Safety Instructions
4
Table of Contents
7
Operating Precautions
8
Precaution for Use
10
SD Memory Cards Compatible with this Product
12
(SD Speed Class 6)
14
SDHC Memory Cards
14
Compatibility of Recorded Video
15
About AVCHD
15
About DV
15
Outline
16
Using this Camera
16
Shooting and Playing Back with this Camera
16
Editing and Saving with External Devices
17
Accessories
18
Optional Accessories
19
Using Tele Conversion Lenses, Wide Conversion Lenses
19
Description of Parts
20
Front Side and Rear Side
20
Right Side
21
Left Side
22
Remote Control
23
Preparation
24
Recharging the Battery
24
Recharging
24
Power Sources
26
Using the Battery
26
Using the AC Adaptor
26
Adjusting the Grip Belt
27
Attaching the Shoulder Strap
27
Detaching and Attaching the Lens Hood
28
Fitting the Eye Cup
28
The Remote Control
29
Insert the Battery
29
Remote Control Usable Range
29
Basic Operations
30
Turn On/Off the Camera
30
Tally Lamp
30
Using the Cursor Button
31
Basic Operations
31
Menu Screen Operations
31
Playback Mode (PB Mode Only)
31
Using the Viewfinder
32
Using as a LCD Monitor
33
Emphasizing Outlines
33
Adjusting the Screen Display
34
Setting the Calendar
35
Setting the Time Zone
35
Setting the Clock
35
Basic Shooting Operations
36
Preparing for Recording
36
SD Memory Card ACCESS Lamp
36
Shooting in Auto Mode
37
Checking Photos Taken (REC CHECK)
38
Using the Zoom Function
39
Digital Zoom Function
39
Using the Setup Menus
40
Using the Menus
40
Using the Function Menu
41
Initializing the Menu Settings
41
Setup Menu Structure
42
CAMERA Mode Menu
42
PHOTO Mode Menu
43
DV in Mode Menu
43
PB Mode Menu
44
Thumbnail Menu (DV Mode Only)
44
Specifications
45
Index
48
Advertisement
Related Products
Panasonic AG-HMC80PJ
Panasonic AVCCAM AG-HMC80 Series
Panasonic AVCCAM AG-HMC81E
Panasonic AVCCAM AG-HMC81
Panasonic AG HMC150 - AVCCAM Camcorder - 1080p
Panasonic AGHMC40PJU
Panasonic AVCCAM AG-HMC150P
Panasonic AG-HMC40PJ
Panasonic AG-HMC150
Panasonic AG-HMC70
Panasonic Categories
Camcorder
Air Conditioner
TV
Digital Camera
Cordless Telephone
More Panasonic Manuals
Login
Sign In
OR
Sign in with Facebook
Sign in with Google
Upload manual
Upload from disk
Upload from URL