Sign In
Upload
Manuals
Brands
NEC Manuals
Monitor
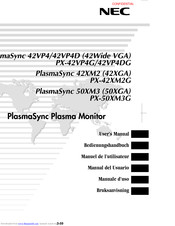
PlasmaSync PX-50XM3G (50XGA)
NEC PlasmaSync PX-50XM3G (50XGA) Manuals
Manuals and User Guides for NEC PlasmaSync PX-50XM3G (50XGA). We have
2
NEC PlasmaSync PX-50XM3G (50XGA) manuals available for free PDF download: Model Information, User Manual
NEC PlasmaSync PX-50XM3G (50XGA) Model Information (108 pages)
Brand:
NEC
| Category:
Monitor
| Size: 1.15 MB
Table of Contents
Table of Contents
9
How to Attach Options to the Plasma Monitor
10
Ventilation Requirements for Enclosure Mounting
10
Safety Metal Fittings
10
Introduction
11
Introduction to the Plasmasync Plasma Monitor
11
The Features You'll Enjoy Include
11
Contents of the Package
11
Options
11
Part Names and Function
12
Front View
12
Rear View/ Terminal Board
13
Remote Control
14
Battery Installation and Replacement
15
Using the Wired Remote Control Mode
16
Operating Range
16
Handling the Remote Control
16
Installation
17
Connecting Your PC or Macintosh Computer
18
Connections with Equipment that Have a Digital Interface
18
Connecting Your Document Camera
18
Connecting Your VCR or Laser Disc Player
18
Connecting Your DVD Player
18
Pin Assignments and Signal Levels for 15 Pin RGB (Analog
19
Creating a Video Wall
20
Cable Management
20
Basic Operations
21
Power
21
To Turn the Unit on and off
21
Volume
21
To Adjust the Sound Volume
21
Mute
21
To Cancel the Sound
21
Display
21
To Check the Settings
21
Digital Zoom
21
Off Timer
22
To Set the off Timer
22
To Check the Remaining Time
22
To Cancel the off Timer
22
WIDE Operations
23
Wide Screen Operation (Manual
23
When Viewing Videos or Digital Video Discs
23
Wide Screen Operation with Computer Signals
24
When "PICTURE SIZE" Is Set to "OFF
24
OSM Controls
25
Menu Operations
25
Menu Tree
26
Picture Settings Menu
28
Adjusting the Picture
28
Setting the Picture Mode According to the Brightness of the Room
28
Reducing Noise in the Picture
29
Setting the Color Temperature
29
Adjusting the Color to the Desired Level
29
Changing the Gamma Curve
30
Making the Low Tone Adjustments
30
Adjusting the Colors
31
Audio Settings Menu
31
Adjusting the Treble, Bass and Left/Right Balance and Audio Input Select
31
Setting the Allocation of the Audio Connectors
32
Image Adjust Settings Menu
32
Adjusting the Position, Size, Fine Picture, Picture Adj
32
Option1 Settings Menu
33
Setting the On-Screen Menu
33
Setting the BNC Connectors
34
Setting the RGB1 Connector
34
Setting a Computer Image to the Correct RGB Select Screen
34
Setting High Definition Images to the Suitable Screen Size
35
Setting the Input Skip
36
Resetting to the Default Values
36
Option2 Settings Menu
37
Setting the Power Management for Computer Images
37
POWER/STANDBY Indicator
37
Setting the Picture to Suit the Movie
37
Reducing Burn-In of the Screen
38
Setting the Gray Level for the Sides of the Screen
41
Setting the Screen for S1/S2 Video Input
42
Setting the Picture Size for RGB Input Signals
42
Option3 Settings Menu
43
Using the Timer
43
Setting the Power on Mode
44
Enabling/Disabling the Front Panel Controls
45
Enabling/Disabling Remote Control Wireless Transmission
45
Loop out Setting
46
ID Number Setting
46
Video Wall Setting
47
Advanced OSM Settings Menu
50
Setting the Menu Mode
50
Language Settings Menu
50
Setting the Language for the Menus
50
Color System Settings Menu
51
Setting the Video Signal Format
51
Source Information Menu
51
Checking the Frequencies, Polarities of Input Signals, and Resolution
51
External Control
52
Troubleshooting
53
Table of Contents
63
How to Attach Options to the Plasma Monitor
64
Ventilation Requirements for Enclosure Mounting
64
Introduction
65
Introduction to the Plasmasync Plasma Monitor
65
The Features You'll Enjoy Include
65
Contents of the Package
65
Options
65
Part Names and Function
66
Front View
66
Rear View/ Terminal Board
67
Remote Control
68
Battery Installation and Replacement
69
Using the Wired Remote Control Mode
70
Operating Range
70
Handling the Remote Control
70
Installation
71
Connecting Your PC or Macintosh Computer
72
Connections with Equipment that Have a Digital Interface
72
Connecting Your Document Camera
72
Connecting Your VCR or Laser Disc Player
72
Connecting Your DVD Player
72
Pin Assignments and Signal Levels for 15 Pin RGB (Analog
73
Creating a Video Wall
74
Cable Management
74
Basic Operations
75
Power
75
To Turn the Unit on and off
75
Volume
75
To Adjust the Sound Volume
75
Mute
75
To Cancel the Sound
75
Display
75
To Check the Settings
75
Digital Zoom
75
Off Timer
76
To Set the off Timer
76
To Check the Remaining Time
76
To Cancel the off Timer
76
WIDE Operations
77
Wide Screen Operation (Manual
77
When Viewing Videos or Digital Video Discs
77
Wide Screen Operation with Computer Signals
78
When "PICTURE SIZE" Is Set to "OFF
78
OSM Controls
79
Menu Operations
79
Menu Tree
80
Picture Settings Menu
82
Adjusting the Picture
82
Setting the Picture Mode According to the Brightness of the Room
82
Reducing Noise in the Picture
83
Setting the Color Temperature
83
Adjusting the Color to the Desired Level
83
Changing the Gamma Curve
84
Making the Low Tone Adjustments
84
Adjusting the Colors
85
Audio Settings Menu
85
Adjusting the Treble, Bass and Left/Right Balance and Audio Input Select
85
Setting the Allocation of the Audio Connectors
86
Image Adjust Settings Menu
86
Adjusting the Position, Size, Fine Picture, Picture Adj
86
Option1 Settings Menu
87
Setting the On-Screen Menu
87
Setting the BNC Connectors
88
Setting the RGB1 Connector
88
Setting a Computer Image to the Correct RGB Select Screen
88
Setting High Definition Images to the Suitable Screen Size
89
Setting the Input Skip
90
Resetting to the Default Values
90
Option2 Settings Menu
91
Setting the Power Management for Computer Images
91
POWER/STANDBY Indicator
91
Setting the Picture to Suit the Movie
91
Reducing Burn-In of the Screen
92
Setting the Gray Level for the Sides of the Screen
95
Setting the Screen for S1/S2 Video Input
96
Setting the Picture Size for RGB Input Signals
96
Option3 Settings Menu
97
Using the Timer
97
Setting the Power on Mode
98
Enabling/Disabling the Front Panel Controls
99
Enabling/Disabling Remote Control Wireless Transmission
99
Loop out Setting
100
ID Number Setting
100
Video Wall Setting
101
Advanced OSM Settings Menu
104
Setting the Menu Mode
104
Language Settings Menu
104
Setting the Language for the Menus
104
Color System Settings Menu
105
Setting the Video Signal Format
105
Source Information Menu
105
Checking the Frequencies, Polarities of Input Signals, and Resolution
105
External Control
106
Troubleshooting
107
Advertisement
NEC PlasmaSync PX-50XM3G (50XGA) User Manual (58 pages)
Brand:
NEC
| Category:
Monitor
| Size: 0.77 MB
Table of Contents
Important Information
3
Table of Contents
5
How to Attach Options to the Plasma Monitor
6
Introduction
7
Introduction to the Plasma Monitor
7
The Features You'll Enjoy Include
7
Contents of the Package
7
Options
7
Part Names and Function
8
Front View
8
Rear View/ Terminal Board
9
Remote Control
10
Battery Installation and Replacement
11
Using the Wired Remote Control Mode
12
Operating Range
12
Handling the Remote Control
12
Installation
13
Connecting Your PC or Macintosh Computer
14
Connections with Equipment that Have a Digital Interface
14
Connecting Your Document Camera
14
Connecting Your VCR or Laser Disc Player
14
Connecting Your DVD Player
14
Pin Assignments and Signal Levels for 15 Pin RGB (Analog
15
Creating a Video Wall
16
Cable Management
16
Basic Operations
17
Power
17
To Turn the Unit on and off
17
Volume
17
To Adjust the Sound Volume
17
Mute
17
To Cancel the Sound
17
Display
17
To Check the Settings
17
Digital Zoom
17
Off Timer
18
To Set the off Timer
18
To Check the Remaining Time
18
To Cancel the off Timer
18
WIDE Operations
19
Wide Screen Operation (Manual
19
When Viewing Videos or Digital Video Discs
19
When Viewing a High Definition Video Source
19
Wide Screen Operation with Computer Signals
20
When "PICTURE SIZE" Is Set to "OFF
20
OSM Controls
21
Menu Operations
21
Picture Settings Menu
24
Adjusting the Picture
24
Setting the Picture Mode According to the Brightness of the Room
24
Reducing Noise in the Picture
25
Setting the Color Temperature
25
Adjusting the Color to the Desired Level
25
Changing the Gamma Curve
26
Making the Low Tone Adjustments
26
Adjusting the Colors
27
Audio Settings Menu
27
Adjusting the Treble, Bass and Left/Right Balance and Audio Input Select
27
Setting the Allocation of the Audio Connectors
28
Image Adjust Settings Menu
28
Adjusting the Position, Size, Fine Picture, Picture Adj
28
Option1 Settings Menu
29
Setting the On-Screen Menu
29
Setting the BNC Connectors
30
Setting the RGB1 Connector
30
Setting a Computer Image to the Correct RGB Select Screen
31
Setting High Definition Images to the Suitable Screen Size
31
Setting the Input Skip
32
Resetting to the Default Values
32
Option2 Settings Menu
33
Setting the Power Management for Computer Images
33
POWER/STANDBY Indicator
33
Setting the Picture to Suit the Movie
33
Reducing Burn-In of the Screen
34
Setting the Gray Level for the Sides of the Screen
37
Setting the Picture Size for RGB Input Signals
37
Option3 Settings Menu
38
Using the Timer
38
Setting the Power on Mode
39
Enabling/Disabling the Front Panel Controls
40
Enabling/Disabling Remote Control Wireless Transmission
40
Loop out Setting
41
ID Number Setting
41
Video Wall Setting
42
Advanced OSM Settings Menu
45
Setting the Menu Mode
45
Language Settings Menu
45
Setting the Language for the Menus
45
Color System Settings Menu
46
Setting the Video Signal Format
46
Source Information Menu
46
Checking the Frequencies, Polarities of Input Signals, and Resolution
46
External Control
47
Table of Signals Supported
48
42Wide VGA/42XGA
48
50Xga
50
Supported Resolution
50
Computer Input Signals Supported by this System
50
Troubleshooting
52
Specifications
54
42Wide VGA
54
42Xga
55
50Xga
56
Advertisement
Related Products
NEC PlasmaSync PX-50XM3A
NEC PX-50XM3
NEC PlasmaSync PX-50XM4A
NEC PX-50XM6A
NEC PX-50XM2A
NEC PX-50XM1A
NEC PlasmaSync PX-50XM6G
NEC PX-50XM4
NEC PlasmaSync PX-50XM5
NEC PX-50XM6
NEC Categories
Monitor
Projector
Server
Telephone
Computer Hardware
More NEC Manuals
Login
Sign In
OR
Sign in with Facebook
Sign in with Google
Upload manual
Upload from disk
Upload from URL