Sign In
Upload
Manuals
Brands
Honeywell Manuals
Barcode Reader
1900GSR-2
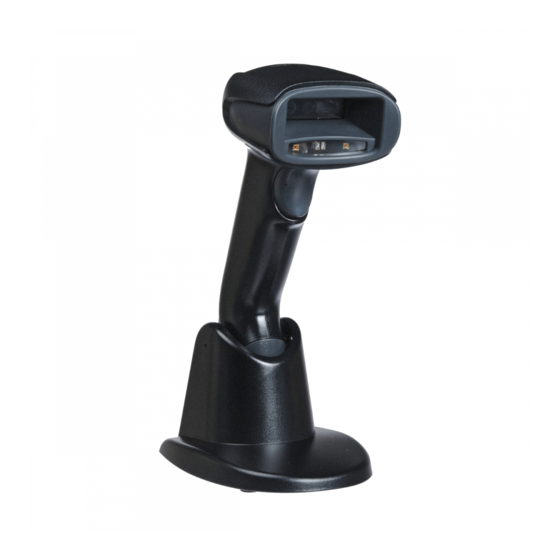
User Manuals: Honeywell 1900GSR-2 Barcode Scanner
Manuals and User Guides for Honeywell 1900GSR-2 Barcode Scanner. We have
2
Honeywell 1900GSR-2 Barcode Scanner manuals available for free PDF download: User Manual, Quick Start Manual
Honeywell 1900GSR-2 User Manual (298 pages)
Area-Imaging Scanner
Brand:
Honeywell
| Category:
Barcode Reader
| Size: 4.05 MB
Table of Contents
Solids and Water Protection
6
Table of Contents
13
Chapter 1 - Getting Started
23
About this Manual
23
Unpacking Your Device
23
Connecting the Device
24
Connecting with USB
24
Connecting with Keyboard Wedge
25
Connecting with RS232 Serial Port
27
Connecting with RS485
28
Reading Techniques
30
Menu Bar Code Security Settings
30
Setting Custom Defaults
31
Resetting the Custom Defaults
31
Resetting the Factory Defaults
32
Chapter 2 - Programming the Interface
33
Introduction
33
Programming the Interface - Plug and Play
33
Keyboard Wedge
33
Laptop Direct Connect
33
RS232 Serial Port
34
Rs485
34
RS485 Packet Mode
35
USB IBM Surepos
36
USB PC or Macintosh Keyboard
36
Usb Hid
37
USB Serial
37
Verifone ® Ruby Terminal Default Settings
38
Gilbarco ® Terminal Default Settings
39
Honeywell Bioptic Aux Port Configuration
39
Datalogic™ Magellan © Bioptic
39
Aux Port Configuration
39
NCR Bioptic Aux Port Configuration
40
Wincor Nixdorf Terminal Default Settings
40
Wincor Nixdorf Beetle™ Terminal Default Settings
41
Keyboard Country Layout
42
Keyboard Style
49
Keyboard Conversion
50
Control Character Output
51
Keyboard Modifiers
51
Keyboard Function Relationships
51
RS232 Baud Rate
54
RS232 Word Length: Data Bits, Stop Bits, and Parity
55
RS232 Receiver Time-Out
56
RS232 Handshaking
56
RS232 Timeout
57
Xon/Xoff
57
Ack/Nak
57
Scanner to Bioptic Communication
58
Scanner-Bioptic Packet Mode
58
Scanner-Bioptic ACK/NAK Mode
59
Scanner-Bioptic ACK/NAK Timeout
59
Chapter 3 - Cordless System Operation
61
How the Cordless Charge Base/Access Point Works
61
Linking the Scanner to a Charge Base
61
Linking the Scanner to an Access Point
62
Communication between the Cordless System and the Host
62
RF (Radio Frequency) Module Operation
63
System Conditions
63
Linking Process
63
Scanner Is out of Range
64
Scanner Is Moved Back into Range
64
Out of Range and Back into Range with Batch Mode on
64
Page Button
64
About the Battery
64
Charging Information
65
Battery Recommendations
65
Proper Disposal of the Battery
66
Beeper and LED Sequences and Meaning
66
Scanner LED Sequences and Meaning
67
Base/Access Point LED Sequences and Meaning
67
Base Power Communication Indicator
68
Reset Scanner
68
Scanning While in Base Cradle
68
Paging
69
Paging Mode
69
Paging Pitch
69
Error Indicators
69
Beeper Pitch - Base Error
69
Number of Beeps - Base Error
70
Scanner Report
70
Scanner Address
71
Base or Access Point Address
71
Scanner Modes
71
Charge Only Mode
71
Linked Modes
72
Unlinking the Scanner
73
Override Locked Scanner
73
Out-Of-Range Alarm
73
Alarm Sound Type
74
Flexible Power Management
75
Batch Mode
76
Batch Mode Beep
77
Batch Mode Storage
77
Batch Mode Quantity
78
Batch Mode Output Order
80
Delete Last Code
80
Clear All Codes
80
Transmit Records to Host
81
Batch Mode Transmit Delay
81
Multiple Scanner Operation
81
Scanner Name
82
Application Work Groups
84
Application Work Group Selection
85
Resetting the Factory Defaults: All Application Work Groups
85
Resetting the Custom Defaults: All Application Work Groups
86
Using the Scanner with Bluetooth Devices
86
Pcs/Laptops
86
Pdas/Mobility Systems Devices
87
Changing the Scanner's Bluetooth PIN Code
87
Minimizing Bluetooth/Ism Band Network Activity
87
Auto Reconnect Mode
88
Maximum Link Attempts
89
Relink Time-Out
90
Bluetooth/Ism Network Activity Examples
90
Host Command Acknowledgment
91
Chapter 4 - Input/Output Settings
95
Power up Beeper
95
Beep on BEL Character
95
Trigger Click
96
Good Read and Error Indicators
96
Beeper - Good Read
96
Beeper Volume - Good Read
97
Beeper Pitch - Good Read
97
Beeper Pitch - Error
98
Beeper Duration - Good Read
98
LED - Good Read
98
Number of Beeps - Good Read
99
Number of Beeps - Error
99
Good Read Delay
100
User-Specified Good Read Delay
100
Manual/Serial Trigger Modes
100
Manual Trigger
100
Serial Trigger
101
Presentation Mode
103
Presentation LED Behavior after Decode
103
Presentation Sensitivity
103
In-Stand Sensor Mode
104
Streaming Presentation™ Mode
104
Streaming Presentation In-Stand Programming
105
Mobile Phone Read Mode
105
Image Snap and Ship
106
Hands Free Time-Out
106
Reread Delay
106
User-Specified Reread Delay
107
Illumination Lights
107
Aimer Delay
108
User-Specified Aimer Delay
108
Scanner Time-Out
108
Aimer Mode
109
Centering
109
Preferred Symbology
111
High Priority Symbology
111
Low Priority Symbology
112
Preferred Symbology Time-Out
112
Preferred Symbology Default
112
Output Sequence Overview
113
Require Output Sequence
113
Output Sequence Editor
113
To Add an Output Sequence
113
Other Programming Selections
114
Output Sequence Editor
115
Partial Sequence
115
Require Output Sequence
116
Multiple Symbols
116
No Read
117
Video Reverse
118
Chapter 5 - Data Editing
119
Prefix/Suffix Overview
119
To Add a Prefix or Suffix
119
To Clear One or All Prefixes or Suffixes
120
To Add a Carriage Return Suffix to All Symbologies
121
Prefix Selections
121
Suffix Selections
122
Function Code Transmit
122
Intercharacter, Interfunction, and Intermessage Delays
122
Intercharacter Delay
123
User Specified Intercharacter Delay
123
Interfunction Delay
124
Intermessage Delay
124
Chapter 6 - Data Formatting
125
Data Format Editor Introduction
125
To Add a Data Format
125
Symbology Chart
126
Other Programming Selections
127
Terminal ID Table
128
Data Format Editor Commands
128
ASCII Conversion Chart (Code Page 1252)
129
Move Commands
129
Search Commands
130
Miscellaneous Commands
131
Data Formatter
132
Data Format Non-Match Error Tone
133
Primary/Alternate Data Formats
134
Single Scan Data Format Change
134
Chapter 7 - Symbologies
138
All Symbologies
138
Message Length Description
138
Codabar
139
Codabar Concatenation
140
Codabar Message Length
141
Code 39
142
Code 39 Append
143
Code 39 Message Length
143
Code 32 Pharmaceutical (PARAF)
144
Code Page Mapping of Printed Barcodes
145
Full ASCII
145
Code 39 Code Page
145
Interleaved 2 of 5
146
Interleaved 2 of 5 Message Length
147
Nec 2 of
148
Check Digit
148
Code 93
150
Code 93 Code Page
150
Straight 2 of 5 Industrial (Three-Bar Start/Stop)
151
Straight 2 of 5 IATA (Two-Bar Start/Stop)
152
Matrix 2 of 5
153
Code 11
154
Check Digits Required
154
Code 128
155
ISBT 128 Concatenation
155
Code 128 Code Page
156
Gs1-128
157
Telepen
158
Upc-A
159
Upc-A/Ean-13
161
With Extended Coupon Code
161
Upc-E0
162
Upc-E1
165
Ean/Jan-13
165
ISBN Translate
167
Ean/Jan-8
168
Msi
170
Msi Check Character
170
Msi Message Length
171
GS1 Databar Omnidirectional
172
GS1 Databar Limited
172
GS1 Databar Expanded
173
Trioptic Code
174
Codablock a
174
Codablock F
176
Pdf417
177
Micropdf417
178
GS1 Composite Codes
179
UPC/EAN Version
179
GS1 Emulation
180
TCIF Linked Code 39 (TLC39)
181
QR Code
181
Data Matrix
183
Maxicode
184
Aztec Code
185
Chinese Sensible (Han Xin) Code
186
Postal Codes - 2D
187
Single 2D Postal Codes
187
Combination 2D Postal Codes
188
Postal Codes - Linear
190
China Post (Hong Kong 2 of 5)
190
Korea Post
192
Chapter 8 - Imaging Commands
193
Single-Use Basis
193
Command Syntax
193
Image Snap - IMGSNP
194
IMGSNP Modifiers
194
Image Ship - IMGSHP
197
IMGSHP Modifiers
197
Intelligent Signature Capture - IMGBOX
206
Signature Capture Optimize
206
IMGBOX Modifiers
207
RF Default Imaging Device
211
Chapter 9 - Interface Keys
213
Keyboard Function Relationships
213
Supported Interface Keys
215
Chapter 10 - Utilities
221
To Add a Test Code I.D. Prefix to All Symbologies
221
Show Decoder Revision
221
Show Scan Driver Revision
221
Show Software Revision
221
Show Data Format
222
Test Menu
222
Totalfreedom
222
Application Plug-Ins (Apps)
223
Ezconfig Introduction
223
Installing Ezconfig from the Web
224
Chapter 11 - Serial Programming Commands
227
Conventions
227
Menu Command Syntax
227
Query Commands
228
Responses
229
Trigger Commands
230
Resetting the Custom Defaults
230
Menu Commands
231
Chapter 12 - Product Specifications
267
Scanner Product Specifications
267
Scanner Product Specifications
268
CCB01-010BT Charge Base Product Specifications
269
Standard Cable Pinouts
270
Keyboard Wedge
270
Serial Output
271
RS485 Output
272
Chapter 13 - Maintenance
275
Repairs
275
Maintenance
275
Cleaning the Device
275
Inspecting Cords and Connectors
275
Replacing Cables in Corded Scanners
275
Replacing an Interface Cable
276
Replacing Cables and Batteries in Cordless Systems
276
Replacing an Interface Cable in a Base
276
Changing a Scanner Battery
277
Troubleshooting a Xenon Scanner
277
Troubleshooting a Cordless System
278
Troubleshooting a Base
278
Troubleshooting a Cordless Scanner
279
Customer Support
281
Technical Assistance
281
Online Technical Assistance
282
Product Service and Repair
282
Online Product Service and Repair Assistance
283
Limited Warranty
283
Appendix A - Reference Charts
285
Symbology Chart
285
Code Page Mapping of Printed Barcodes
290
Sample Symbols
293
Programming Chart
296
Chapter 14 - Customer Support
285
Advertisement
Honeywell 1900GSR-2 Quick Start Manual (17 pages)
Corded Imaging Scanner
Brand:
Honeywell
| Category:
Scanner
| Size: 0.44 MB
Table of Contents
Getting Started
2
Power Supply Assembly (if Included)
2
RS232 Serial Port
4
Keyboard Wedge
5
Reading Techniques
6
Standard Product Defaults
6
USB Serial
7
Keyboard Country
7
Turbo Mode
9
Add Code ID Prefix to All Symbologies
10
Function Code Transmit
11
Poor Quality PDF Codes
11
Data Format Editor Instructions
12
Programming Chart
13
Advertisement
Related Products
Honeywell 1900GSR-2USB
Honeywell 1900GHD-2
Honeywell Xenon 1900H
Honeywell 1900GHD
Honeywell Granit 1910i
Honeywell Xenon 1980i
Honeywell Xenon 1981i
Honeywell Granit XP 1990iSR
Honeywell Granit XP 1990iXR
Honeywell Granit XP 1991iSR
Honeywell Categories
Thermostat
Controller
Control Unit
Security Camera
Accessories
More Honeywell Manuals
Login
Sign In
OR
Sign in with Facebook
Sign in with Google
Upload manual
Upload from disk
Upload from URL