Sign In
Upload
Manuals
Brands
Hitachi Manuals
Desktop
65
Hitachi 65 Manuals
Manuals and User Guides for Hitachi 65. We have
1
Hitachi 65 manual available for free PDF download: Instruction Manual
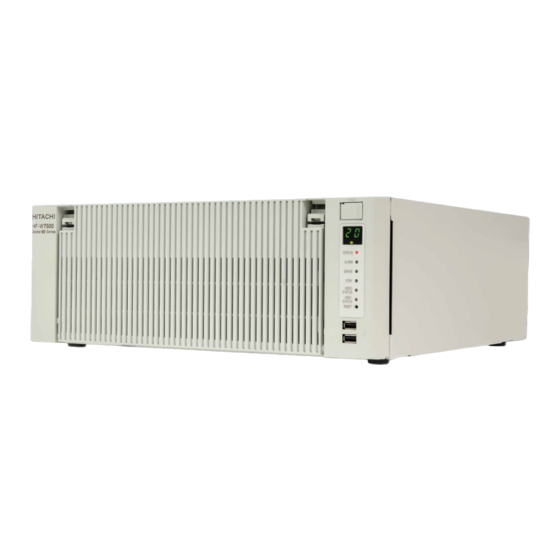
Hitachi 65 Instruction Manual (281 pages)
INDUSTRIAL COMPUTER
Brand:
Hitachi
| Category:
Desktop
| Size: 5.11 MB
Table of Contents
Important Notifications
6
Safety Instructions
9
Precautions
32
Precautions about the Equipment
32
Network
37
Display Screen
38
HARD DISKS DRIVES (Hdds
39
Dvds
40
Extension Boards
42
Usb Device
42
Bios Settings
43
Lithium Batteries
43
Rack-Mounting Metal Fittings
43
The Optical Mouse
43
Maintenance Services
44
Windows® Settings
44
Table of Contents
50
Chapter 1 Getting Started
57
Scope
57
Installing an Extension Board
57
Role of an Operator
57
Work Flow
59
Name and Function of each Part
60
Figure 1-1 Name of each Part (Front View)
61
Figure 1-2 Name of each Part (Rear View)
62
Figure 1-3 Physical Configuration Inside Equipment
63
Table 1-2 Environment
69
Installation Environment
70
Installation
70
Figure 1-4 Operation and Service Clearance (Top View)
71
Figure 1-5 Installation Clearance
71
Table 1-3 Dimension, Service Clearance, and Installation Clearance
71
Figure 1-6 Exterior View (Horizontal Installation on the Desktop)
72
Figure 1-7 Exterior View (Rack Mount)
72
Figure 1-8 Exterior View (Vertical Installation)
74
Hardware Connection
75
Power Cord
76
Figure 1-9 Hardware Connection
76
Table 1-4 Power Cord and Plug Identification
79
Chapter 2 Operation
81
Before Turning on the Power
81
Starting the Equipment
82
Shutting down the Equipment
83
Power Shutdown
84
Emergency Shutdown
84
DVD Drive
85
Inserting an Optical Disc
86
Ejecting an Optical Disc
86
Figure 2-1 DVD Drive (Front View)
86
Controlling the Power Using the LAN
87
Enabling the WOL (Wake on LAN) Function
87
Turning on the Power Using the LAN
89
Setting up the LAN Interface
91
Table 2-1 Specification of the LAN Setting
91
Setting up the Screen
103
Chapter 3 Setup
109
Setup Procedure When You Turn on the Power for the First Time
109
Setting up Windows® 10
109
Setting up Windows Server® 2019
114
Configuring Basic Settings after os Setup
118
Basic Settings for Windows® 10 and Windows Server® 2019
118
Chapter 4 Precautions While the os Is Running
123
Event Log Entries During Setup
123
Table 4-1 Error / Warning Eventlog (During the os Setup)
123
Event Log Entries While the os Is Running
124
Table 4-2 Error / Warning Eventlog (While Windows® 10 and Windows Server® 2019 Running)
124
Scheduled Functions by Default
126
Security Enhancement Function
130
Factory-Shipped Network Settings
130
Product Activation in Windows® 10
131
If Mouse Operations Do Not Work on the Sign-In Screen
131
Display of Device Manager
132
Chapter 5 Specifications
133
Equipment Specifications
133
Table 5-1 Common Specifications List
133
Table 5-2 Individual Specifications List
135
Table 5-3 os Type List
136
Table 5-4 Accessories List
136
Table 5-5 Option Specifications
136
Table 5-6 Supported Resolutions List
137
Table 5-7 Main Memory Constitution List
137
Table 5-8 Optional LAN Adapter Specifications List
137
Table 5-9 Maximum Current Specifications
138
Table 5-10 Maximum Current Specifications by Function
138
Memory Space
139
I/O Space
140
Table 5-11 I/O Space List
140
Interrupts List
141
Table 5-12 Interrupts List
141
Serial Port Settings
142
Table 5-13 Interrupts List (IRQ Assignment When the APIC Is Disabled)
142
Table 5-14 Serial Port Default Settings
142
BIOS Setup
143
Table 5-15 BIOS Setup Menu Operation Key
143
Table 5-16 BIOS Setup Menu List
144
Boot Menu
148
Table 5-17 Boot Menu Operation Key
148
Table 5-18 Boot Menu List
148
Hardware System Clock
149
Table 5-19 Hardware System Clock Specification
149
Interface Specifications
150
Connector Specifications
150
External Control Specifications
155
Table 5-20 External Control I/O Port Specifications
155
Table 5-21 List of External Control I/O Signals
156
External Interface Cable Length Specifications
159
Table 5-22 External Interface Cable Length Specifications
159
Chapter 6 Checkup and Maintenance
161
Daily Checkup
161
Periodic Checkup
164
Table 6-1 Periodic Checkup
164
Installing and Removing Components
165
Types and Locations of Installed Components
165
Figure 6-1 Types and Locations of Installed Components
165
Before Installing or Removing Components
166
Installing and Removing the Cover of the Equipment
167
Figure 6-2 Removing the Cover of the Equipment
167
Installing and Removing an Extension Board
168
Table 6-2 Extension Boards List
169
Figure 6-3 Installing an Extension Board
171
Installing and Removing a Main Memory
172
Figure 6-4 Removing the SATA Cables
173
Figure 6-5 Installing a Main Memory
174
Table 6-3 Main Memory Combination List
174
Installing and Removing an HDD
175
Figure 6-6 Opening the Front Cover
176
Figure 6-7 Removing an HDD
176
Figure 6-8 Removing a Drive Bay 3 HDD
177
Installing and Removing a DVD Drive
178
Figure 6-9 Removing a DVD Cover
178
Figure 6-10 Removing the Screw Fixing the DVD Drive
179
Figure 6-11 Removing the DVD Drive
179
Attaching and Removing Rack-Mounting Metal Fittings (Option)
180
Figure 6-12 Attaching Rack-Mounting Metal Fittings
181
Attaching and Removing Rubber Feet
182
Figure 6-13 Removing a Rubber Foot
182
Figure 6-14 Removing Cover Screws
183
Replacing a Dust Filter
184
Figure 6-15 Replacing a Dust Filter
184
Installing and Removing a Lithium Battery
185
Figure 6-16 Removing a Lithium Battery
186
Enabling the Remote Power on Function
187
Table 6-4 Remote Power on Setting
187
Figure 6-17 Removing a Jumper Socket
188
Chapter 7 Restoring the Factory-Shipped Condition Usinga Recovery DVD
189
Overview of Restoration Procedure
189
Preparation
190
Restoring the System Drive Back to the Factory-Shipped Condition
191
Procedure for Restoring the System Drive Back to the Factory-Shipped Condition
191
Errors Generated During a Restoration Process and Their Corrective Actions
199
Table 7-1 List of Errors of the Recovery Operation
199
Chapter 8 Maintenance Operations
200
Overview
200
Table 8-1 RAS Features Overview
200
Collecting a Memory Dump
205
Table 8-2 Error that Trigger a Memory Dump
205
Memory Dump Confirmation Messages
207
Configuring the Settings Related to a Memory Dump
208
Startup Suppression on Serious Failure Detection
210
Maintenance Operation Commands
211
Table 8-3 Maintenance Operation Commands
211
Log Information Collection Command (Logsave)
212
Table 8-4 Information Saved by Logsave
212
Table 8-5 Error Messages of the Logsave Command
213
Memory Dump File Copy Command (Mdump)
214
Table 8-6 Error Messages of the Mdump Command
215
Disk Area Allocation Command for Saving a Memory Dump (Createdmp)
216
Table 8-7 Error Messages of the Createdmp Command
217
RAS Information Display Command (Getrasinfo)
218
Table 8-8 Information Displayed by the Getrasinfo Command
218
Table 8-9 Error Messages of the Getrasinfo Command
227
Chapter 9 Troubleshooting
229
List of Problems
229
Problems that Occur before the os Startup
229
Problems that Occur after the os Startup
230
Countermeasures
231
Problems that Occur before the os Startup
231
Problems that Occur after the os Startup
235
STOP Error Codes
248
Table 9-1 STOP Error Codes
248
Table 9-2 Action List for STOP Error Code 0X80
249
Event Log
250
Table 9-3 Event Log Entries Unique to the Equipment
251
Checking the System Load by Using Performance Monitor
255
Table 9-4 Performance Counters Related to the Performance of the Equipment
257
Digital LED for Status Indication
259
POST Messages
259
Table 9-5 POST Codes and Stop Factor/Action
259
Displaying a Hardware Status Code
261
Table 9-6 Hardware Status Code and Cause/Action
261
Chapter 10 Raid1
262
What Is the RAID1
262
Setup
264
Overview of Setup
264
Setting up a New RAID1
264
Checking the Status of the RAID1
265
Checking by the Status Lamps
265
Figure 10-1 HDD Status Lamp
265
Checking by the Hardware Status Window
266
Recovery from Failure
267
Detecting a Failure
267
Table 10-1 Action List of When the RAID Detected Failure
267
Recovery from a Failure in One Drive
268
Recovery from Failure in both Drives
275
Preventive Maintenance
276
Creating a Backup Drive
276
Recovery Using a Backup Drive
277
Performing Periodical Drive Replacement
278
Appendix Handling Replaceable Components
281
Advertisement
Advertisement
Related Products
Hitachi 65F59 - Digital Projection HDTV
Hitachi 65F710
Hitachi 65SWX20B - 16:9 Projection HDTV-Ready TV
Hitachi 65TWX20B
Hitachi 65S500
Hitachi 65S700
Hitachi 65T500
Hitachi 65X500
Hitachi 65XWX20B
Hitachi 65G500
Hitachi Categories
Projector
Air Conditioner
Drill
Power Tool
TV
More Hitachi Manuals
Login
Sign In
OR
Sign in with Facebook
Sign in with Google
Upload manual
Upload from disk
Upload from URL