Sign In
Upload
Manuals
Brands
Canon Manuals
Projector
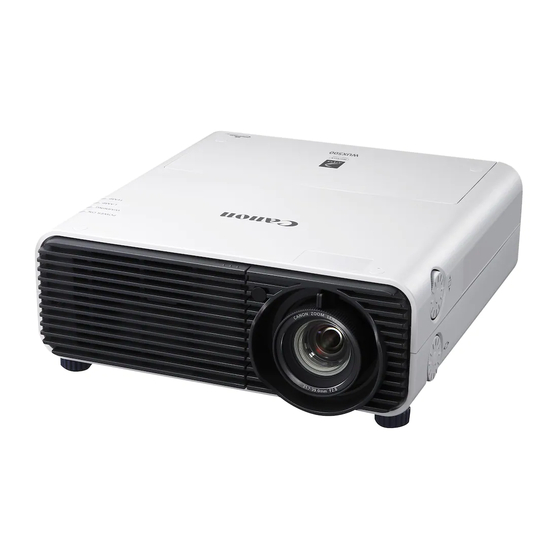
WUX500
Canon WUX500 Manuals
Manuals and User Guides for Canon WUX500. We have
1
Canon WUX500 manual available for free PDF download: User Manual
Canon WUX500 User Manual (190 pages)
Brand:
Canon
| Category:
Projector
| Size: 17.37 MB
Table of Contents
How to Use this Manual
2
Table of Contents
3
Safety Instructions
5
Safety Precautions
6
Caution on Hanging from the Ceiling
6
AC Power Cord Requirement
9
Federal Communication Commission Notice
10
Precautions for Use
12
Installation and Handling Precautions
13
Precautions on the Lamp
14
Precautions for the Batteries of the Remote Control
15
For Safe Use
17
Before Installation
18
Precautions When Carrying/Shipping the Projector
18
Precautions for Installation
18
When Using Mounted on the Ceiling
20
Install Facing in the Correct Direction
21
About Trademarks
22
Copyright Notice
22
Software under the Gnu General Public License Version
23
Open Source Software
23
Before Use
24
Projector Highlights
24
Edge Blending
25
Included Accessories
26
Attaching the Lens Cap
26
Part Names
27
Projector
27
Front Side
27
Rear Side
27
Projection Lens
28
Side Control
28
LED Indicators
29
Led Indicator Displays
30
Input Terminal
31
Remote Control
32
Preparing the Remote Control
34
Installing Remote Control Batteries
34
Remote Control Operating Range
35
Basic Guide
37
Installation Procedure
38
Setting up the Projector
38
Floor Installation
38
Positioning the Projector in Front of the Screen
38
Ceiling Mounting or Rear Projection
40
Mounting the Projector on the Ceiling
40
Relationship between Projecting Distance and Image Size
41
Lens Shift Function
41
Connection Procedure
43
Connecting a Computer
43
Connecting AV Equipment
45
Plugging the Projector in
46
Projection Procedure
47
Step 1 Turn the Projector on
47
Adjusting Image
48
When Notebook Computer Screen Does Not Appear
48
When the Language Selection Screen Appears
48
When the Password Input Screen Appears
48
Changing Notebook Computer Screen Output
49
Turning on External Monitor Output
49
Step 2 Select an Input Signal
50
Setting the Display Resolution of the Computer
51
Step 3 Adjust the Image
51
Auto Pc Adjustment
52
Windows Vista
52
Adjusting Image Size
53
Adjusting the Image Position
53
Selecting Screen Aspect
54
Step 4 Select an Aspect Ratio (Screen Aspect) Matching the Screen
54
Types of Aspect Ratios
56
Selecting an Aspect Ratio
57
Step 5 Adjusting Keystone Distortion
58
Corner Adjustment
59
Resetting the Keystone Adjustment
60
Image Modes
61
Step 6 Select the Image Quality (Image Mode)
61
Selecting an Image Mode
62
Step 7 Turn the Projector off
62
Convenient Features
63
Freezing the Picture
63
Temporarily Blacking out an Image
63
Advanced Guide
65
Using Menus
66
Menu Configuration
66
Basic Menu Operations
67
Menu Description
69
Input Settings
69
Input Signal Settings
71
Split Screen
73
Color Space
74
Over Scan
74
Image Adjustment
76
Image Mode
77
Color Adjustment
78
Ambient Light
79
Random Noise Reduction
79
Dynamic Gamma
80
Mpeg Noise Reduction
80
Axis Color Adjust
81
Lamp Mode
82
Install Settings
83
Fan Mode
86
Screen Color
89
Menu Display Time
90
Menu Position
90
Test Pattern
91
System Settings
92
Logo Capture
93
Logo Position
93
No Signal Screen
93
Screen When Blank
93
Key Lock
94
Serial Communication
96
Power Management Mode
97
Direct Power on
98
Other Settings
100
Password Settings
100
Factory Defaults
103
Network Settings
105
Connection Methods
105
Network Connection Overview
105
Wireless LAN (Wi-Fi)
108
Completing Projector Settings
110
Amx Device Discovery
119
Crestron Roomview
119
Completing Computer Settings
120
Specifying an Ip Address
120
Displaying the Network Configuration Screen
122
Resetting the Ip Address Setting of the Computer
122
Setting up the Network
122
Network Setting
124
Setting Errors
135
Error List
137
Controlling the Projector from a Computer
138
Checking Projector Information
140
Advanced Projection
142
Projecting Images on a USB Flash Drive
142
Description of USB File Browser
144
Selecting an Image for Projection
145
Selecting a Drive
145
Operating the Projected Image
145
Selecting a Folder
145
Running a Slideshow of Data Saved in a USB Flash Memory
146
Creating an Image File Folder
146
Setting a Slideshow Interval
146
Using PC-Free Multi Projection
147
Split-Screen Display
150
Projecting from Multiple Projectors at Once (Edge Blending)
151
Basic Instructions
151
Black Level Adjustment
152
Other Information
157
Maintenance
158
Cleaning the Projector and the Air Filter
158
Cleaning the Air Filter
158
Replacing the Air Filter
160
Table of Contents
161
Replacing the Lamp
161
Replacement Lamp
163
Lamp Replacement Procedure
164
If the Lamp Cover Comes off
166
Product Specifications
167
Relationship between Aspect and Screen Aspect
167
Displayed Test Patterns
171
Supported Signal Types
172
External View
176
Pin Assignment
177
Communication Format
177
Troubleshooting
180
LED Indicator Details
180
Symptoms and Solutions
181
You Cannot Turn on the Projector
181
You Cannot Project an Image from the Projector
182
There Is no Sound
183
The Projected Image Is Blurred
184
You Cannot Project an Image Appropriately
185
The Projector Power Turns off
185
You Cannot Operate the Remote Control
186
Index
187
Option
189
Advertisement
Advertisement
Related Products
Canon REALiS WUX5000
Canon WUX500ST
Canon WUX5800
CANON WUX5800Z
Canon WUX10 - REALiS WUXGA LCOS Projector
Canon MARKLL WUX10
Canon WUX6000
Canon WUX6010
Canon WUX450ST
Canon WUX10 MarkII
Canon Categories
Printer
Digital Camera
All in One Printer
Camcorder
Scanner
More Canon Manuals
Login
Sign In
OR
Sign in with Facebook
Sign in with Google
Upload manual
Upload from disk
Upload from URL