Sign In
Upload
Manuals
Brands
Brother Manuals
Sewing Machine
KH-930
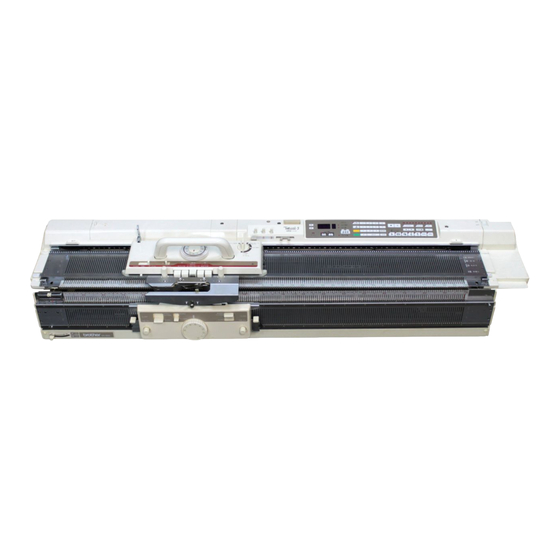
Brother KH-930 Manuals
Manuals and User Guides for Brother KH-930. We have
1
Brother KH-930 manual available for free PDF download: Service Manual
Brother KH-930 Service Manual (57 pages)
electroknit. with kg-88II/89II/93
Brand:
Brother
| Category:
Sewing Machine
| Size: 6.27 MB
Table of Contents
Contents
2
Product Characteristics
3
Product Specifications
3
Quick Troubleshooting Chart
4
Notes of Caution for Checking and Repair
7
Circuitry Configuration
8
Main PC Board
8
Operation PC Board
8
Encoder PC Board
8
Solenoid PC Board
9
Fb100
9
Power
9
Test Programs
10
Test 885 Needle Position Detect Circuit Test
10
Needle Number Indication
13
Memory Test
13
Display Key Test
14
Checking and Repair of the Power System
15
Checking the Power Cords
15
Checking the AC Power Source
15
Replacing the Fuses
15
Checking the Fuses
16
Checking Output Voltage
16
Checking the Needle Selector
17
Checking with the Power Switch Turned off
17
Checking with the Power Switch Turned on
17
Checking with the Solenoid on
17
Checking the Solenoid
18
Checking Needle Selection by Test Pattern
19
Removing Electrical
20
Electronic Parts and PC Boards
20
Removing the Lithium Battery and the Main PC Board
20
Removing the Operation PC Board
21
Reassembly of the Operation PC Board and the Main PC Board
21
Removing the Encoder PC Board and the Slit Disc
22
Removing the Power Supply Pc Board
23
Removing the Left Position Sensor PC Board
23
Removing the Right Position Sensor PC Board
24
Removing the Filter PC Board
24
Removing the Transformer
25
When "888" Begins to Blink with the Power Switch on
26
Disassembly, Assembly and Adjustment of K Carriage
27
Removing the Cam Button Unit
28
Removing the Handle Lock Spring
28
Removing the Front Slide Plate Spring
28
Removing the Intarsia Level
28
Removing the Connection Plate Spring
29
Removing the Needle Selection Change Spring
29
Removing the K Carriage Sensor Magnet
29
Removing the Carriage Rear Plate
29
Removing the Front Slide Plate
30
Removing the Carriage Front Foot
30
Removing Guide Cam
30
Removing the Tuck Cam
30
Removing the Sub Selection Cam
31
Removing the Needle Selection Cam
31
Removing the Separation Cam
31
Removing the Intarsia Cum
31
Assembling the K Carriage
32
Mounting the Connecting Plate
32
Mounting the Carriage Rear Foot
32
Mounting the Intersia Cam a
32
Mounting the Cam Plate
33
Mounting Valve Cam G
33
Mounting the Sub Selection Cam
33
Mounting the Stitch Cam Guide Plate
34
Mounting Guide Cam B and Valve Cam B
34
Mounting the Valve Cam F Spring
35
Mounting Change Plate B
35
Mounting the Tuck Cap Spring
35
Mounting the Carriage Rear Plate
35
Mounting the Upper Slide Plate
36
Mounting the Front Slide Plate Spring
36
Mounting the Handle Screws
36
Mounting the Knit Reader Tripper and Row Counter Tripper
36
Mounting the Carriage Error
37
Mounting the Stitch Deal
37
Mounting the Carriage Handle
37
Functional Check of the K Carriage
38
Functioning of the Change Knob
38
Functioning of the MC Cam
38
Functioning of the Raising Cam
38
How to Adjust the K Carriage
39
Functioning of the Cam Button Unit
39
Functioning the H.C.I. Knob
39
Front and Rear Adjustment of the Sinker Plate
39
Disassembling the Carriage
40
Removing the I. Carriage Handle
40
Removing the L Carriage Cover
40
Assembling the I. Carriage
42
Mounting the I. Cam
42
Mounting the Handle Setting Base
42
Mounting Valve Cam C
42
Mounting the Release Button
43
Mounting the Change Lever Spring
43
Mounting the Magnet
43
Mounting the Rubber Wheel and the Cam Plate
43
How to Adjust the L. Carriage
44
Adjusting the Horizontal Position of the Plate Spring
44
Adjusting the Vertical Position of the Plate Spring
44
Adjusting the Position of the Needle Transfer Plate
44
Replacing the I. Cam
45
How to Adjust the Sinker Plate Bend
45
Disassembling the Main Body
46
Removing the Panel
46
Removing the Accessory Box Assembly
46
Removing the Main Body
46
Removing the Needle Selector Plate Holder
47
Disassembly of the Needle Selector Unit
47
Removing the Rotary Encoder
47
Assembling the Main Body
48
Mounting the Needle Selector Unit
48
Removing the Rotary Cam Lever
48
Removing the Rotary Cam
48
Mounting the Rotary Cam Lever
49
Mounting the Rotary Encoder
49
Mounting the Needle Selector Plate Holder
50
Mounting the Belt
51
Mounting the Encoder PC Board
52
The Main Body Housing
52
Mounting the Left Belt Cover
52
Mounting the Accessory Box Assembly
52
Adjustment and Check of the Needle Selector Mechanism
53
Adjusting the Card Reader Guide Plate
53
Adjusting the Rotary Cam Position
53
Checking the Needle Selector Mechanism
54
Selector Knob
55
Troubleshooting
56
Advertisement
Advertisement
Related Products
Brother KH-965
Brother KH-900
Brother Model KH--830
Brother Model KHC-820
Brother Electroknit KH-910
Brother KH-588
Brother KE-431C
Brother KE-434B
Brother KE-484C
Brother KE-430FS
Brother Categories
Sewing Machine
All in One Printer
Printer
Label Maker
Fax Machine
More Brother Manuals
Login
Sign In
OR
Sign in with Facebook
Sign in with Google
Upload manual
Upload from disk
Upload from URL