Sign In
Upload
Manuals
Brands
Brother Manuals
Sewing Machine
Innov-is 4000
User Manuals: Brother Innov-is 4000 Sewing Machine
Manuals and User Guides for Brother Innov-is 4000 Sewing Machine. We have
3
Brother Innov-is 4000 Sewing Machine manuals available for free PDF download: Operation Manual, Installation Manual
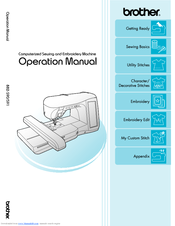
Brother Innov-is 4000 Operation Manual (249 pages)
Computerized Sewing and Embroidery Machine
Brand:
Brother
| Category:
Sewing Machine
| Size: 7.69 MB
Table of Contents
Table of Contents
9
Important Safety Instructions
2
What You Can Do with this Machine
7
How to Use this Manual
8
Table of Contents
9
Adjustments During the Embroidery
10
Names of Machine Parts and Their Functions
12
Machine
12
Needle and Presser Foot Section
13
Embroidery Unit
13
Operation Buttons
14
Included Accessories
14
Options
17
Chapter 1 Getting Ready
18
Turning the Machine On/Off
19
Lcd Screen
20
Key Functions
21
Using the Machine Setting Mode Key
23
Adjusting Screen Brightness
26
Choosing the Display Language
27
Using the Machine Operation Mode Key
28
Using the Pattern Explanation Key
29
Lower Threading
30
Winding the Bobbin
30
Using the Supplemental Spool Pin
30
Using the Spool Pin
32
Setting the Bobbin
33
Pulling up the Bobbin Thread
34
Threading Using the "Automatic Threading" Button
36
Threading Manually
38
Using the Twin Needle Mode
40
Using Threads that Unwind Quickly
42
Using the Spool Net
42
Using the Vertical Spool Pin
42
Upper Threading
36
Changing the Presser Foot
43
Removing the Presser Foot
43
Attaching the Presser Foot
43
Attaching the Walking Foot
44
Changing the Needle
45
About the Needle
47
Fabric/Thread/Needle Combinations
47
Chapter 2 Sewing Basics
48
Sewing
49
Sewing a Stitch
49
Using the Foot Controller
50
Sewing Reinforcement Stitches
51
Sewing Curves
51
Changing Sewing Direction
51
Sewing Heavyweight Fabrics
52
Sewing Lightweight Fabrics
52
If the Fabric Does Not Fit under the Presser Foot
52
If the Fabric Does Not Feed at the Beginning of Stitching
52
Stitch Settings
53
Setting the Stitch Width
53
Setting the Stitch Length
53
Setting the Thread Tension
54
Proper Thread Tension
54
Upper Thread Is too Tight
54
Upper Thread Is too Loose
54
Useful Functions
55
Automatic Reinforcement Stitching
55
Automatic Thread Cutting
56
Locking the Screen
57
Using the Knee Lifter
57
Chapter 3 Utility Stitches
58
Selecting Utility Stitches
59
Selecting a Stitch
59
Stitch Selection Screens
59
Using the Mirror Image Key
60
Using the Image Key
60
Saving Your Stitch Settings
61
Saving Settings
61
Using the Sewing Type Selection Key
62
Retrieving Saved Settings
62
Sewing the Stitches
64
Straight Stitches
64
Changing the Needle Position (Left or Middle Needle Position Stitches Only)
66
Using the Straight Stitch Needle Plate and the Straight Stitch Foot
66
Basting
67
Dart Seam
68
Gathering
68
Flat Fell Seam
69
Pintuck
70
Zigzag Stitches
71
Overcasting (Using a Zigzag Stitch)
71
Appliqué (Using a Zigzag Stitch)
71
Patchwork (for Crazy Quilt)
72
Sewing Curves (Using a Zigzag Stitch)
72
Cord Guide Bobbin Cover (Using a Zigzag Stitch)
72
Elastic Zigzag Stitches
73
Tape Attaching
73
Overcasting
73
Overcasting
74
Overcasting Using Presser Foot "G
74
Overcasting Using Presser Foot "J
75
Overcasting Using the Side Cutter
76
When Sewing Straight Stitches While Using the Side Cutter
77
Quilting
78
Piecing
79
Quilting
79
Appliqué
80
Quilting with Satin Stitches
81
Free-Motion Quilting
82
Blind Hem Stitches
83
Appliqué
84
If the Needle Does Not Catch the Fold
84
If the Needle Catches too Much of the Fold
84
Shelltuck Stitches
85
Sewing Sharp Curves
85
Scallop Stitches
86
Top Stitching
86
Smocking Stitches
87
Fagoting
87
Tape or Elastic Attaching
88
Heirloom
89
Hemstitching (1) (Daisy Stitch)
89
Hemstitching (2) (Drawn Work)
89
Hemstitching (3)
90
One-Step Buttonholes
91
Sewing Stretch Fabrics
94
Odd Shaped Buttons/Buttons that Do Not Fit into the Button Holder Plate
94
Four-Step Buttonholes
95
Darning
97
Bar Tacks
99
Bar Tacks on Thick Fabrics
100
Button Sewing
101
Attaching 4 Hole Buttons
102
Attaching a Shank to the Button
102
Eyelet
103
Multi-Directional Sewing (Straight Stitch and Zigzag Stitch)
104
Zipper Insertion
105
Centered Zipper
105
Inserting a Side Zipper
106
Chapter 4 Character/ Decorative Stitches
108
Selecting Stitch Patterns
109
Stitch Selection Screens
110
Selecting Decorative Stitch Patterns/7Mm Decorative Stitch Patterns/Satin Stitch Patterns/7Mm Satin Stitch Patterns/Cross Stitch/Utility Decorative Stitch Patterns
111
Selecting Decorative Stitch Patterns/7Mm Decorative Stitch Patterns/Satin Stitch Patterns/ 7Mm Satin Stitch Patterns/Cross Stitch/Utility Decorative Stitch Patterns
111
Alphabet Characters
111
Deleting Characters
112
Sewing Stitch Patterns
113
Sewing Attractive Finishes
113
Basic Sewing
113
Making Adjustments
114
Editing Stitch Patterns
116
Key Functions
116
Changing the Size
117
Changing the Length (for 7Mm Satin Stitch Patterns Only)
118
Creating a Vertical Mirror Image
118
Creating a Horizontal Mirror Image
118
Sewing a Pattern Continuously
118
Changing Thread Density (for Satin Stitch Patterns Only)
119
Checking the Image
119
Combining Stitch Patterns
121
Before Combining
121
Combining Various Stitch Patterns
121
Combining Large and Small Stitch Patterns
123
Combining Horizontal Mirror Image Stitch Patterns
123
Combining Stitch Patterns of Different Length
124
Making Step Stitch Patterns (for 7Mm Satin Stitch Patterns Only)
125
More Examples
126
Using the Memory Function
127
Stitch Data Precautions
127
Types of Stitch Data that Can be Used
127
Types of USB Devices/Media that Can be Used
127
Computers and Operating Systems with the Following Specifications Can be Used
127
Precautions on Using the Computer to Create and Save Data
127
Trademarks
128
Saving Stitch Patterns in the Machine's Memory
129
If the Memory Is Full
129
Saving Stitch Patterns to USB Media (Commercially Available)
131
Saving Stitch Patterns in the Computer
132
Retrieving Stitch Patterns from the Machine's Memory
133
Recalling from USB Media
134
Recalling from the Computer
135
Chapter 5 Embroidery
136
Before Embroidering
137
Embroidery Step by Step
137
Attaching Embroidery Foot "W
138
Attaching the Embroidery Unit
139
About the Embroidery Unit
139
Removing the Embroidery Unit
140
Selecting Patterns
141
Copyright Information
141
Pattern Selection Screens
142
Selecting Embroidery Patterns/Heirloom Patterns/Border Patterns/Cross Stitch Patterns/Floral Alphabet Patterns
143
Selecting Alphabet Character Patterns
144
Selecting Frame Patterns
145
Selecting Patterns from Embroidery Cards
146
Selecting Patterns from USB Media/Computer
146
About Embroidery Cards (Sold Separately)
146
Viewing the Sewing Screen
147
Key Functions
148
Preparing the Fabric
149
Attaching Iron-On Stabilizers (Backing) to the Fabric
149
Hooping the Fabric in the Embroidery Frame
150
Types of Embroidery Frames
150
Inserting the Fabric
151
Embroidering Small Fabrics or Fabric Edges
152
Using the Embroidery Sheet
152
Embroidering Small Fabrics
152
Embroidering Edges or Corners
152
Embroidering Ribbons or Tape
153
Attaching the Embroidery Frame
154
Removing the Embroidery Frame
154
Confirming the Pattern Position
155
Checking the Pattern Position
155
Previewing the Completed Pattern
156
Sewing an Embroidery Pattern
157
Sewing Attractive Finishes
157
Embroidery Needle Plate Cover
157
Sewing Embroidery Patterns
158
Sewing Embroidery Patterns Which Use Appliqué
159
When Threading Manually
159
Adjustments During the Embroidery Process
161
If the Bobbin Runs out of Thread
161
If the Thread Breaks During Sewing
162
Restarting from the Beginning
163
Resuming Embroidery after Turning off the Power
163
Making Embroidery Adjustments
165
Adjusting Thread Tension
165
Correct Thread Tension
165
Upper Thread Is too Tight
165
Upper Thread Is too Loose
165
Using the Automatic Thread Cutting Function (END COLOR TRIM)
166
Using the Thread Trimming Function (JUMP STITCH TRIM)
166
Adjusting the Embroidery Speed
167
Selecting the Length of JUMP STITCH Not to Trim
167
Changing the Thread Color Display
168
Changing the Embroidery Frame Display
169
Revising the Pattern
170
Changing the Pattern Position
170
Aligning the Pattern and the Needle
170
Changing the Size
171
Rotating the Pattern
172
Creating a Horizontal Mirror Image
173
Changing the Density (Alphabet Character and Frame Patterns Only)
173
Changing the Colors of Alphabet Character Patterns
174
Using the Memory Function
175
Embroidery Data Precautions
175
Types of Embroidery Data that Can be Used
175
Types of USB Devices/Media that Can be Used
175
Computers and Operating Systems with the Following Specifications Can be Used
175
Precautions on Using the Computer to Create and Save Data
176
Tajima (.Dst) Embroidery Data
176
Trademarks
176
Saving Embroidery Patterns in the Machine's Memory
177
If the Memory Is Full
177
Saving Embroidery Patterns to USB Media (Commercially Available)
179
Saving Embroidery Patterns in the Computer
180
Retrieving Patterns from the Machine's Memory
181
Recalling from USB Media
181
Recalling from the Computer
182
Embroidery Applications
184
Using a Frame Pattern to Make an Appliqué (1)
184
Using a Frame Pattern to Make an Appliqué (2)
185
Chapter 6 Embroidery Edit
186
Explanation of Functions
187
Selecting Patterns to Edit
188
Selecting Embroidery Patterns/Heirloom Patterns/Border Patterns/Cross Stitch Patterns/Floral Alphabet Patterns/Frame Patterns
189
Selecting Alphabet Character Patterns
189
Editing Patterns
192
Key Functions
193
Moving the Pattern
194
Rotating the Pattern
194
Changing the Size of the Pattern
195
Deleting the Pattern
196
Changing the Configuration of Alphabet Character Patterns
196
Changing Alphabet Character Spacing
196
Changing the Color of each Alphabet Character in a Pattern
197
Changing the Thread Color
198
Creating a Custom Thread Table
199
Choosing a Color from the Custom Thread Table
200
Adding a Color to the Custom Thread Table from the List
200
Designing Repeated Patterns
201
Sewing Repeated Patterns
201
Repeating One Element of a Repeated Pattern
203
Assigning Thread Marks
204
After Editing
205
Combining Patterns
206
Editing Combined Patterns
206
Sewing Combined Patterns
208
Using the Memory Function
209
Chapter 7 My Custom Stitch
210
Designing a Stitch
211
Entering Stitch Data
213
Key Functions
213
Moving a Point
215
Moving Part or All of the Design
216
Inserting New Points
217
Using Stored Custom Stitches
218
Storing Custom Stitches in Your List
218
If the Memory Is Full
218
Retrieving Stored Stitches
219
Chapter 8 Appendix
220
Care and Maintenance
221
Cleaning the LCD Screen
221
Cleaning the Machine Casing
221
Cleaning the Race
221
Adjusting the Screen
223
Screen Visibility Is Low
223
Touch Panel Is Malfunctioning
223
Troubleshooting
225
Error Messages
228
Alarm Sounds
233
Specifications
234
Upgrading Your Machine's Software
235
Upgrade Procedure Using USB Media
235
Upgrade Procedure Using Computer
235
Stitch Setting Chart
238
Index
245
Advertisement
Brother Innov-is 4000 Installation Manual (52 pages)
3.0 Installation Manual - English
Brand:
Brother
| Category:
Sewing Machine
| Size: 4.35 MB
Table of Contents
English
3
Contents of CD-Rom
4
Installation Overview
4
Verifying the Operating Environment
5
Installation Procedure
5
Français
19
Contenu du CD-Rom
20
Vue D'ensemble de L'installation
20
Procédure D'installation
21
Vérification de L'environnement D'utilisation
21
Italiano
35
Contenuto del CD-Rom
36
Panoramica Sull'installazione
36
Controllo Dell'ambiente Operativo
37
Procedura D'installazione
37
Español
43
Contenido del CD-Rom
44
Introducción a la Instalación
44
Comprobación del Entorno de Funcionamiento
45
Procedimiento de Instalación
45
Brother Innov-is 4000 Operation Manual (26 pages)
premium upgrade package, Version 4.0 Upgrade Kit
Brand:
Brother
| Category:
Sewing Machine
| Size: 1.61 MB
Table of Contents
Table of Contents
2
Before You Start
3
New Features
3
Embroidering with the Border Embroidery Frame
4
Sample Projects Using the Border Embroidery Frame
4
Selecting a Pattern
4
Hooping the Fabric in the Border Embroidery Frame
6
Attaching the Border Embroidery Frame to the Embroidery Unit
8
Embroidering the First Pattern
9
Removing the Border Embroidery Frame
9
Embroidering the Next Pattern
10
If the Bobbin Runs out of Thread
12
Selecting a New Border Pattern
12
Creating an Appliqué Piece
13
Sample Projects Using Created Appliqué Pieces
13
Using a Frame Pattern for the Outline
16
Changing the Pointer Shape When a USB Mouse Is Used
18
Changing the Background Colors of the Embroidering Patterns
18
Basting Embroidery
19
Separating Combined Character Patterns
20
Selecting a Small Font/Cyrillic Font
22
List of New Patterns
23
Border Patterns (Additions from Decorative Stitch Patterns)
23
Small Fonts
24
Cyrillic Fonts
24
Cyrillic Fonts
25
Advertisement
Advertisement
Related Products
Brother 4234DT
Brother Innov-is 4000DLTD
Brother Innov-is 40
Brother Duetta 4500D
Brother 4
Brother 4100D
Brother 4234D
Brother Innov-is 40e
Brother Innov-is 4000D
Brother Innov-is NV6000D
Brother Categories
Sewing Machine
All in One Printer
Printer
Label Maker
Fax Machine
More Brother Manuals
Login
Sign In
OR
Sign in with Facebook
Sign in with Google
Upload manual
Upload from disk
Upload from URL