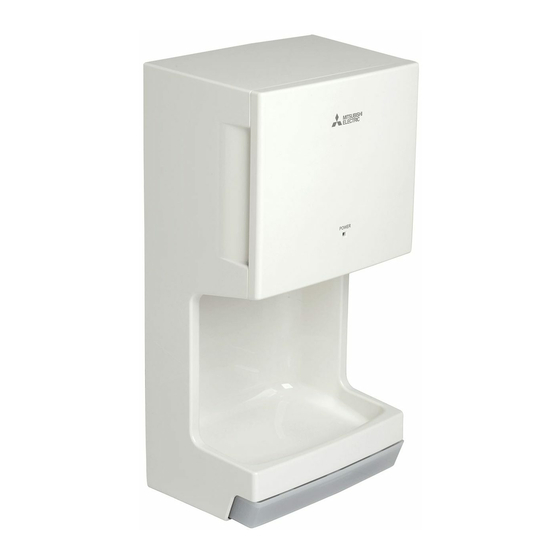
Mitsubishi Electric Jet Towel JT-MC106G-W-NA Instruction Manual
Hand dryer
Hide thumbs
Also See for Jet Towel JT-MC106G-W-NA:
- Installation manual (32 pages) ,
- Handbook (28 pages)
Table of Contents
Advertisement
Quick Links
MODEL
JT-MC106G-W-NA
Unit color
-W
White
INSTRUCTION MANUAL
Read the manual thoroughly before using the unit to ensure it is used safely and correctly.
After reading the manual, store it in an easily accessible location for future reference.
as this may affect the safety and functionality of the unit.
This unit is intended for the purpose of drying hands and is not covered by a warranty if used for any other purpose.
It has no sterilizing or disinfecting functions.
INDEX
How to open/close the front cover
Precautions for when opening/closing the front cover
Precautions for when opening/closing the front cover
Hand dryer
You should not attempt to install the unit yourself,
Location of Name plate indicating
Model name and Electrical ratings
Input Power: 120 Vac Single-phase
2
3
4
4
4
5
5
6
7
7
8
8
9
10
11
12
NA 1
875HJ9801
Indoor use only
For User
Advertisement
Table of Contents

Summary of Contents for Mitsubishi Electric Jet Towel JT-MC106G-W-NA
-
Page 1: Table Of Contents
875HJ9801 Hand dryer MODEL JT-MC106G-W-NA Location of Name plate indicating Model name and Electrical ratings Unit color White Input Power: 120 Vac Single-phase Indoor use only For User INSTRUCTION MANUAL Read the manual thoroughly before using the unit to ensure it is used safely and correctly. -
Page 2: Safety Precautions
Safety Precautions The dangers arising from improper handling and the extents of the dangers are classifi ed and explained as shown below. The following may lead to death or Warning serious personal injury if handled incorrectly. Do not install in locations where they may be Do not modify or disassemble the unit. -
Page 3: Names Of Parts
Names of Parts Shaded areas in the fi gure indicate antibacterial material (excluding outlet nozzle areas). Inside the front cover (Refer to "How to open/close the front cover" on page 4) Power light Front cover Setting switches Air fi lter Nozzle Sensor light Sensor switch... -
Page 4: How To Use The Unit
How to use the unit How to open/close the front cover How to open the front cover Pull the tab for opening the Hold the handle are on the Open. front cover. right hand side of the main unit. Main Main unit unit... -
Page 5: If Not Using For A Long Period
If not using for a long period Then turn the breaker off. How to use the unit Rub your hands together after the water is blown off. The dryer starts automatically when your hands enter the hand drying area. Refer to "Hand detection area" Caution Do not use with disinfectants such as alcohol or chemicals on your hands. -
Page 6: Turning The Heater On
Turning the heater on Open the front cover. Open Refer to "How to open/close the front cover" on page 4. Front cover Press the heater switch or the sensor switch and let the settings light turn on. Turn the heater switch "ON". The heater may not operate during continued use as there is Heater switch the danger of scalding when the temperature of the warm air... -
Page 7: Maintenance
Maintenance Warning Caution Always turn off the sensor switch during Wear gloves during maintenance work. maintenance work. Not doing so may result in injuries. Failure to do so may result in an electric shock. Always turn off the sensor switch during Do not allow water to get on the unit. -
Page 8: Turning The Sensor Off Before Maintenance
Maintenance - Continuation Turning the sensor off before maintenance Pull the tab and open the front cover. Open the cover and press the sensor switch. The sensor light "OFF" is lit. Front cover Main unit Sensor light Sensor switch Pull Front cover Open Perform cleaning. -
Page 9: Cleaning The Air Filter
Maintenance - Continuation Cleaning the air fi lter Around once a week A dirty air fi lter will shorten the working life of the motor and heater and decrease the drying performance Caution due to insuffi cient air volume and air speed and bacteria can grow in the fi lter area due to dust deposits. Pull the tab, open the front cover and turn the Front cover Sensor... -
Page 10: Emptying And Cleaning The Drain Tank
Maintenance - Continuation Emptying and cleaning the drain tank Before it fi lls up (at least once a week) Empty the water in the drain tank at least once a week before the drain water exceeds the full line. If the drain water is left inside, it can cause foul odors or the water can spill onto the fl oor and tarnish it. Pull the tab, open the front cover and turn the Front cover Sensor... -
Page 11: Trouble Shooting
Trouble shooting Implement the inspections and procedures below in the following cases. In such cases Inspections Procedures Are any lights in the display on? Turn on the ground fault circuit interrupter at the branch circuit. Has a power blackout occurred? Turn the sensor switch "ON". -
Page 12: Specifi Cations
Specifi cations Model Voltage Frequency Heater Power Input (W) Current (A) Weight (kg) Dimensions (W Single-phase (in.) JT-MC106G-W-NA 60Hz (250 480 (mm)) 120 Vac • The capacity of the drain tank is 0.6 L. Settings and drying times guide Drying times guide Noise (approx.)


