Table of Contents
Advertisement
Quick Links
'S MANUAL
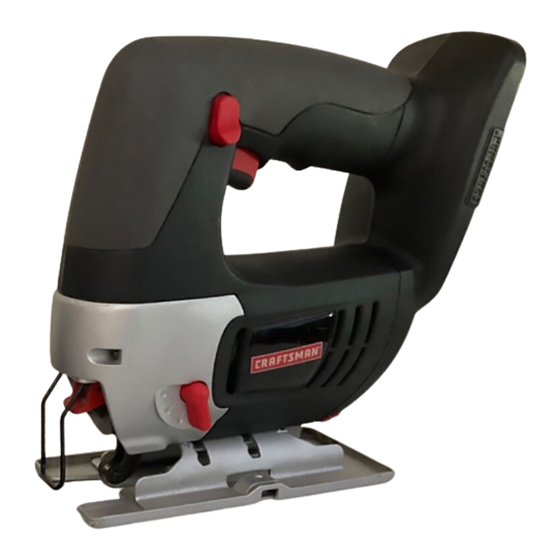
19.2 VOLT CORDLESS J_G SAW
Variable Speed / Orbital
Model No.
315.114280
WARNING:
To reduce the risk of injury,
the user must read and understand the
operator's manual before using this
product.
Use jig saw only with recommended
Craftsman
battery pack and charger
(both sold separately)
Customer
Help Line: 1-800-932-3188
Sears, Roebuck
and Co., 3333 Beverly Rd., Hoffman
Estates,
IL 60179 USA
Visit the Craftsman web page: www.sears.comicraftsman
983000-488
8-04
Save this manuaJ for future
reference
US
Advertisement
Table of Contents

Summary of Contents for Craftsman 315.114280
- Page 1 (both sold separately) product. Customer Help Line: 1-800-932-3188 Sears, Roebuck and Co., 3333 Beverly Rd., Hoffman Estates, IL 60179 USA Visit the Craftsman web page: www.sears.comicraftsman Save this manuaJ for future reference 983000-488 8-04...
- Page 2 NEAREST SEARS STORE OR SEARS PARTS & REPAIR CENTER (N TNE UNITED STATES, and Sears wi(( replace it, free of charge. (f this Craftsman too( is used for commercia( or rental purposes, this warranty app(ies for only 90 days from the date of purchase.
-
Page 3: Personal Safety
[] Do not overreach. Keep proper footing and balance WARNING!READ ANDUNDERSTAND ALL INSTRUCTIONS. Failure to followallinstructions at all times. Proper footing and balance enable better listedbelow, m ayresult i nelectricshock, f ireand/or control of the tool in unexpected situations. serious personal injury. [] Use safety equipment. - Page 4 SERVmCE [] When servicing a tool, use only identical replace- ment parts. Follow instructions in the Maintenance [] Tool service must be performed only by qualified section of this manual. Use of unauthorized parts or repair personnel. Service or maintenance performed failure to follow Maintenance hstructions may create a by unqualified personne! may result in a risk of injury.
- Page 5 a. That pins on plug of extension cord are the WARNING! READ AND UNDERSTAND ALL INSTRUCTIONS. Failure to follow all instructions same number, size and shape as those of plug on charger. listed below, may result in electric shock, fire and/or serious personal injury.
- Page 6 Someof the followingsymbolsmaybe usedon this too!. Please studythemand learntheirmeaning. P roper interpretation o f thesesymbolswillallowyouto operate the too!betterandsafer. SYMBOL NAME DESIGNATION/EXPLANATmON Volts Voltage Amperes Current Hertz Frequency ( cyclespersecond) Watt Power Minutes Time Alternating Current Typeofcurrent Direct C urrent Typeor a characteristic o f current NoLoadSpeed Rotational speed,at no load ClassII Construction...
- Page 7 Thefollowing signal w ordsandmeanings a reintended to explain the levels of riskassociated withthisproduct. SYMBOL SIGNAL MEANING DANGER: hdicates an imminently hazardous situation, which, if not avoided, will result in death or serious injury. WARNING: hdicates a potentially hazardous situation, which, if not avoided, could result in death or serious injury.
- Page 8 PRODUCT SPECmFmCATmONS Length of Stroke ................................1 in. Strokes Per Minute .............................. 0-2,1 O0/min Switch ................................Vanable Speed Blade Clamp ................................Toolqess Cutting Angle ..........................0 ° to 45 ° both Left and Right ©rbital Motion ................................ 4 Positions TRIGGER SWITCH LOCK-OFF BUTTON...
- Page 9 KNOWTHISTOOL NOTE: You can depress the lock-off button from either the left or right side. See Figure 1. Before attempting to use this tool, familiarize yourself with SWITCH all operating features and safety requirements. To turn your saw ON, depress the lock-off button and pull TOOL-LESS BLADE CLAMP...
-
Page 10: Battery Pack
LED FUNCTmONS OF CHARGER WARNING:Donotallowfamiliarity withtoolsto makeyoucareless. Remember thata careless LED WILL BE ON TO mNDmCATE STATUS fractionofa second issufficient t o inflictserious CHARGER AND BATTERY PACK: injury. [] Red LED on = Fast charging mode. [] Green LED on = Fully charged and in trickle charge WARNING: Always wear safety goggles or safety mode. -
Page 11: To Install Battery Pack
[] Press downonthebattery packto besurecontacts on TO iNSTALL BATTERY PACK the battery packengage properly withcontacts inthe See Figure 3. charger. Follow these steps to install the battery pack. [] Normally t he redLEDoncharger w it!comeon.This [] Lock the trigger switch by placing the rotation selector indicates t hecharger i s infastcharging mode. - Page 12 _, WARNING:Battery toolsarealways inoperating condition. T herefore, switchshouldalways belocked whennot inuseor carrying atyourside. BLADECLAMP TO iNSTALLBLADES See Figure 4. Remove battery pack, See Figure 3. Lift blade clamp lock / release }ever located on front of saw. Insert saw blade between blade clamp and saw bar, Release and !ock blade clamp }ever, Replace battery pack, HEX KEY STORAGE...
- Page 13 GENERALCUTTING See Figure 6. Rest the front of the saw base on the workpiece and align cutting edge of the blade with the line on your workpiece. Start your saw and move it forward on the work surface. Apply downward pressure to keep the saw steady only enough...
- Page 14 BASE ANGLE CUTTING (BEVEL OUTT(NG) P(VOTSCREWS See Figures 8 - 9. Beve( cutting angles may be adjusted from 0 ° to 45 ° right or (eft, Ang(es for cuts from 0 ° to 45 ° in 15 ° increments are marked on a sca(e on both the (eft and right side of the base, Notches on the rear of the base provide...
- Page 15 SPLmNTERoFREE CUTTING BASE PIVOTSCREWS See Figures 12 ° 13. The base of your jig saw has a narrow slot to permit splinter=free cutting, It is especially useful when cutting plywood, This feature should only be used when mak= ing straight cuts or circle cuts, it is not for bevel cutting or plunge cutting, NOTB: The non=orbital setting also helps reduce splin= tering when cutting plywood,...
- Page 16 WARNING:Whenservicing, useonlyidentical WARMNG: Do not at any time let brake fluids, Craftsman r eplacement parts.Useofanyotherpart gasoline, petroleum-based products, penetrating maycreatea hazard or cause productdamage. oils, etc. come in contact with plastic parts. Chemi- cals can damage, weaken or destroy plastic which may result in serious personal injury.
-
Page 18: Parts Ust
CRAFTSMAN 19.2 VOLT CORDLESS JiG SAW - MODEL NO. 315.114280 number in all correspondence regarding your CORDLESS JiG SAW or when ordering repair parts. he model number will be found on a plate attached to the motor housing, Always mention...


