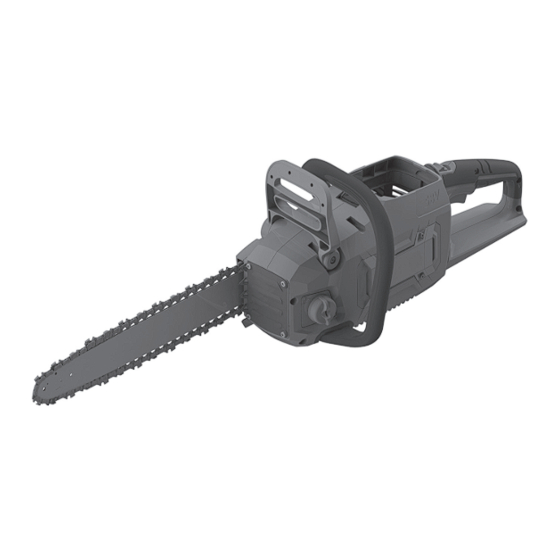
Table of Contents
Advertisement
Quick Links
Advertisement
Table of Contents

Summary of Contents for AEG A58CHS18B8
- Page 1 ACS58B18 A58CHS18B4 A58CHS18B8 Original instructions...
- Page 2 mportant! It is essential that you read the instructions in this manual before assembling, operating, and maintaining the product. Subject to technical modifications.
- Page 3 ACS58B18...
- Page 4 A58CHS18B4 A58CHS18B8...
- Page 5 BAR MOUNTING FRONT HAND GUARD/ NUTS CHAIN BRAKE FRONT HANDLE BATTERY PACK TRIGGER RELEASE CHAIN SPIKED COVER BUMPER CHAIN TENSIONING SCREW CHAIN REAR HANDLE SCRENCH TOOL SCABBARD CHAIN LUBRICANT TANK CAP GUIDE BAR...
-
Page 6: Using The Chain Brake
USING THE CHAIN BRAKE ADJUSTING THE CHAIN TENSION CLEANING THE PRODUCT INSTALLING AND REMOVING THE SCABBARD... - Page 7 INSTALLING AND REMOVING THE BATTERY START STOP USING THE PRODUCT ADDING CHAIN AND BAR OIL REPLACING THE CHAIN AND BAR STORING THE PRODUCT...
-
Page 8: Installing And Removing The Battery
INSTALLING AND REMOVING THE BATTERY click... - Page 9 START USING THE PRODUCT STOP...
- Page 10 BRAKE ON USING THE CHAIN BRAKE NOTE: The product does not turn on while the chain brake is engaged. BRAKE OFF...
- Page 11 ADJUSTING THE CHAIN TENSION...
- Page 12 NOTE: The chain tension is correct when the gap is 6.5 mm. Check the chain tension regularly, as the chain stretches when it heats up. APPROX. 6.5 mm FLATS 7.85~9.8 Nm (80~100 Kgf-cm) click...
- Page 13 ADDING CHAIN AND BAR OIL...
- Page 14 click...
- Page 15 REPLACING THE CHAIN AND BAR...
- Page 16 NOTE: Always properly dispose of used chain and bar. NOTE: For replacment chain and bar part CHAIN DRIVE numbers, see page 25. LINKS GROOVE is 6...
- Page 17 NOTE: The chain tension is correct when the gap is 6.5 mm. Check the chain tension regularly, as the chain stretches when it heats up. APPROX. 6.5 mm FLATS...
- Page 18 7.85~9.8 Nm (80~100 Kgf-cm) click...
- Page 19 INSTALLING AND REMOVING THE SCABBARD...
- Page 20 CLEANING THE PRODUCT NOTE: Clean the the product with a with a soft-bristle brush or with a soft, dry cloth. NOTE: Do not use water to clean the product..
-
Page 21: Storing The Product
STORING THE PRODUCT... - Page 22 NOTE: Always remove chain and bar oil from the oil tank before storing the product. NOTE: Store the product in a cool, dry, and well- ventilated area that is inaccessible to children. Keep the product away from corrosive agents, such as garden chemicals and de-icing salts.
- Page 23 Figure 1 Figure 6 Figure 2 Figure 7 Figure 3 Figure 8 5 cm / 2 in 5 cm / 2 in Figure 4 Figure 9 Figure 5 Figure 10...
- Page 24 Figure 11 Figure 12 diffe An e Iden Figure 13 Figure 14 Figure 15...
-
Page 25: Intended Use
BATTERY AND CHARGER of a diameter determined by the cutting length of the guide bar. It is Model ACS58B18 A58CHS18B4 A58CHS18B8 designed to cut wood only. The product is to be used only in domestic applications by adults who Battery pack... -
Page 26: Work Area Safety
Save all warnings and instructions for future reference. If devices are provided for the connection of dust extraction and collection facilities, ensure these are connected and properly corr The term “power tool’’ in the warnings refers to your mains-operated used. Use of dust collection can reduce dust-related hazards. (corded) power tool or battery-operated (cordless) power tool. -
Page 27: Chainsaw Safety Warnings
Wear safety glasses and hearing protection. Further protective Ensure before each use that all controls and safety devices function erly correctly. Do not use the product if the OFF switch does not stop equipment for head, hands, legs and feet is recommended. the motor. - Page 28 Only use replacement bars and chains specified by the Do not use a back-and-forward sawing motion; let the chain do the manufacturer. Incorrect replacement bars and chains may cause work. Keep the chain sharp and do not try to push the chain through chain breakage and/or kickback.
-
Page 29: Operation
Skating/Bouncing the horizontal cut into the buttress first, followed by the vertical cut. Remove the resulting loose section from the work area. Follow When the chainsaw fails to dig in during a cut, the guide bar can the correct tree felling procedure after you have removed the large begin hopping or dangerously skidding along the surface of the log buttress roots. -
Page 30: Transportation And Storage
Holding the chainsaw TRANSPORTATION AND STORAGE See figure 1. Turn off the product, remove the battery pack, and allow the product Always hold the product with your right hand on the rear handle to cool down before storing or transporting. Remove all chain and bar and your left hand on the front handle. -
Page 31: Maintenance Schedule
■ injury caused by unforeseen, abrupt movement or kickback of the Replacing guide bar and saw chain guide bar (cutting hazards) See pages 15 - 18. duct ■ injury caused by parts ejected from the saw chain (cutting/ 1. Remove the battery. Wear protective gloves. injection hazards) 2. - Page 32 Spiked bumper The integral bumper spike may be used as a pivot when making a cut. Set the chain brake to the RUN position. It helps to keep the body of the chainsaw steady while cutting. When cutting, push the machine forward until the spikes dig into the edge of the wood, then move the rear handle up or down in the direction of Set the chain brake to the BRAKE position.
- Page 33 ally will ould...
- Page 36 31 Gilby Road, Mount Waverley, VIC, 3149, Australia Techtronic Industries N.Z. Limited Unit C, 70 Business Parade South, AEG is a registered trade mark used under Highbrook, Auckland 2013, New Zealand license from AB Electrolux (publ). POWERFIT is a trade mark of Techtronic Outdoor 960087702-01 Products Technology Limited in ANZ.


