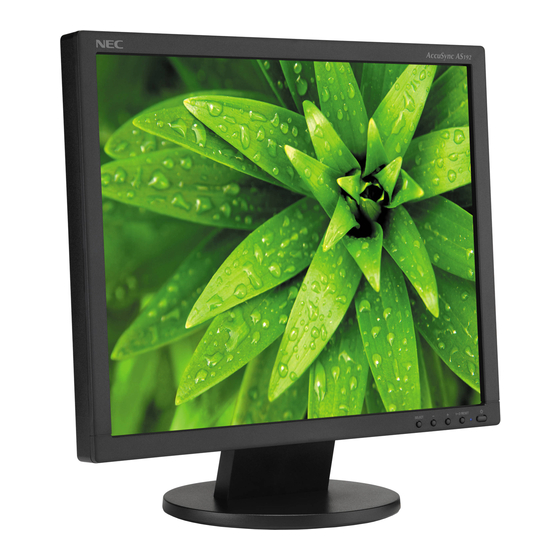
NEC AccuSync AS192 User Manual
Nec accusync as192: user guide
Hide thumbs
Also See for AccuSync AS192:
- Specifications (2 pages) ,
- Specifications (2 pages) ,
- Specifications (2 pages)
Table of Contents
Advertisement
Advertisement
Table of Contents

Summary of Contents for NEC AccuSync AS192
- Page 1 AccuSync AS192 User’s Manual...
-
Page 2: Table Of Contents
Index Warning, Caution ... English-1 Registration Information ...English-1 Recommended use ...English-3 Contents ...English-5 Quick Start ... English-5 Controls ...English-8 Specifications - AS192 ... English-11 Features ...English-12 Troubleshooting ...English-13 TCO Displays 5 ...English-14 Manufacturer’s Recycling and Energy Information ... English-15... -
Page 3: Warning, Caution
U.S.A./Canada Voltage 120* *When operating the AccuSync AS192 monitor with its AC 125-240V power supply, use a power supply cord that matches the power supply voltage of the AC power outlet being used. NOTE: This product can only be serviced in the country where it was purchased. -
Page 4: Canadian Department Of Communications Compliance Statement
C-UL: Bears the C-UL Mark and is in compliance with Canadian Safety Regulations according to CAN/CSA C22.2 No. 60950-1. FCC Information Use the attached specified cables with the AccuSync AS192(L195GY) color monitor so as not to interfere with radio and television reception. -
Page 5: Recommended Use
Do not place any heavy objects on the power cord. Damage to the cord may cause shock or fire. • Do not place this product on a sloping or unstable cart, stand or table, as the monitor may fall, causing serious damage to the monitor. - Page 6 For optimum performance, allow 20 minutes for warm-up. • Adjust the monitor height so that the top of the screen is at or slightly below eye level. Your eyes should look slightly downward when viewing the middle of the screen.
-
Page 7: Contents
Power Cord* Remember to save your original box and packing material to transport or ship the monitor. *1 Type of power cord included will depend on the where the LCD monitor is to be shipped. Quick Start To attach the Base Stand to the LCD Stand: 1. -
Page 8: Remove Monitor Stand For Mounting
3. Connect the 15-pin mini D-SUB of the video signal cable to the appropriate connector on the back of the monitor ( Figure B.1). 4. Connect one end of the power cord to the monitor and the other end to the power outlet. Place the Video Signal Cable and power cord to the Cable holder (Figure C.1). -
Page 9: Removing The Base Stand
This LCD monitor is designed for use with a flexible arm. Please use screws (4pcs) as shown in the picture when installing. To meet the safety requirements, the monitor must be mounted to an arm which, guaranties the necessary stability under consideration of the weight of the monitor. -
Page 10: Controls
Controls OSD (On-Screen Display) control buttons on the front of the monitor function as follows: 1. Basic function at pressing each key Button OSD not Shows OSD. showing OSD showing Goes to Adjustment stage. (Icon selection stage) OSD showing Goes to Icon selection stage. Adjust value decreases or (Adjustment stage) 2. -
Page 11: Auto Adjust
BRIGHTNESS Adjusts the overall image and background screen brightness. To enter ECO MODE, press the “1 2/RESET” button. ECO MODE OFF: Sets brightness variable to 100% ECO MODE1: Sets brightness to 70%. This setting can adjust brightness to a range in which power is reduced to meet Energy Star measurement conditions. ECO MODE2: Sets brightness to 40%. -
Page 12: Monitor Info
The OSD control menu will stay on as long as it is in use. In the OSD Turn OFF submenu, you can select how long the monitor waits after the last touch of a button to shut off the OSD control menu. The preset choices are 10 - 120 seconds by 5-second increments. -
Page 13: Specifications
In flat panel technologies, each dot on the screen is actually one pixel, so to expand resolutions to full screen, an interpolation of the resolution must be done. NOTE: Technical specifications are subject to change without notice. AccuSync AS192 Monitor Notes Sync : VGA text... -
Page 14: Features
VESA Standard Mounting Interface: Allows users to connect their AccuSync monitor to any VESA standard third party mounting arm or bracket. Allows for the monitor to be mounted on a wall or an arm using any third party compliant device. -
Page 15: Troubleshooting
To alleviate image persistence, turn the monitor off for as long as an image was displayed. For example, if an image was on the monitor for one hour and a residual image remains, the monitor should be turned off for one hour to erase the image. -
Page 16: Tco Displays 5
TCO Displays 5 This display is designed for both you and the planet! TCO Certified is a third party verified program, where every product model is tested by an accredited impartial test laboratory. TCO Certified represents one of the toughest certifications for displays worldwide. -
Page 17: Manufacturer's Recycling And Energy Information
Manufacturer’s Recycling and Energy Information NEC DISPLAY SOLUTIONS is strongly committed to environmental protection and sees recycling as one of the company’s top priorities in trying to minimize the burden placed on the environment. We are engaged in developing environmentally- friendly products, and always strive to help define and comply with the latest independent standards from agencies such as ISO (International Organisation for Standardization) and TCO (Swedish Trades Union).


