Table of Contents
Advertisement
Quick Links
Advertisement
Table of Contents

Summary of Contents for AEG HK774400FB
- Page 1 HK774400FB User Manual USER MANUAL...
-
Page 2: Table Of Contents
10. ENERGY EFFICIENCY..................... 19 FOR PERFECT RESULTS Thank you for choosing this AEG product. We have created it to give you impeccable performance for many years, with innovative technologies that help make life simpler features you might not find on ordinary appliances. Please spend a few minutes reading to get the very best from it. - Page 3 ENGLISH usage. Always keep the instructions in a safe and accessible location for future reference. 1.1 Children and vulnerable people safety This appliance can be used by children aged from 8 • years and above and persons with reduced physical, sensory or mental capabilities or lack of experience and knowledge if they have been given supervision or instruction concerning the use of the appliance in a...
-
Page 4: Safety Instructions
CAUTION: The cooking process has to be supervised. • A short term cooking process has to be supervised continuously. WARNING: Danger of fire: Do not store items on the • cooking surfaces. Metallic objects such as knives, forks, spoons and lids •... - Page 5 ENGLISH the front of the below unit, is free. • If the mains socket is loose, do not The warranty does not cover damages connect the mains plug. caused by the lack of an adequate • Do not pull the mains cable to ventilation space.
- Page 6 WARNING! heating. Risk of fire and explosion 2.4 Care and cleaning • Fats and oil when heated can release flammable vapours. Keep flames or • Clean regularly the appliance to heated objects away from fats and oils prevent the deterioration of the when you cook with them.
-
Page 7: Product Description
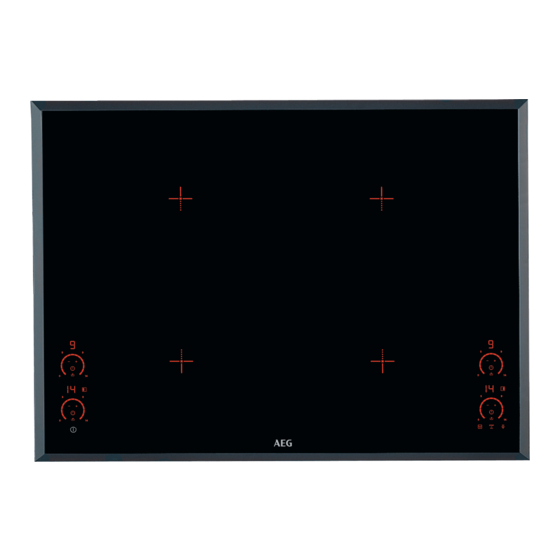
ENGLISH 3. PRODUCT DESCRIPTION 3.1 Cooking surface layout Induction cooking zone Control panel 3.2 Control panel layout To see the control panel activate the appliance with Use the sensor fields to operate the appliance. The displays, indicators and sounds tell which functions operate. - Page 8 Sensor Function Comment field To set the timer function. To increase or decrease the time. Power function To activate and deactivate the function. Control bar To set a heat setting. Lock / The Child Safety De- To lock / unlock the control panel.
-
Page 9: Daily Use
ENGLISH 4. DAILY USE WARNING! Heat setting The hob deacti- Refer to Safety chapters. vates after 4.1 Activating and 8 - 9 4 hours deactivating 10 - 14 1.5 hour Touch for 1 second to activate or 4.3 The heat setting deactivate the hob. - Page 10 First set the heat setting for the cooking left / right control sensors. zone then set the function. To activate the function or change the To deactivate the function: touch time: touch and then touch .
- Page 11 ENGLISH 4.12 OffSound Control When the function operates, you cannot change the heat setting. (Deactivating and activating The function does not stop the timer the sounds) functions. Deactivate the hob. Touch for 3 To activate the function: touch seconds. The display comes on and goes comes on.
-
Page 12: Hints And Tips
5. HINTS AND TIPS cookware with a smaller diameter than WARNING! the minimum receives only a part of the Refer to Safety chapters. power generated by the cooking zone. 5.1 Cookware Refer to “Technical information” chapter. For induction cooking zones a strong electro-magnetic 5.2 The noises during... -
Page 13: Care And Cleaning
ENGLISH the heat setting, it is not proportional to The data in the table is for the increase of the cooking zone guidance only. consumption of power. It means that the cooking zone with the medium heat setting uses less than a half of its power. Heat setting Use to: Time... -
Page 14: Troubleshooting
6.2 Cleaning the hob stains, shiny metallic discoloration. Clean the hob with a moist cloth and • Remove immediately: melted plastic, non-abrasive detergent. After plastic foil, sugar and food with sugar. cleaning, wipe the hob dry with a soft If not, the dirt can cause damage to cloth. - Page 15 ENGLISH Problem Possible cause Remedy Residual heat indicator does The zone is not hot because If the zone operated suffi- not come on. it operated only for a short ciently long to be hot, speak time. to an Authorised Service Centre.
-
Page 16: Installation
Problem Possible cause Remedy The electrical connection is Speak to a qualified electri- comes on. incorrect. The supply voltage cian to check the installation. is out of range. There is an error in the hob Deactivate the hob. Remove comes on. - Page 17 ENGLISH • To replace the damaged mains cable cable type: H05V2V2-F T min 90°C. use the following (or higher) mains Speak to your local Service Centre. 8.4 Assembly min. 500mm min. 50mm min. min. 2 mm min. 2 mm < 20 mm >...
-
Page 18: Technical Data
You can not use the protection box if you install the hob above an oven. 9. TECHNICAL DATA 9.1 Rating plate Model HK774400FB PNC 949 597 106 01 Typ 60 GDD CC AU 220 - 240 V 50 - 60 Hz Induction 7.4 kW Made in Germany Ser.Nr. -
Page 19: Energy Efficiency
Right 160 x 360 200 x 420 10. ENERGY EFFICIENCY 10.1 Product information according to EU 66/2014 Model identification HK774400FB Type of hob Built-In Hob Number of cooking zones Heating technology Induction Diameter of circular cook- Left front 21.0 cm... - Page 20 • If it is possible, always put the lids on • Put the cookware directly in the the cookware. centre of the cooking zone. • Before you activate the cooking zone • Use the residual heat to keep the put the cookware on it.
- Page 21 ENGLISH...
- Page 22 www.aeg.com...
- Page 23 ENGLISH...
- Page 24 www.aeg.com/shop...


