Table of Contents
Advertisement
Advertisement
Table of Contents

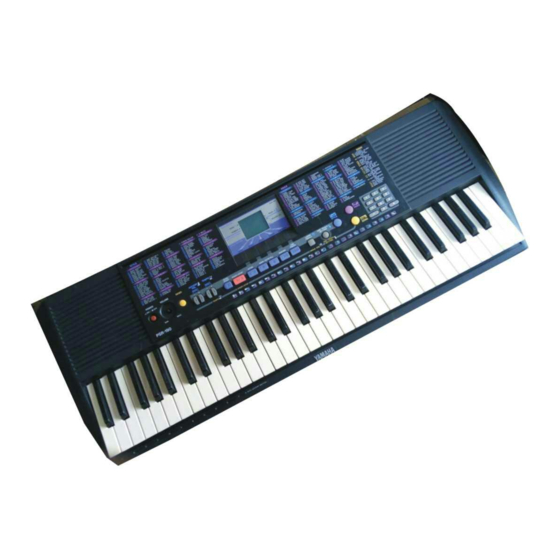
Summary of Contents for Yamaha Portatone PSR-190
-
Page 2: Table Of Contents
ENGLISH – Contents Main Features ...1 Precautions — Taking Care of Your PortaTone...1 Setting Up...2 Getting Started — Playing the Demo Songs ...3 The Panel Display ...3 Selecting and Playing Voices — The Voice Mode ...4 Selecting and Playing Styles — The Style Mode ...5 About the METRONOME Icon...6 About Multi Fingering...8 One Touch Setting in the Style Mode...9... -
Page 3: Main Features
• Never use alcohol, thinner, or other chemical solvents, since they will damage the finish. Also, do not leave vinyl chloride material on the PortaTone for a long time, since it may adhere to the exterior. Yamaha is not responsible for damage caused by improper usage. -
Page 4: Setting Up
Power Requirements Your PortaTone can run either on batteries (sold separately) or on normal household current by using the optional Yamaha PA-3/3B Power Adaptor (or another adaptor specifically recommended by Yamaha). Using an AC Power Adaptor To connect your PortaTone to a wall socket, you will need the optionally available Yamaha PA-3/3B Power Adaptor. -
Page 5: The Panel Display
Getting Started — Playing the Demo Songs The PortaTone has a variety of Demo Songs, specially recorded to showcase the dynamic sounds and rhythms and give you an idea of what you can do with the instrument. First, turn on the power. Press the POWER ON/OFF button. -
Page 6: Selecting And Playing Voices — The Voice Mode
Selecting and Playing Voices — The Voice Mode Many of these Voices have special preset characteristics or embellishments. The Voices are divided into various categories depending on their characteristics or the effects used. Harmony Voices (#45 - #58) automatically add a one-, two- or three-note harmony to the original monophonic Voice. -
Page 7: Selecting And Playing Styles — The Style Mode
Percussion Voice Chart (Voices 94 and 00) Selecting and Playing Styles — The Style Mode The Style mode provides dynamic rhythm/accompaniment patterns — as well as Voice settings appropriate for each pattern — for various popular music styles, as listed on the panel. A total of 100 different Styles are available, in fifteen different categories. -
Page 8: About The Metronome Icon
Start the selected Style. You can do this in one of three ways: • Pressing the START/STOP button The rhythm starts playing immediately without bass and chord accompaniment. The currently selected Main A or B section will play. (You can select either pattern by pressing the appropriate button —... - Page 9 Change the Style section (Main A , Main B, or Jam Track), if you wish. • Main A and Main B While the Style is playing, you can add variation in the rhythm/accompaniment by pressing the MAIN/AUTO FILL A or B button. This automatically plays one of four Fill-in patterns, and smoothly leads into the next section —...
-
Page 10: About Multi Fingering
About Multi Fingering The Auto Accompaniment function automatically generates bass and chord accompaniment for you to play along with, by using Multi Fingering operation. You can change the chords of the accompaniment by playing keys in the AUTO ACCOMP SECTION of the keyboard using either the “Single Finger” or “Fingered” method. With Single Finger you can simply play a one-, two- or three-finger chord indication (see Single Finger Chords below). -
Page 11: One Touch Setting In The Style Mode
One Touch Setting in the Style Mode The One Touch Setting function automatically selects an appropriate Voice, Tempo, Accompaniment volume and Large/Small for playing with the Style you select. In other words, when One Touch Setting is on, the Voice, Tempo and Accompaniment Volume automatically changes when you change the Style. -
Page 12: One Touch Setting In The Song Mode
Stop the Song. Press the START/STOP button. If playback was started by pressing the START/STOP button, the selected Song stops automatically at the end. If Minus One is on, the selected Song repeats playback indefinitiely. Also, if you start Song playback with the DEMO button, all Songs play back repeatedly in succession from the song number 01, indefinitely. -
Page 13: Specifications
Specifications / Technische Daten Caractéristiques techniques / Especificaciones Keyboard Number of Keys Key Size Register Voice Tone Generation Number of Voices Maximum Polyphony Effect Dual Split Sustain Harmony/Echo Style Number of Styles Auto Accompaniment Chord Detection Sections Jam Track Song Number of Songs Minus One One Touch Setting...


