Table of Contents
Advertisement
Quick Links
CONSUMER LIMITED WARRANTY
IMPORTANT SAFETY INSTRUCTIONS .........................
INSTALLATION INSTRUCTIONS
..................................11
APPEARANCE OVERVIEW
& INSTALLATION INSTRUCTIONS
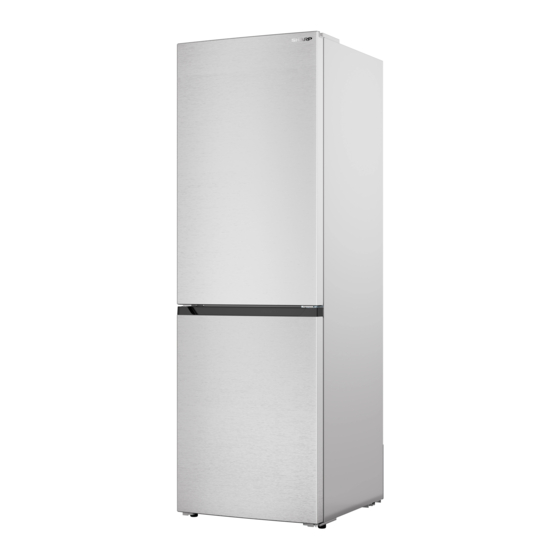
REFRIGERATOR
MODEL : S J B 1 2 5 5 G S
.......................... 3
4
............................. 7
OPERATION MANUAL
..........................................12
USER INTERFACE
..................................................13
DAILY USE
......................................15
CARE AND CLEANING
......................................16
TROUBLE SHOOTING
January 25, 2022
Advertisement
Table of Contents

Summary of Contents for Sharp SJB1255GS
- Page 1 OPERATION MANUAL & INSTALLATION INSTRUCTIONS REFRIGERATOR MODEL : S J B 1 2 5 5 G S ......3 ..........12 CONSUMER LIMITED WARRANTY USER INTERFACE ..........13 IMPORTANT SAFETY INSTRUCTIONS ......DAILY USE ......7 ........15 INSTALLATION INSTRUCTIONS CARE AND CLEANING ........11 ........16 APPEARANCE OVERVIEW...
-
Page 2: Customer Assistance
Æ Downloads including the Installation Guide, Spec Sheet, and Owner’s Manual CONTACT US If at any time you have questions or comments concerning your SHARP product, please contact the SHARP Customer Assistance Center. We are available to assist you through multiple contact methods for your convenience:... -
Page 3: Consumer Limited Warranty
In no event should Sharp be liable, or in any way responsible, for any damages or defects in the Product which were caused by repairs or attempted repairs performed by anyone other than a Sharp authorized servicer. -
Page 4: Important Safety Instructions
IMPORTANT SAFETY INSTRUCTIONS • The refrigerator must be disconnected from the source MEANING OF SAFETY WARNING of electrical supply before attempting the installation of SYMBOLS accessory. • The appliance is intended to be used as is. Do not alter the PROHIBIT specifications by enhancing any applications of the appliance. -
Page 5: Food Safety
IMPORTANT SAFETY INSTRUCTIONS WARNINGS FOR USING FOOD SAFETY To avoid contamination of food, please respect the following PROHIBIT instructions: • Do not arbitrarily disassemble or reconstruct the • Opening the door for long periods can cause a significant refrigerator, nor damage the refrigerant circuit; increase of the temperature in the compartments of the maintenance of the appliance must be conducted by a appliance. -
Page 6: Warnings For Energy
IMPORTANT SAFETY INSTRUCTIONS WARNINGS FOR DISPOSAL WARNINGS FOR ENERGY 1. Refrigerating appliances might not operate consistently PROHIBIT (possibility of defrosting of contents or temperature Refrigerant and cyclopentane foaming material used for the becoming too warm in the frozen food compartment) when refrigerator are flammable. -
Page 7: Installation Instructions
INSTALLATION INSTRUCTIONS SPACE REQUIREMENT DIMENSIONS SIZE (IN) 23.6 27.0 72.8 Min. 2.0 Min. 2.0 Min. 2.0 37.8 38.6 Depth without door is 24.4"... -
Page 8: Installation Location
INSTALLATION INSTRUCTIONS INSTALLATION LOCATION TOOLS TO PREPARE • This refrigerator is designed for indoor, household use only. Phillips Head Socket Wrench Wrench • Keep away from heat and avoid direct sunlight or places near Screwdriver a heat source, such as an oven or a radiator. •... - Page 9 INSTALLATION INSTRUCTIONS 8. Unscrew and remove the bottom hinge pin with wrench or 4. Move door switch from right hinge cover to left hinge cover 3/8” socket wrench, turn the bracket over and refit it. in accessary bag. Unscrew Screw 9.
-
Page 10: Levelling The Unit
INSTALLATION INSTRUCTIONS Lengthen Shorten 13. Replace top hinge cover. Before screw the cover, connect terminals of door switch. If you only want to dissemble door follow steps 1-3 for HOW TO REMOVE SHELVES disassembly. To remove the removable shelf: First, lift up the rear end of shelf, and then pull the shelf out. -
Page 11: Appearance Overview
APPEARANCE OVERVIEW Wine Rack (supplied) -
Page 12: User Interface
USER INTERFACE SETTING PANEL BUTTONS & TEMPERATURE SETTING OPTIONAL MODES MODE ECO MODE Press [MODE] to select [ECO] Mode or [FREEZE BOOST] In this mode, the temperature of fridge and freezer is Mode, and please wait until the flash turns to continuous light, automatically set at 41˚F and 0˚F. -
Page 13: Daily Use
DAILY USE DAILY USE HINTS FOR STORAGE OF FROZEN FOOD To obtain the best performance from this appliance, you should: FREEZING FRESH FOOD • Make sure that the commercially frozen foods were • The freezer compartment is suitable for freezing fresh food adequately stored by the retailer. - Page 14 Temperature sensor of fridge compartment Temperature sensor of freezer compartment Defrost temperature sensor in freezer compartment Fan motor in evaporator room of freezer comportment Defrost heater or the fuse connected with heater When ERROR codes appear, call 1-800-BE-SHARP.
-
Page 15: Care And Cleaning
• Clean the appliance and the interior accessories with cloth and lukewarm water. After cleaning, wipe with fresh water and rub dry. • After everything is dry, place appliance back into service. REPLACE THE LAMP The internal light is a LED type. To replace the lamp, contact 1-800-BE-SHARP. -
Page 16: Troubleshooting
Side panel is hot Condenser is inside the panel It's normal If the malfunction shows again, contact the Sharp customer support (1-800-BE-SHARP) to dispatch a service technician. Please record your model number and serial number below. Model number ________________________________________________ Serial number _________________________________________________...


