Advertisement
Quick Links
Advertisement

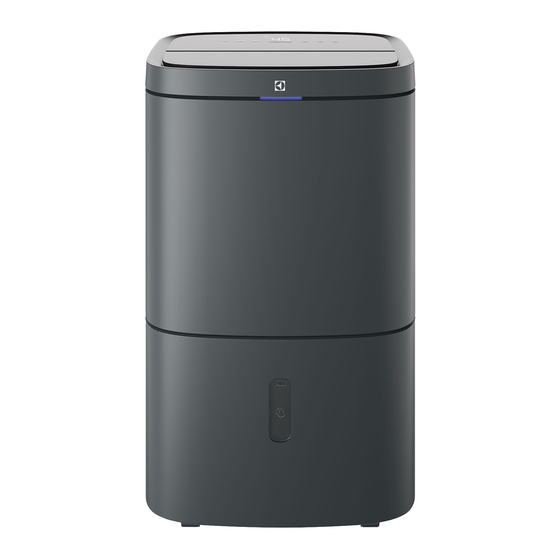
Summary of Contents for Electrolux EDH12TRBD2
- Page 1 EDH12TRBD2 EDH14TRBD2 EDH12TRBW2 EDH14TRBW2 Dehumidifier User Manual...
-
Page 2: Table Of Contents
8. ENVIRONMENT CONCERNS ................19 WE’RE THINKING OF YOU Thank you for purchasing an Electrolux appliance. You’ve chosen a product that brings with it decades of professional experience and innovation. Ingenious and stylish, it has been designed with you in mind. So whenever you use it, you can be safe in the knowledge that you’ll get great results every time. -
Page 3: Safety Information
ENGLISH SAFETY INFORMATION Before the installation and use of the appliance, carefully read the supplied instructions. The manufacturer is not responsible for any injuries or damage that are the result of incorrect installation or usage. Always keep the instructions in a safe and accessible location for future reference. -
Page 4: Safety Instructions
"The software in this product contains components that are based on free and open source software. Electrolux gratefully acknowledges the contributions of the open software and robotics communities to the development project. To access the source code of these free and open source software components whose license conditions require publishing, and to see their full copyright information and applicable license terms, please visit: http://electrolux.opensoftwarerepository.com (folder NIU5)"... -
Page 5: Product Description
ENGLISH 3. PRODUCT DESCRIPTION 3.1 General overview Control panel Castors Louvre / Air outlet HEPA particle filter Air Quality Index (AQI) indicator Mesh pre-filter Water tank Filter lid / Air intake Water level indication Wire Tag Air quality sensor Power cord Drainage plug / Water outlet 3.2 Control panel layout 12L (Without Wireless feature) - Page 6 6 www.electrolux.com Number Symbol Buttons Description To activate and deactivate the appliance. ON/OFF button To activate the WiFi hotspot by long press. Selected models only. To switch between the function settings: • Dryer Menu button • Purifier • Complete To switch between the modes selection: •...
-
Page 7: Before First Use
ENGLISH 4. BEFORE FIRST USE 4.1 Selecting a Location 4.3 Wireless / app connection Important For selected models only: This feature allows you to connect your appliance to 1. Appliance must be upright for one hour Wi-Fi network and to link it to your smart prior to operating. -
Page 8: Operating Instructions
8 www.electrolux.com 5. OPERATING INSTRUCTIONS 5.1 To Turn On the appliance 5.3 Basic function selection To begin operating the dehumidifier, Tap " " button to chose your desired make sure the appliance is plugged in basic function between COMPLETE correctly. - Page 9 ENGLISH Purifier function In this function, the appliance purifies the air and maintains air quality at a healthy level. NOTE: • In SMART mode, you cannot adjust the humidity setting and the fan speed. Manual mode NOTE: 1. When chose COMPLETE function, in •...
- Page 10 10 www.electrolux.com 2. PURIFIER function + SLEEP mode will • Please ensure louvre is NOT stopped at have lower noise than COMPLETE + completely closed position when SLEEP, as the dehumidification function deactivating SWING feature and is turned off. appliance still operating, as this cause overheating.
- Page 11 The filter change icon " " will light up to remind you to replace the HEPA particle filter. Refer to the Electrolux Life App or the Electrolux website on where to purchase 5.9 Child Lock Indicator replacement filters. Always ensure the plastic protective packaging is removed Long press "...
- Page 12 WiFi module, which enables remote control and access to the full functionality of the system via our smartphone app. Download our Electrolux Life App and follow the instructions for how to connect it with your appliance.
- Page 13 ENGLISH 5.15 Removing collected water There are two ways to remove collected water. Use the Water Tank When the water tank is full, the unit will beep 15 times and the Water Tank Full indicator " " will flash. Following the steps below to remove the collected water from the water tank: 1.
- Page 14 14 www.electrolux.com Continuous Drainage 3. Direct the hose toward the drain and place the other end of the hose into the Once the continuous drainage is enabled, drain, making sure that there are no water can be automatically emptied from...
-
Page 15: Care, Cleaning And Storage
Vacuum at least once every 4 shock, insulation failure, or rusting. weeks or as per instructions in the • The air intake grille and outlet get Electrolux Life App. soiled easily, so cleaning such parts with a vacuum cleaner is recommended. - Page 16 HEPA particle filter can not be washed, the mesh pre-filter is put behind the it can only be replaced. back of the lid. Please visit electrolux.com to order your replacement filter. 6.3 Storage If you are not going to use the appliance for a long time, please store it properly.
-
Page 17: What To Do If
ENGLISH 7. WHAT TO DO IF... Before calling for service, review this list. It may save you time and expense. This list includes common occurrences that are not the result of defective workmanship or materials in this appliance. Occurrence Possible Cause Solution Wall plug Push plug firmly into wall outlet. - Page 18 18 www.electrolux.com Occurrence Possible Cause Solution Select Complete function, and adjust Humidity setting is in manual mode to a lower setting or too high. choose Continunous operation for maximum dryness. Dehumidifier has The higher the moisture in the room air,...
-
Page 19: Environment Concerns
ENGLISH 8. ENVIRONMENT CONCERNS Do not dispose appliances marked with Recycle the materials with the symbol the symbol with the household waste. Put the packaging in applicable containers Return the product to your local recycling to recycle it. Help protect the environment facility or contact your municipal office. - Page 20 www.electrolux.com/shop...


