Advertisement
Quick Links
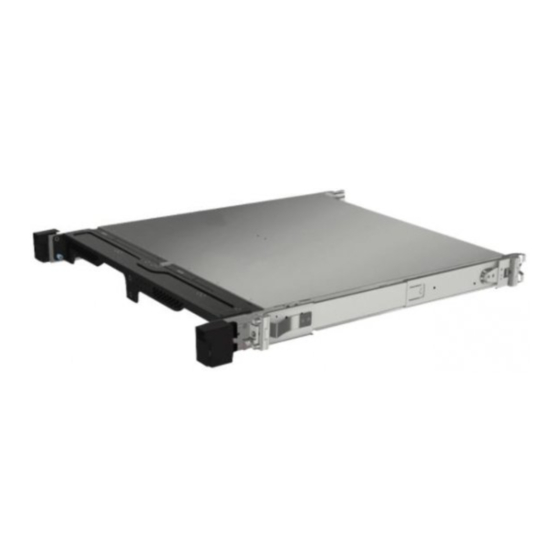
ThinkSystem E2 enclosure short rail kit
Read guidelines first
Review the documentation that comes with the rack for safety and cabling information. Before you install the
server in a rack, read the following guidelines:
• Two or more people are required to install 2U/4U or larger devices in a rack.
• Some illustrations might differ from your server. All types of server are removed and installed in a similar
manner.
• See the Maintenance Manual for the maximum room air temperature.
• Install the server only in a rack that has perforated doors.
• Do not block any air vents, usually 15 cm (6 inches) of air space provides proper airflow.
• Plan the device installation starting from the bottom of the rack.
• Install the heaviest device in the bottom of the rack.
• Do not leave open space above or below an installed server in your rack. To help prevent damage to
server components, always install a filler panel to cover the open space and to help ensure proper air
circulation.
• Do not extend more than one device out of the rack at the same time.
• Do not place any objects on the top of the rack-mounted devices.
• Connect all power cords to properly wired and grounded electrical outlets.
• Do not overload the power outlet when installing multiple devices in the rack.
• Remove the rack doors and side panels to provide easier access during installation.
• Install the server in a rack that meets the following requirements:
– Minimum depth of 70 mm (2.76 inches) between the front mounting flange and inside of the front door.
– Minimum depth of 190 mm (7.48 inches) between the rear mounting flange and inside of the rear door.
– The maximum distance between the front and the rear EIA flange of the rack is 810 mm (31.9 inches).
– If you want to install the rails and a 0U PDU into the same rack, the rack must be 42U or higher.
Safety notice
CAUTION:
Make sure the rails support your server model and use
safe practices when lifting
1 1
Advertisement

Summary of Contents for Lenovo ThinkSystem E2
- Page 1 ThinkSystem E2 enclosure short rail kit Read guidelines first Review the documentation that comes with the rack for safety and cabling information. Before you install the server in a rack, read the following guidelines: • Two or more people are required to install 2U/4U or larger devices in a rack.
- Page 2 Rail Support Matrix For the detailed information about the rail support, see the following website: https://en.resources.lenovo.com/ brochures/thinksystem-rail-support-matrix Part number Find the rail part number on the label as shown, use the part number to identify your rail model in the Rail Support Matrix above.
- Page 3 The rail package contains the following items: Document Left rail Right rail Two M6 screws Four screws...
-
Page 4: Installation Steps
Installation steps Remove Inner Rails Step 1. Pull the inner rail outward until you see the release latch. Step 2. Press the release latch. Step 3. Pull out the inner rail away from the outer rail. - Page 5 Install Inner Rails on System Step 1. Align the mounting holes in the inner rail with the corresponding rail mounting pins on the side of the server. Step 2. Push the inner rail as shown until the mounting pins on the server lock into place with the inner rail. Note : Make sure the stamp “Front”...
- Page 6 Install Rear Mounting Bracket to Rack Step 1. Align the pins on the rear end of the outer rail to the holes on the rear of the rack. Step 2. Slightly move the rail aside to hook the rear mounting bracket latch to the frame, and then push the outer rail outward as shown.
- Page 7 Install Front Mounting Bracket to Rack Install Rear Screws (optional) Step 1. Open the front bracket and align the front end of the outer rail to If you want to ship the rack with the the holes in the rack. Ensure that the front end and rear end of the rail are server installed or place the rack in a at the same horizontal level.
- Page 8 Slide System into Rails in Rack Step 1. Carefully lift the server and align the server to the slide rails. Position the server as shown and push the server into the rack. Step 2. Press the release latches. Step 3. Push the server all the way into the rack until the server locks into place with a click. Tighten Front Screws (optional) Secure the server before you move the rack, or if you place the rack in a vibration-prone area.
- Page 9 Removal steps Removal of System from Rack Note: Make sure you have enough help and use safe practices when performing step 3. Step 1. Disconnect all cables from the rear server. Open the rack release latch in the front of the server; then, slowly slide the server out until it stops.
- Page 10 First Edition (August 2019) © Copyright Lenovo 2019. LENOVO and THINKSYSTEM are trademarks of Lenovo. All other trademarks are the property of their respective owners. LIMITED AND RESTRICTED RIGHTS NOTICE: If data or software is delivered pursuant to a General Services Administration (GSA) contract, use, reproduction, or disclosure is subject to restrictions set forth in Contract No.


