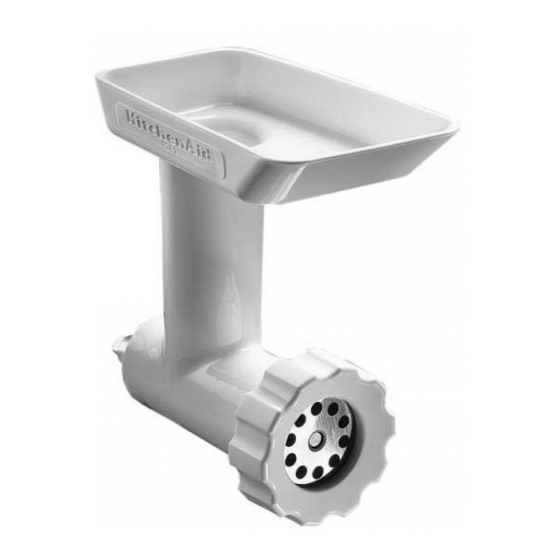
KitchenAid 5FGA Manual
Hide thumbs
Also See for 5FGA:
- Instructions and recipes manual (16 pages) ,
- Instructions and recipes manual (209 pages)
Table of Contents
Advertisement
Quick Links
Advertisement
Table of Contents

Summary of Contents for KitchenAid 5FGA
- Page 1 5FGA, 5FVSP, 5FVSFGA...
- Page 3 English ............... 5 Deutsch ..............19 Français ..............33 Italiano ..............47 Nederlands .............. 61 Español ..............75 Português ..............89 Ελληνικά ..............103 Svenska ..............117 Norsk ..............131 Suomi ..............145 Dansk ..............159 Íslenska ..............173 Русский ..............187 Polski ..............
-
Page 5: Table Of Contents
TABLE OF CONTENTS PARTS AND FEATURES ..................6 Parts and accessories ..................6 Fruit and Vegetable Strainer parts ..............6 STAND MIXER ATTACHMENT SAFETY ..............7 Important safeguards ..................7 Waste disposal ....................9 USING THE STAND MIXER ATTACHMENT............9 Food Grinder attachment plate chart ............9 Fruit and Vegetable Strainer attachment chart ..........10 Assembling the Food Grinder attachment ...........11 Assembling the Fruit and Vegetable strainer ..........12 Attaching the grinder/strainer to the Stand Mixer ........13... -
Page 6: Parts And Features
PARTS AND FEATURES PARTS AND ACCESSORIES Combination food pusher/wrench Grinder body Grind worm Fine grinding Ring plate Coarse Knife blade grinding plate FRUIT AND VEGETABLE STRAINER PARTS* Large grind worm Strainer cone Splash shield Strainer tray Spring and shaft assembly *These parts are sold separately as model 5FVSP. -
Page 7: Stand Mixer Attachment Safety
STAND MIXER ATTACHMENT SAFETY IMPORTANT SAFEGUARDS When using electrical appliances, basic safety precautions should always be followed, including the following: 1. Read all instructions. Misuse of appliance may result in personal injury. 2. This appliance is not intended for use by persons (including children) with reduced physical, sensory or mental capabilities, or lack of experience and knowledge, unless they have been given supervision... - Page 8 7. The use of attachments not recommended or sold by KitchenAid may cause fire, electrical shock, or injury 8. Do not use the appliance outdoors. 9. Avoid contacting moving parts. Keep fingers out of discharge opening.
-
Page 9: Waste Disposal
STAND MIXER ATTACHMENT SAFETY WASTE DISPOSAL Disposal of packing material The packing material is 100% recyclable and is marked with the recycle symbol . The various parts of the packing must therefore be disposed of responsibly and in full compliance with local authority regulations governing waste disposal. -
Page 10: Fruit And Vegetable Strainer Attachment Chart
USING THE STAND MIXER ATTACHMENT FRUIT AND VEGETABLE STRAINER ATTACHMENT CHART USE THESE WITH THESE SUGGESTED USES SPEED PARTS PARTS SPRING AND SHAFT ASSEMBLY STRAINER CONE Sauces Chutneys Jams and Fruit Butters Hummus LARGE GRIND WORM STRAINER TRAY with SPLASH SHIELD RING GRINDER BODY To strain fruits and vegetables:... -
Page 11: Assembling The Food Grinder Attachment
USING THE STAND MIXER ATTACHMENT ASSEMBLING THE FOOD GRINDER ATTACHMENT Place the knife blade over the square Insert the small grind worm into the shank at the exposed end of the grinder body. grind worm. Place grinding plate over the knife, Place the ring on the grinder body, matching the tabs of the plate with turning by hand until secured but not... -
Page 12: Assembling The Fruit And Vegetable Strainer
USING THE STAND MIXER ATTACHMENT ASSEMBLING THE FRUIT AND VEGETABLE STRAINER Slide the smaller end of the spring and shaft assembly into the opening Insert the large grind worm into the on the large grind worm until it is grinder body. secured firmly in place. -
Page 13: Attaching The Grinder/Strainer To The Stand Mixer
USING THE STAND MIXER ATTACHMENT ATTACHING THE GRINDER/STRAINER TO THE STAND MIXER Turn the Stand Mixer off and unplug. For Stand Mixers with a hinged attachment hub cover: Flip up to open. For Stand Mixers with a removable attachment hub cover: Turn the attachment knob counterclockwise to remove attachment hub cover. -
Page 14: Using The Food Grinder Attachment
USING THE STAND MIXER ATTACHMENT USING THE FOOD GRINDER ATTACHMENT Cut food into small strips or pieces Turn the Stand Mixer to Speed 4 and feed them into hopper. Meat and feed food into hopper using should be cut into long narrow strips. combination food pusher/wrench. -
Page 15: Using The Fruit And Vegetable Strainer Attachment
USING THE STAND MIXER ATTACHMENT USING THE FRUIT AND VEGETABLE STRAINER ATTACHMENT After attaching the Fruit and Vegetable Strainer attachment to the Stand Mixer, place the mixer bowl under the strainer tray to catch strained food and place a smaller bowl under the open end to catch food waste. -
Page 16: Care And Cleaning
CARE AND CLEANING CLEANING THE GRINDER/STRAINER ATTACHMENT These parts are dishwasher safe: Completely disassemble the grinder worms, strainer cone, strainer attachment parts. tray, splash shield, ring, food tray and combination food pusher/wrench. NOTE: To loosen the ring: if the ring is too tight to remove by hand, slip the combination food pusher/wrench over the grooves, and turn counterclockwise... -
Page 17: Warranty And Service
Authorised KitchenAid Service/Customer Centre. For more information, visit our website at: www.KitchenAid.co.uk www.KitchenAid.eu ©2017 All rights reserved. KITCHENAID and the design of the stand mixer are trademarks in the U.S. and elsewhere. WARRANTY AND SERVICE | 17...


