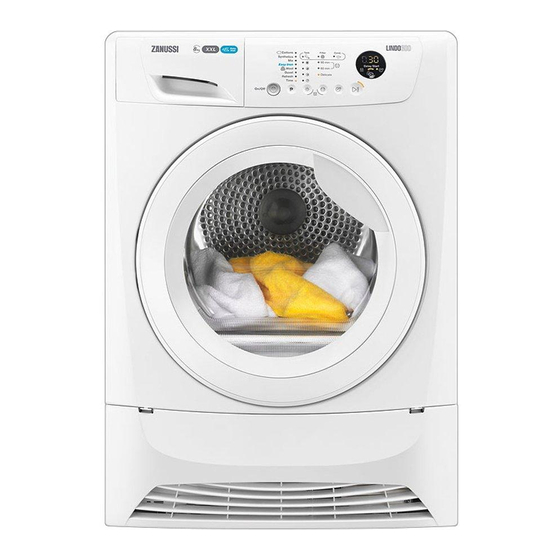
Zanussi ZDC8203W User Manual
Hide thumbs
Also See for ZDC8203W:
- User manual (60 pages) ,
- User manual (33 pages) ,
- User manual (17 pages)
Table of Contents
Advertisement
Advertisement
Table of Contents

Summary of Contents for Zanussi ZDC8203W
- Page 1 User Manual GETTING STARTED? EASY. ZDC8203W EN User Manual Tumble Dryer...
-
Page 2: Safety Information
SAFETY INFORMATION Before beginning the installation and use of this appliance, carefully read the supplied instructions. The manufacturer is not responsible for any injuries or damages that are the result of incorrect installation or usage. Always keep the instructions in a safe and accessible location for future reference. - Page 3 The ventilation opening in the base must not be covered by a • carpet, mat, or any floor covering. WARNING: The appliance must not be supplied through an • external switching device, such as timer, or connected to a circuit that is regularly switched on and off by a utility. Connect the mains plug to the mains socket only at the end of •...
-
Page 4: Safety Instructions
Before any maintenance operation, deactivate the appliance • and disconnect the mains plug from the socket. SAFETY INSTRUCTIONS INSTALLATION • Remove all the packaging. WARNING! Risk of injury, electric • Do not install or use a damaged appliance. shock, fire, burns or damage to the •... -
Page 5: Easy Start
EASY START PRODUCT DESCRIPTION Water container Control panel Appliance door Primary Filter Bottom cover with the airflow slots WARNING! Do not put any object on the bottom cover Buttons to open the bottom cover Adjustable feet Condenser door Locks for condenser door Rating plate For ease of loading laundry or ease of installation the door is reversible. -
Page 6: Programme Table
Press the touch buttons with your finger in the area with the symbol or name of the option. Do not wear gloves when you operate the control panel. Make sure that the control panel is always clean and dry. Indicators Indicators Description Time Drying... -
Page 7: Anticrease 90 Min
Load (max.) Programmes Type of load Fabric mark For drying sport shoes only with Drying Rack (see separate 1 pair of sport user manual provided with Drying Rack). shoes Single or double duvets and pillows (with feather, down or Duvet 3kg/ synthetic fillings). - Page 8 OPTIONS TABLE Programmes Anti- Anti- crease crease Delicate 90 min 60 min ■ ■ ■ ■ ■ ■ ■ Cottons ■ ■ ■ ■ ■ ■ Synthetics ■ ■ ■ ■ ■ Easy Iron ■ ■ Wool ■ ■ ■ Duvet ■...
-
Page 9: Before First Use
3. Press and hold buttons (B) and (D) at the same 4. Press the button (F) again and again until the time. indicator of the correct level comes on. 5. To confirm the adjustment, press and hold One of the these indicators comes on: buttons (B) and (D) at the same time for •... -
Page 10: Hints And Tips
• After 5 minutes if you do not start the Always clean the filter and empty the programme. water container when a programme is • After 5 minutes from the end of the programme. completed. STAND-BY FUNCTION To decrease the energy consumption, this function automatically deactivates the appliance: HINTS AND TIPS PREPARING THE LAUNDRY... -
Page 11: Draining The Water Container
DRAINING THE WATER CONTAINER You can use the water from the water container as an alternative to distilled water (e.g. for steam ironing). Before you use the water, remove dirt residues with a filter. CLEANING THE CONDENSER CLEANING THE DRUM Use a standard neutral soap detergent to clean the inner surface of the drum and drum lifters. -
Page 12: Cleaning The Control Panel And Housing
CAUTION! Do not use abrasive CAUTION! Do not use furniture materials or steel wool to clean the cleaning agents or cleaning agents drum. which can cause corrosion. CLEANING THE CONTROL PANEL AND CLEANING THE AIRFLOW SLOTS HOUSING Use a vacuum cleaner to remove fluff from the Use a standard neutral soap detergent to clean the airflow slots. -
Page 13: Technical Data
Problem Possible solution The display shows (e.g. E51). Deactivate and activate the appliance. Start a new programme. If the problem occurs again, contact the Service. 1) After maximum 5 hours, the programme ends automatically. 2) It can happen that some area remains humid when drying big items (e.g. bed sheets ). remaining laundry moisture degree "... -
Page 14: Environmental Concerns
ENVIRONMENTAL CONCERNS with the symbol with the household waste. Recycle materials with the symbol . Put the Return the product to your local recycling facility or packaging in relevant containers to recycle it. Help contact your municipal office. protect the environment and human health by recycling waste of electrical and electronic appliances. - Page 16 WWW.ZANUSSI.COM/SHOP...


