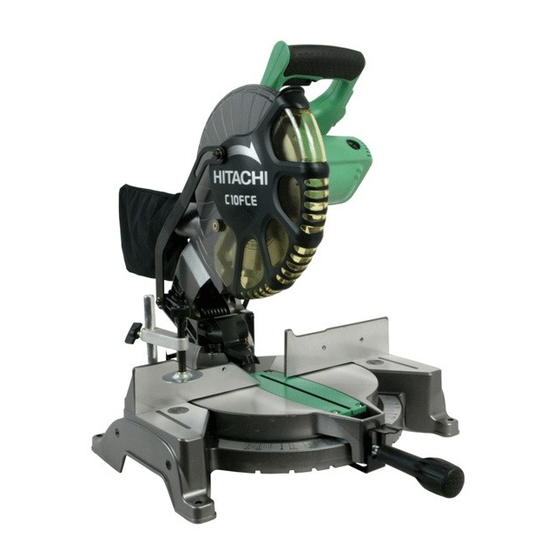
Hitachi C 10FCH Handling Instructions Manual
Compound saw
Hide thumbs
Also See for C 10FCH:
- Handling instructions manual (34 pages) ,
- Instruction manual (80 pages) ,
- User manual (76 pages)
Table of Contents
Advertisement
Compound Saw
Model C 10FCH
Handling instructions
Note:
Before using this Electric Power Tool, carefully read through these
HANDLING INSTRUCTIONS to ensure efficient, safe operation. It is
recommended that these INSTRUCTIONS be kept readily available
as an important reference when using this power tool.
C 10FCE
•
Advertisement
Table of Contents

Summary of Contents for Hitachi C 10FCH
-
Page 1: Handling Instructions
Compound Saw Model C 10FCH C 10FCE • Handling instructions Note: Before using this Electric Power Tool, carefully read through these HANDLING INSTRUCTIONS to ensure efficient, safe operation. It is recommended that these INSTRUCTIONS be kept readily available as an important reference when using this power tool. -
Page 2: General Operational Precautions
14. Maintain tools with care. Keep cutting tools sharp Use only original HITACHI replacement parts. and clean for better and safer performance. Follow 10. This tool should only be disassembled for instructions for lubrication and changing replacement of carbon brushes. -
Page 3: Specifications
37. Shut off power and wait for saw blade to stop before 23. Use only saw blades recommended by HITACHI. servicing or adjusting tool. 24. The saw blades should be from 235 mm to 255 mm 38. During a miter or bevel cut the blade should not be external diameter ranges. -
Page 4: Standard Accessories
2. Power switch STANDARD ACCESSORIES Ensure that the power switch is in the OFF position. If the plug is connected to a receptacle while the trigger (1) 255 mm TCT Saw blade (mounted on tool) ..... 1 switch is in the ON position, the power tool will start (2) Dust bag .............. -
Page 5: Adjusting The Power Tool Prior To Use
(2) During bevel and compound cutting, attach the dust bag 1. Tightly secure the material by vise assembly to be at a right angle to the base surface as shown in Fig. 3. cut so that it does not move during cutting 2. - Page 6 5. Confirmation for use of sub fence (Standard (1) Light up the laser marker and make a groove of about 5 accessory) (Fig. 7) mm deep on the workpiece that is about 38 mm in height In the case of direct angle cutting and angle cutting, and 89 mm in width.
- Page 7 8. Cutting operation (1) As shown in Fig. 13 the width of the saw blade is the width of the cut. Therefore, slide the workpiece to the right (viewed from the operator’s position) when length is desired, or to the left when length desired.
- Page 8 9. Miter cutting procedures When stopping the bevel cutting operation halfway, (1) Loosen the side handle and push the lever for angle start cutting after pulling back the motor head to the stoppers. Then, adjust the turntable until the indicator initial position.
- Page 9 14. Confirmation for use Crown molding vise, Crown CAUTION molding Stopper (L) and (R) (Optional accessory) Always confirm that the motor head (see Fig. 2) does (1) Crown molding Stopper (L) and (R) (optional not contact the crown molding vise assembly when it accessories) allow easier cuts of crown molding is lowered for cutting.
-
Page 10: Maintenance And Inspection
Dismount the saw blade by reversing the mounting protection, carbon brush inspection and replacement procedures described in paragraph 1 above. on this tool should ONLY be performed by a Hitachi The saw blade can easily be removed after lifting the Authorized Service Center. - Page 11 CAUTION discharge dust and the like. Repair, modification and inspection of Hitachi Power 6. Inspecting the screws Tools must be carried out by a Hitachi Authorized Regularly inspect each component of the power tool Service Center. for looseness. Especially laser device should be maintained by the Re-tighten screws on any loose part.
- Page 12 C10FCH (1/2)
- Page 13 C10FCH (1/2) 323-141 322-901 323-137 322-964 M6 × 10 323-138 949-610 D13 × 14 949-900 322-910 323-142 322-903 M5 × 6 962-782 949-457 D2 × 12 M8 × 16 949-531 949-655 323-144 322-899 975-144 949-453 M6 × 10 M4 × 8 307-956 949-215 323-135...
- Page 14 C10FCH (2/2)
- Page 15 C10FCH (2/2) M7 × 17.5 998-335 303-792 308-789 620-2VV 319-106 980-700 323-133 “90-94” 322-916 M4 × 10 990-430 302-428 322-919 600-0VV 600-3VV 322-915 D5 × 50 322-918 953-121 322-917 158-1 340-591D 110V “159” 982-027 158-2 340-591E 220V “159” M5 × 16 987-512 158-3 340-615E...
- Page 16 C10FCE (1/2)
- Page 17 C10FCE (1/2) M6 × 10 307-956 322-711 ”506-509” M6 × 22 322-889 993-609 M6 × 22 322-890 322-959 M6 × 6 322-965 987-860 302-518 ”6” 322-958 984-528 –––––––– M6 × 20 323-208 322-713 ”607-610” M6 × 15 322-935 301-806 322-936 ––––––––...
- Page 18 C10FCE (2/2)
- Page 19 C10FCE (2/2) M7 × 17.5 998-335 937-623 M5 × 40 308-789 322-123 319-106 322-914 ”138, 139” M5 × 8 323-133 ”75-79” 938-477 M4 × 10 990-430 938-241 322-919 140-1 999-038 110V 600-3VV 140-2 999-065 220 – 240V 322-918 945-161 322-917 976-819 D25.4 982-027...
- Page 20 Hitachi Koki Co., Ltd. Code No. C99127611 Printed in China...


