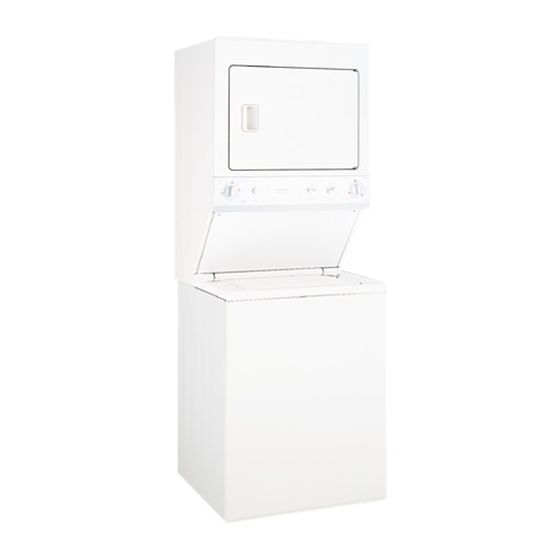
Table of Contents
Advertisement
Quick Links
-&WARNING
-
POTENTIAL FIREAND SHOCK HAZARD
• Use only rigid metal or flexible metal 4" diameter ductwork inside the dryer cabinet or for exhausting to the outside.
Use of plastic or other combustible ductwork can cause a fire. Foil or other easily punctured ductwork can cause a fire
if it collapses or becomes restricted in use or during installation.
• This appliance must be properly grounded and installed as described in these instructions.
IMPORTANT
• Exhausting the dryer to the outside is required to
prevent large amounts of moisture, lint and other
products of combustion from being blown into the
room.
• Service information and a wiring diagram are located
in the dryer access panel.
TOOLS NEEDED
• Slip joint pliers
• Phillips-head and flat-blade screwdrivers
• Ratchet with 3/8" socket
• Carpenter's level
• Adjustable wrenches
• Pipe thread sealer
CONTENTS
Installation Procedure ........
page 2
........
page S
Electrical Information .........
page 5
.............
page 6
Exhaust Information ..........
page 6
Mobile Home Installation ..... page 7
Closet Installation ............
page 7
Door Ventilation Opening ..... page 8
Requirements ................
page 8
7: /_"
54_/16"
PRODUCT DIMENSIONS
_
25V4"
I ]
@
®
v
. _19W'
en_
"'_.Ft.,
Water .............
inlets (rear)
_/
Drain outlet
(rear)
3YJ'
_27"
16V4"
Gas supply
........... pipe (rear)
:....N.L.
21/2
H
149-90331]
09-07 JR
134923400
(0907)
Printedinthe
United States
Advertisement
Table of Contents

Summary of Contents for GE 49-90331
-
Page 1: Table Of Contents
-&WARNING POTENTIAL FIREAND SHOCK HAZARD • Use only rigid metal or flexible metal 4" diameter ductwork inside the dryer cabinet or for exhausting to the outside. Use of plastic or other combustible ductwork can cause a fire. Foil or other easily punctured ductwork can cause a fire if it collapses or becomes restricted in use or during installation. -
Page 2: Installation Procedure
Installation Instructions U N PACKI NG SPACE MAKER'" UNPACKING SPACEMAKER'" (CONT.) NOTE: from T he tub blocking pad, shipping bolt and plastic Remove tape two corner pads rear bottom corners of appliance. spacer should be retained for use if the appliance is the four transported at a later date. - Page 3 Installation Instructions CONNECTING TO PLUMBING FACILITIES MOVING SPACEMAKER'" TO OPERATING LOCATION CAUTION: Be sure water supplg lines have been thoroughlg flushed to remove particles that might Remove 2 screws securing access panel clog the washer filter screens. to the dryer cabinet. Lift the front access panel until the tabs can be disengaged from the dryer Check inlet hoses to insure the rubber washers cabinet and remove the panel.
- Page 4 Installation Instructions CONNECTING TO GAS SUPPLY CHECKING APPLIANCE OPERATION If codes materials Connect gas supply to dryer. Make sure packing shipping allow, use new flexible metal tubing (design removed, including the washer shipping bolt and certified by the American Gas Association). Be plastic spacer block.
-
Page 5: Plumbing Information
Installation Instructions PLUMBING INFORMATION ELECTRICAL CONN ECTION INFORMATION WATER SUPPLY REQUIREMENTS CAUTION: • HOT AND COLD WATERFAUCETS - Must be within 42" For personal safetg: of the appliance water inlet hose connections. The TURN OFF ELECTRICITY AT POWER SOURCE(CIRCUIT fuucets must be 3/4" garden hose-tgpe so inlet BREAKER/FUSEBOX)BEFOREINSTALLING OR hoses cun be connected. -
Page 6: Gas Information
Installation Instructions EXHAUST GAS CONNECTION INFORMATION CAUTION: EXHAUST DUCT LENGTH INFORMATION Do not attempt to alter gas orifice or adjust burner air • The MAXIMUM ALLOWABLElength of the exhaust shutter. Natural gas input may vary in some areas from system depends upon the type of duct, number of 700 to 1200 B.T.U.per cubic foot. -
Page 7: Mobile Home Installation
Installation Instructions MOBILE HOME INSTALLATION EXHAUST (CONT.) • Installation must conform to Manufactured Home SEALING OF JOINTS Construction and Safetg Standard, Title 24 CFR, • All joints should be tight to avoid leaks. Part 32-80, NOTE: The male end of each section of duct must point •... -
Page 8: Door Ventilation Opening
Installation Instructions -AWARNING - MISCELLANEOUS REQUIREMENTS LOCATION For gour safetg, the information in this manual must be followed to minimize the risk of fire or explosion or to • The appliance must be installed on firm flooring to prevent propertg damage, personal injurg or loss of life. minimize vibration during spin cycles.


