Table of Contents
Advertisement
Quick Links
Advertisement
Table of Contents

Summary of Contents for AEG AC30100S
- Page 1 AC30100S Original instructions...
- Page 2 Important! It is essential that you read the instructions in this manual before assembling, operating and maintaining the product. Subject to technical modifications.
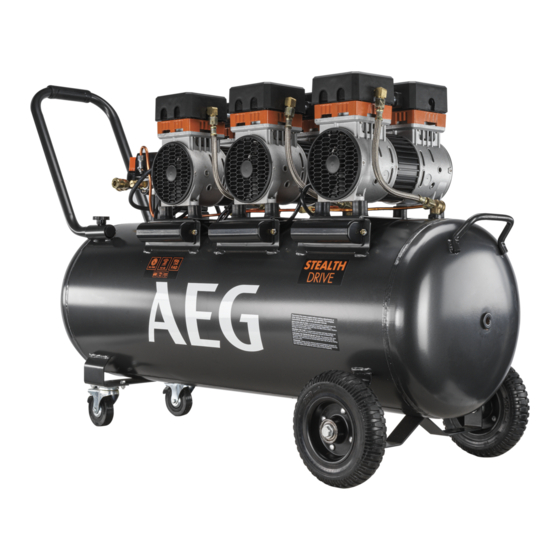
- Page 3 Fig. 1 1 - Air filter assembly x3 2 - Pressure relief valve 3 - Front handle 4 - Power cord 5 - AUTO/OFF switch 6 - Pressure regulator knob 7 - Tank pressure gauge 8 - Regulator pressure gauge 9 - Quick connect coupler 10 - Tank 11 - Wheel lock x2...
- Page 4 Fig. 6 1 - Unlock 2 - Lock Fig. 7 Fig. 9 1 - Quick connect coupler 2 - Quick connect air fitting 3 - To reduce pressure (Turn counterclockwise) 4 - Pressure relief valve 5 - Regulator locking ring Fig.
- Page 5 Fig. 10 Fig. 11 1 - Pressure relief valve 1 - Drain valve 2 - To close 2 - Open position 3 - To release air 3 - Closed position Fig. 12 1 - Air filter housing 2 - Air filter 3 - Air filter cover 4 - Air hose...
-
Page 6: General Safety Warnings
TECHNICAL DATA AIR COMPRESSOR AC30100S Rated motor power 2200 W Rated current 9.2 A Air outlets 2 pcs, 6.35mm (1/4”) NITTO style connector/ coupler (suitable for NITTO fitments) Quick connector fitting size 6.35 mm (1/4”) BSP thread Weight 71.5 kg... -
Page 7: Air Compressor Safety Warnings
■ Use the air compressor only for its intended use. Do not alter or AIR COMPRESSOR USE AND CARE modify the unit from the original design or function. ■ Do not exceed the pressure rating of any component in the ■... - Page 8 equipment such as gloves to avoid injuries resulting from a high Do not discard the packing material until you have carefully inspected temperature. and satisfactorily operated the product. ■ When using the product with an extension cord, use a 3 x 1.5mm WARNING! If any parts are damaged or missing do not operate heavy duty extension cord only.
- Page 9 INSTALLING AIR FILTERS 3. When disconnecting a hose from 6.35 mm (1/4 in.) quick coupler, always firmly hold release end of hose. See figure 5. 4. Pull back on the release sleeve on the 6.35 mm Attach one air filter to each of the cylinder covers. Screw in a clockwise (1/4 in.) quick coupler.
-
Page 10: Draining The Tank
AEG service centre. 3. Run the air tool to relieve the air pressure in the hose, then Use only AEG accessories and spare parts. Should components need remove the air hose and the tool, or release the pressure from the to be replaced which have not been described, please contact one of tank by the drain valve. - Page 11 If needed, an exploded view of the product can be ordered. Please Do not dispose of electric tools together with state the Article No. as well as the machine type printed on the label household waste material. Electric tools and and order the drawing at your local service agents or directly at: electronic equipment that have reached the end of their life must be collected separately and returned...
-
Page 12: Troubleshooting
TROUBLESHOOTING PROBLEM POSSIBLE CAUSE SOLUTION Compressor will not run Loss of power or overheating Check for proper use of extension cord. No electrical power Check to be sure unit is plugged in. Check fuse/breaker. Blown shop/house fuse Replace shop/house blown fuse. Shop/house breaker open Reset shop/house breaker, determining why problem happened. - Page 13 PROBLEM POSSIBLE CAUSE SOLUTION Air output lower than normal Broken inlet valves Take compressor to service centre. Connections leaking Tighten connections. Hose or tool leaking Check/replace leaking hose/tool. Current limiting protector open on one Unplug unit from the wall and allow to cool for 5 minutes of the motors...
-
Page 14: Parts List
PARTS LIST... - Page 15 Description Description Description Description Cover 1-24 Valve plate Capacitor Universal wheel Left fan 1-25 Valve Capacitor cover Bolt Left crankcase 1-26 Washer Spring Drain cock Connecting rod 1-27 Bolt Washer Terminal box Piston cup 1-28 Right fan Bolt Bolt Binder plate 1-29 Shaft seal Check valve...
- Page 16 Techtronic Industries N.Z. Limited Unit C, 70 Business Parade South AEG is a registered trade mark used under license from AB Electrolux (publ) Highbrook, Auckland 2013, New Zealand NITTO is a registered trade mark owned by Nitto Kohki Co., Ltd.


