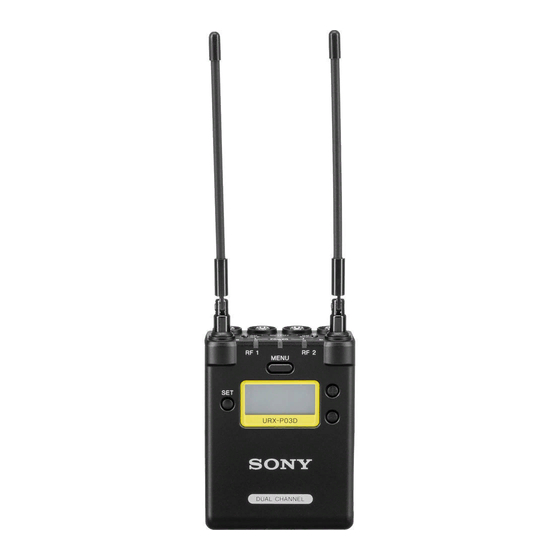
Summary of Contents for Sony URX-P03D/25
- Page 1 4-593-095-12 (1) UHF Synthesized Diversity Tuner Operating Instructions URX-P03D © 2016 Sony Corporation...
-
Page 2: Table Of Contents
Table of Contents Features ............3 Parts Identification ........4 Power Supply..........6 Inserting the Batteries ........6 Supplying Power from a USB Connector..7 Charging Nickel Metal Hydride Batteries ..7 Attaching Accessories........8 Settings ............9 Setting the Receive Channel......9 Searching for Available Channels within a Group (Clear Channel Scan) .... -
Page 3: Features
In combination with a compact camcorder or supplied) allows you to mount the unit on cameras interchangeable-lens digital camera, the unit can be used equipped with a Multi Interface Shoe (e.g., Sony video for various purposes, such as ENG (Electronic News camera recorders and interchangeable-lens digital... -
Page 4: Parts Identification
Indicator display Status Parts Identification Flashing (red) Charging not possible (when batteries other than rechargeable nickel metal hydride batteries are inserted or the nickel metal hydride batteries are deteriorated) Front Note Disconnect the USB cable, and replace the batteries. Power is off or battery is empty c RF (radio frequency) indicators Indicate the RF input level of tuner 1 and tuner 2. - Page 5 MIC INPUT (audio input) connector (3.5-mm diameter, stereo mini plug) Connect to a plug-in power external microphone or Sony BMP-type lavalier microphone. m POWER switches Turn tuner 1 and tuner 2 on or off individually.
-
Page 6: Power Supply
Almost empty Notes • When BATTERY is set to TYPE1, the battery level is indicated based on the use of new LR6 (size AA) Sony alkaline batteries. The battery level may not be displayed correctly when different kinds of batteries, different brand of batteries, or old batteries are used. -
Page 7: Supplying Power From A Usb Connector
• Dry cells are not rechargeable. • When not using the device for a long period of time, remove the batteries. If the batteries leak for any reason, consult your Sony service representative. Supplying Power from a USB Connector The unit can operate from a commercially available USB- output type AC adapter or portable power supply connected to the USB connector. -
Page 8: Attaching Accessories
Attaching the shoe mount adapter Attaching Accessories Attach the belt clip before attaching the shoe mount adapter. Connecting the conversion cable to the Note OUTPUT connector Attach belt clips upside-down if planning to attach the shoe mount adapter. Example: XLR-BMP conversion output cable For a secure connection, turn to lock the connector. -
Page 9: Settings
Notes Settings • If there is no user input within 10 seconds after the channel group display or channel number display starts flashing, the displayed setting that is flashing is saved. Setting the Receive Channel The same applies when setting other parameters. •... -
Page 10: Searching For Active Channels Within A Group (Active Channel Scan)
SET button. The selected compander mode is configured. UWP-D: Select this when operating in conjunction with Sony UWP-D series transmitters. UWP: Select this when operating in conjunction with Sony UWP series transmitters. WL800: Select this when operating in conjunction Press the + button. -
Page 11: Using The Infrared Communication Function
Using the Infrared Communication Function When operating in conjunction with UWP-D series transmitters, the frequency and compander mode settings configured on the unit can be sent and applied to the transmitter using the infrared communication function. Use the + or – button to select “YES,” then press the Note SET button on the transmitter. -
Page 12: Adjusting The Monitor Audio Level
Menu Displays and Detailed Settings Menu Structure and Hierarchy Use the + or – button to select “YES,” then press the Menu structure SET button on the transmitter. This sets the transmit channel and compander mode. UTILITY menu You can display the UTILITY menu from the meter screen which displays information on tuners 1 and 2. -
Page 13: Basic Menu Operations
Setting the audio output level (OUT Basic Menu Operations LEVEL) Sets the audio output level. You can set the level in 3 dB increments in the range –12 dB to +12 dB. The factory Menu name default setting is 0 dB. Function name Note The monitor output level does not change when you... -
Page 14: Rx (Tuner) 1/2 Menu
TYPE1: Recommended setting when using alkaline LR6 Selecting the frequency band (BAND) (size AA) batteries. Indicates the battery level based on the characteristics of new Sony alkaline LR6 (size AA) Select the receive frequency band. batteries. TYPE2: Recommended setting when using rechargeable Note nickel metal hydride batteries. -
Page 15: Ext.in Menu
PLUG-IN PWR: Select this when using a plug-in power occurred in the message persists, microphone. PLL synthesizer contact your Sony MONO BMP +5V: Select this when using a Sony circuit. service representative. lavalier microphone. NO TONE Audio signal Configure the... -
Page 16: Troubleshooting
Troubleshooting If you have any problem, use the following checklist before asking for repairs. If the problem persists, contact your Sony service representative. Symptom Cause Solution The unit does not turn The 3 and # polarity orientation of the batteries is Insert the batteries with the correct polarity incorrect. -
Page 17: Important Notes On Use
Important Notes on Use Specifications 1/4 λ wire antenna Antenna Usage and Storage (angle-adjustable) RF squelch level • Operating the UWP-D series devices near electrical 15 dBµ / OFF (0 dBµ = 1 µV) equipment (motors, transformers, or dimmers) may Audio output level cause interference due to electromagnetic induction. - Page 18 EXPIRATION OF THE WARRANTY, OR FOR channel operation; 500 mA when ANY OTHER REASON WHATSOEVER. charging nickel metal hydride • SONY WILL NOT BE LIABLE FOR CLAIMS OF batteries) ANY KIND MADE BY USERS OF THIS UNIT OR Battery life Approx.
- Page 19 Sony Corporation...


