Table of Contents
Advertisement
Quick Links
Download this manual
See also:
User Manual
Advertisement
Table of Contents

Summary of Contents for D-Link DFL-M510
- Page 1 Building Networks for Peopl e Information Security gateway This Quick Guide will guide you through the installation Process. You are only moments away from using your new D-Link Network Security Product DFL-M510 (ISG)
-
Page 2: Table Of Contents
DFL-M510 Quick Installation Guide 1.Before You Begin 1.1 Check Your Package Contents...1 1.2 DFL-M510 Introduction...2 1.3 DFL-M510 Architecture...3 2.Identifying Components 2.1 Front View...4 2.2 Rear View...5 2.3 LCD Navigation Button Descriptio...5 2.4 LCD Panel ...6 2.5 Status LEDs ...7 3.Connecting the DFL-M510 3.1 Setting up without firewall...8... -
Page 3: Before You Begin
DFL-M510 Before You Begin 1.1 Check Your Package Contents Thank you for purchasing DFL-M510 Information Security Gateway. Before continuing, please check the contents of the product package. This product package should contain the following items: One (1) DFL-M510 Information Security Gateway... -
Page 4: Dfl-M510 Introduction
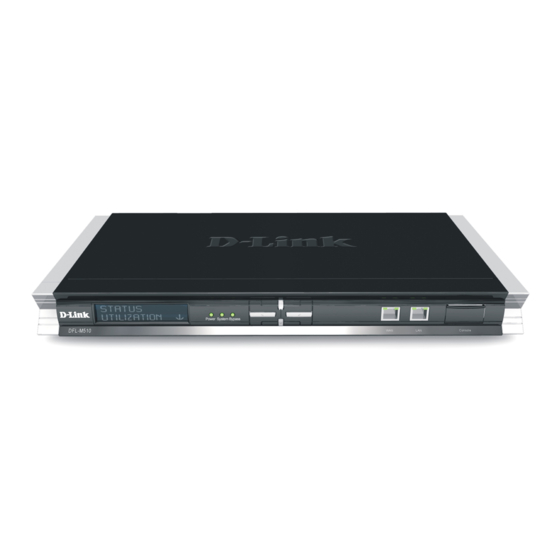
DFL-M510 Quick Installation Guide 1.2 DFL-M510 Introduction DFL-M510 is a transparent network device which is installed in In-Line mode with “Hardware Bypass” function, without any change of current network architecture to control/manage information traffic flow (IM, P2P and Streaming Media … etc.) from intranet and detect/drop the traffic with health concerns (Trojan, Illegal agent and Network worm …... -
Page 5: Dfl-M510 Architecture
DFL-M510 Quick Installation Guide 1.3 DFL-M510 Architecture Without Firewall When there is no firewall involved, we suggest place DFL-M510 after the router or ADSL modem. Here is the recommended structure illustration. ADSL Router With Firewall When there is a firewall, placing the DFL-M510 between the firewall and the LAN is recommended. -
Page 6: Identifying Components
Note: Hardware Bypass – A built-in failure-proof function of the DFL-M510. In an unlikely event of a hardware failure or an accidental power-off, your network traffic will automatically skip (bypass) the DFL-M510 and flow normally as if a DFL-M510 was... -
Page 7: Rear View
DFL-M510 Quick Installation Guide 2.2 Rear View Power socket Power switch 2.3 LCD Navigation Button Description Button Name Description Scroll Up Down Scroll Down Go back to the previous screen Enter Next screen... -
Page 8: Lcd Panel
2.4 LCD Panel Main Menu Device Status Device Config Reset Reboot DFL-M510 Quick Installation Guide Sub-Menu Description System Info. Firmware Ver.: Policy Ver.: Policy Number: Current Date: Current Time: Dev. Up Time: CPU Load: Memory Usage: Current Session: Traffic Info. -
Page 9: Status Leds
DFL-M510 Quick Installation Guide 2.5 Status LEDs Color Power Green System Green Bypass Inbound Green (LAN) (Left) Green (Right) Outbound Green (WAN) (Left) Green (Right) Status Description DFL-M510 is powered on DFL-M510 is powered off DFL-M510 is ready DFL-M510 is not ready... -
Page 10: Connecting The Dfl-M510
ADSL or router and switch. Refer to the following: Connect a UTP cable from the ADSL router to the WAN port on the DFL-M510. Connect a UTP cable from the LAN port on the DFL-M510 to the switch. ADSL Router Note: Transparent Device –... -
Page 11: Setting Up With Firewall
LAN. Refer to the following: Connect a UTP cable from the firewall to the WAN port on the DFL-M510. Connect a UTP cable from the LAN port on the DFL-M510 to the LAN. ADSL Router Note: If you are deploying DFL-M510 over the VLAN (802.1q) network... -
Page 12: Configure Dfl-M510
Note: 1. The IP address shown in the example above is the default setting. If you have change the IP address of the DFL-M510 to conform to a network, then input that IP address in the web brower, instead of the default IP address shown. - Page 13 Either install the Java Runtime from the accessary CD first or login to DFL-M510 directly. Click “Always” to continue and prevent screen appearing again, The login screen appears. Java Runtime is required to login DFL-M510 , Please install the Java Runtime program. Click”Always” to trust the signed applet distributed...
- Page 14 DFL-M510 Installation Guide Login to the DFL-M510 with ID/Password. The computer need to start Java Runtime therefore the log on time would be around 20 seconds. Note: The Setup Wizard would be running automatically when you login into DFL-M510 first time.
-
Page 15: Setup Wizard
4.2 Setup Wizard Running the Setup Wizard Welcome to the DFL-M510 Setup Wizard. This wizard will guide you through the setup of your DFL-M510 Step1 - Setup Wizard welcome page Step2 - Set up the IP/Subnet mask and default gateway... - Page 16 DFL-M510 Installation Guide 4.2 Setup Wizard (Continued) Step3 - Choose the Applications you want to block Step4 - Go to Real-time Monitor or back to configuration page Choose the applications that you want to Block in your network. Next Click...
- Page 17 DFL-M510 Installation Guide 4.2 Setup Wizard (Continued) Step5 - Select ”Yes” to go to Real-Time Monitor your network.
-
Page 18: Warranty
WARRANTY Warranty FCC Warning This equipment has been tested and found to comply with the limits for a Class A digital device, pursuant to Part 15 of the FCC Rules. These limits are designed to provide reasonable protection against harmful interference when the equipment is operated in a commercial environment. - Page 19 DFL-M510 Installation Guide Attenzione! Il presente prodotto appartiene alla classe A. Se utilizzato in ambiente domestico il prodotto può causare interferenze radio, nel cui caso è possibile che l`utente debba assumere provvedimenti adeguati. VCCI Warning VCCI Warning BSMI Warning 警告使用表...


