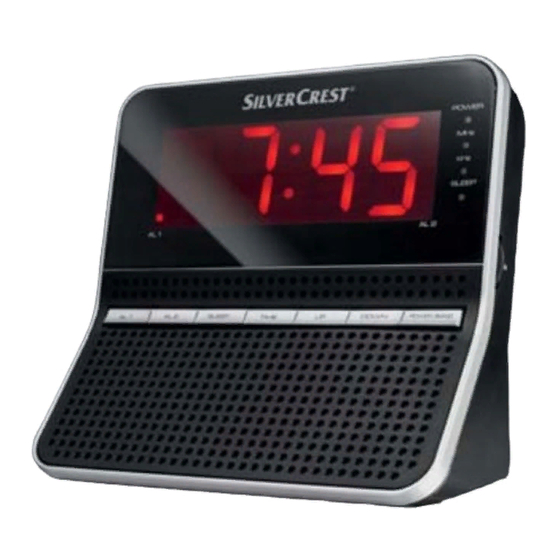
Summary of Contents for Silvercrest SRD 250 A1
- Page 1 Clock Radio SRD 250 A1 Clock Radio Operating instructions KOMPERNASS GMBH BURGSTRASSE 21 · D-44867 BOCHUM www.kompernass.com ID-Nr.: SRD 250 A1-01/11-V2 IAN: 61030...
- Page 2 SRD 250 A1...
-
Page 3: Table Of Contents
Switching the alarm off ....... . 14 Switching the alarm function off ......14 SRD 250 A1... - Page 4 Importer..........20 SRD 250 A1...
-
Page 5: Introduction
Introduction Introduction Information for these operating instructions These operating instructions are a component of the SRD 250 A1 Clock Radio (henceforth designated as the appliance) and they supply you with important information about the intended use, safety and connection as well as operation of the appliance. - Page 6 If the situation is not avoided it can lead to property damage. ► The directives in this warning are there to avoid property damage. NOTE ► A notice signifi es additional information that assists in the handling of the appliance. Introduction SRD 250 A1...
-
Page 7: Safety
MUST be removed from the mains power socket. The appliance should be positioned so that you have unrestricted access to the mains power socket at all times, thus enabling the plug to be immediately withdrawn should an emergency situation arise. SRD 250 A1... -
Page 8: Interaction With Batteries
Before use check the appliance for visible external damage. Do not put into operation an appliance that is damaged or has been dropped. ■ Damaged cables or connections should be replaced by authorised qualifi ed persons or by the customer service department. Safety SRD 250 A1... - Page 9 Avoid direct sunlight. ■ Always pull on the power plug when disconnecting from the wall socket, never pull on the connection cable. ■ If malfunctions occur or thunder storms threaten pull the power plug from the wall socket. SRD 250 A1...
-
Page 10: Operating Components
TIME button: Set the time SLEEP button: Set the automatic switch off AL2 button: Set Alarm time 2 AL1 button: Set Alarm time 1 Power Cable VOL control: Volume control DIMMER switch: Set the display illumination Operating components select frequency band SRD 250 A1... -
Page 11: Setting Up And Connecting
Place the appliance on a fi rm, fl at and even surface . ■ Place the appliance so that the ventilation slots are not covered. ■ Do not place the appliance in a hot, wet or very humid location or in the vicinity of fl ammable materials. SRD 250 A1... -
Page 12: Electrical Connection
When power is restored the correct time appears automatically in the display NOTICE ► The display, radio and alarm do not function with battery- power alone. Setting up and connecting SRD 250 A1... -
Page 13: Providing Mains Power
♦ Press or hold down the UP button to set the minutes. ♦ Press the TIME button SRD 250 A1 . For correct polarity make sure by replacing the cover and . In the display and/or DOWN button again. In the display and/or DOWN button again. -
Page 14: Radio Operation
Handling and operation to switch the device on. set the desired sound level. to set the desired lights up. set the desired radio station. lights up, SRD 250 A1... -
Page 15: Programming The Wake Time And Method
If you want to be awakened with the radio, apart from the wake time programming you must also set, additionally, the desired radio station and volume (see section Radio operation). SRD 250 A1 or AL2 button or DOWN button or AL2 button again. -
Page 16: Switching The Alarm Function On
AL2 button and/or AL2 button to switch the device on. . In the display appears the switch off lights up. Repeated press- shortens the switch off time by . In the dis- . The alarm to tempo- SRD 250 A1... -
Page 17: Setting The Display Illumination
Do not use aggressive cleaning agents or scouring powder. These can aff ect the surfaces of the device. ■ Clean the surfaces of the device with a soft, dry cloth. SRD 250 A1 until the desired is shown. The SLEEP-LED to HIGH if you want the indicators in to LOW if you want the indicators in goes out. -
Page 18: Troubleshooting
VOL regulator The radio station Tune in the radio station is not properly properly with the TUNING tuned in. regulator Try to improve reception Reception is by moving the wire too weak. antenna Troubleshooting SRD 250 A1... -
Page 19: Storage
This obligation is intended to ensure that batteries are disposed of in an environmentally safe fashion. Hand batteries in only when they are fully discharged. SRD 250 A1... -
Page 20: Appendix
220-240 V / 50 Hz 2 x 1.5 V battery Type AA/Mignon/R6/LR6 (Batteries not supplied) approx. 1.5 250 mW 87.5 - 108 MHz 526.5 - 1606.5 kHz +5 - +40 5 - 90 14.3 x 13.3 x 8.3 approx. 435 SRD 250 A1 °C... -
Page 21: Information Regarding The Eg Conformity Declaration
This product is for private use only and is not intended for commer- cial use. The warranty is void in the case of abusive and improper handling, use of force and internal tampering not carried out by our authorised service branch. SRD 250 A1... -
Page 22: Service
Service Service Great Britain Tel.: 0871 5000 720 E-Mail: kompernass@lidl.gb Service Ireland Tel.: 1890 930 034 (0,082 EUR/Min., (peak)) (0,064 EUR/Min., (off peak)) E-Mail: kompernass@lidl.ie Importer KOMPERNASS GMBH BURGSTRASSE 21 44867 BOCHUM, GERMANY www.kompernass.com Appendix (0.10 £/Min.) SRD 250 A1...


